So since i have injured my shoulder from the bench press challenge before Christmas, i have been forced to temporarily alter my chest training in order to continue my progress while my shoulder heals. So i am going to share with you several unconventional exercises that when combined will provide optimal chest development.
Now every gym does not have the latest advancements in machines and equipment for training. Free weights are still king but again if you are looking for something different or if you need to adjust your training to nurse an injury this will take your chest development to a different level.
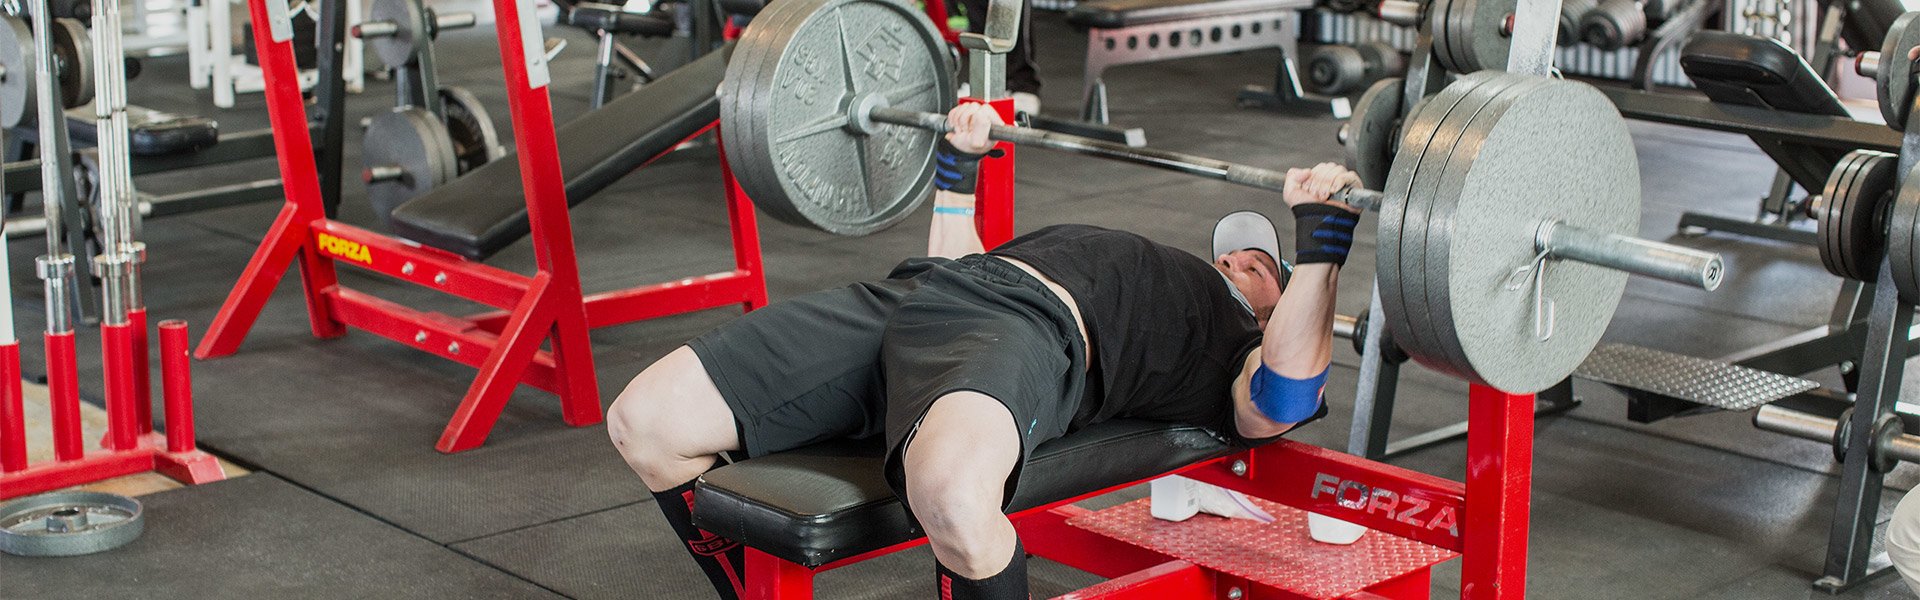
Reverse-Grip Bench Press
Unconventional training strategies can yield unconventional results—a good thing if you want to break away from the pack. Lots of bodybuilding methods are based off tradition, but we’re going to buck tradition and turn to science to take your upper chest development to a whole new level. A recent Canadian study showed that the reverse-grip bench press increased upper pec activation by 30 percent compared to a traditional/flat pronated-grip bench press. By comparison, the incline press has about 5 percent greater upper pec activation over the traditional bench presses.
Tip: Make sure you use a spotter to lift the bar off, thumbs around the bar (much more risky than a traditional bench press), and if you can’t get the technique right, try dumbbells instead of the barbell.
Dumbbell Pullover
The dumbbell pullover was a favorite of the guys with the greatest chests of all time—Arnold Schwarzenegger, Reg Park and virtually any old-timer performed this exercise. It works not only the chest but also the lats and the intercostal serratus anterior (the muscles of the ribcage). Maximally developed intercostal muscles will give the illusion of a bigger rib cage when taking a deep breath and holding a pose because the ribs are pulled up by the intercostal muscles.
I believe one of the reasons chest development hasn’t caught up with other bodypart development is because of the elimination of any pullover variations.
After each exercise, complete one set of 15 reps of dumbbell pullovers with a moderately light weight emphasizing the stretch.
Important Notes: Do this exercise with the intention to stretch and feel the movement, keeping reps in the 12+ range. If you have a history of shoulder problems, its better for you to use the pullover machine as it takes away the downward pull when going through the eccentric portion of the movement.
Watch IFBB Pro Cory Matthews Performing Dumbbell Pullovers
Dips
Bodybuilding guru, the late Vince Gironda, felt dips were the best movement for stimulating muscle growth in the upper body. Virtually every great bodybuilder from the classical area to the modern day pros with the grainy/dense look include dips in his training regimen. The strongest raw bench pressers of all time also include this exercise in their routines.
Perform dips for five sets of five reps, progressively adding weight each set if possible. After the last set, remove the added resistance as fast as possible and do as many reps possible with your bodyweight; rest 20 seconds and do as many reps as possible again with your bodyweight. Rest 20 seconds and repeat one more time. Rest interval: 90 seconds between working set of dips.
Tip: Lean forward to place the emphasis on chest.
“Big Al” Davis Doing Dips with 340 Pounds of Additional Weight
Cable Flyes
By now your stabilizing muscles are tired so we’re going to opt for cables at this point because they provide continuous resistance throughout the entire range of motion. Your focus needs to be on a full range of motion. Perform the negative portion of each rep for three seconds; perform the positive forcefully holding the peak-contracted position at the top for one second.
Pick a weight with which you can do 12–15 reps. Perform the as described above for one minute straight, if you fail before a minute, continue the set with partial reps. Don’t stop! Start with perfect form and end by any means necessary. Rest for two minutes and then do the same thing for 40 seconds. Rest two minutes and the final set will be completed for 30 seconds.
Finisher
Finish this workout with five minutes of push-ups. Perform them to failure, rest 30 seconds, repeat the process until you hit five minutes. Failure means failure, not discomfort! Get the most out of it.
Final Thoughts
The old cliché, “You’re only cheating yourself” applies to anyone who doesn’t give 100 percent on this workout. Half-assed effort will simply equate to half-assed results. If you aren’t in the gym to give 100% of yourself to training. Then you are not one of the true gym junkiez and this workout is not for you. All of these movements are considered “old school” but you will come to realize still relevant to your training needs. If the goal is to grow a chest like “The Oak” Arnold Schwarzenegger then incorporate this routine into your program. Train Hard!!! Train Smart!!!
So since competition prep is underway for many gym junkiez, i figured it would be a good time to share a couple of recipes that will help you get through those days where your cravings are unbearable. Try these protein packed recipes on for size and let me know what you think!!!!!
High Protein Rice Pudding
Ingredients
½ – 1 cup cooked Jasmine Rice
Whey Protein – MTS Nutrition Brand works Best (you choose your flavor – i recommend Mint Choc Chip or the Red Velvet)
Unsweetened Almond Milk
Optional – Fruit (Blueberries, strawberries) 1 cup or Sugar Free Whip Cream 2 Tablespoons
Instructions
Make sludge in a bowl out of two scoops of whey protein and enough almond milk to mix the powder into a pudding consistency. (see video below)
Pour cooked rice into the mix and stir it up
Top with Fruit or Whip Cream
Protein Choc Chip Muffins
Ingredients
2scoops vanilla protein powder 64-67 grams
1tsp baking powder
1/2cup almond flour
1/2cup almond butter can sub for any smooth nut or seed butter
1cup unsweetened applesauce
1/2cup chocolate chips
Instructions
Preheat the oven to 350 degrees Fahrenheit and line a muffin tin with 8 greased muffin tins and set aside.
In a large mixing bowl, add your dry ingredients and mix well. Add your almond butter and unsweetened applesauce and mix until fully combined. Stir through your chocolate chips.
Divide the batter amongst the greased muffin tins and bake for 10-15 minutes- Check at 10 minutes and test with a skewer- If it comes out clean, remove immediately. Allow to cool for 5 minutes, before transferring to a wire rack to cool completely.
Recipe Notes
Depending on the protein powder you use, cooking time varies. Continually check on the muffins and remove as soon as a skewer comes out clean.
Muffins need to be kept refrigerated once cooled. They are also freezer friendly!
60 Second Protein Brownie
1 scoop protein powder- 33-35 grams (I recommend using a vegan or casein blend)*
1 T coconut flour
2 T granulated sweetener of choice (optional)**
1/2 tsp baking powder
1-2 T dark cocoa powder (adjust to desired chocolate content)
1 large egg (Can sub for 1/4 cup egg whites OR 1 flax egg)
Try these recipes out and let me know how you like them. You can get a majority of the ingredients at any local store… but order the supplements from us!!!! Eat Smart!!!
For a period of a few weeks I experienced severe pain in my left shoulder whenever i would raise my arm. Not sure why this began to happen, but my suspicion was that i caused an impingement after sleeping on that side of my body the night before. This has happened in the past several times, as i am sure many bodybuilders and men with defined physiques alike have dealt with. The only difference this time was that my ability to bench press and military press was affected. I tried several methods to relieve the pain; icing, moist heat, mobility work, and the last resort i wanted to take; REST. To no avail i still had a considerable amount of pain around the medial deltoid of my shoulder.
After finally getting it checked it was determined that i had a mild case of bursitis in my shoulder. I was told to just rest and avoid overhead movements as much as possible. Now I am a bodybuilder and AVID gym junkie. I was definitely not going to take a break from training.
Needless to say i was in the gym the next morning to train chest. That was probably one of the worst sessions of training i had gone through in a very long time. I could barely press anything, and machine work was not getting the job done.
That evening i had some deep tissue work done. It was abnormally excruciating. I was in tears; it was crazy.
Anyway the massage therapist suggested that i try cupping therapy. I had very little knowledge of it as i had only heard about it after the last Olympic trials, but i was willing to try anything at this point.
Fast forward. After getting the cupping done for a 45 minute session I was astonished at how much better I actually felt! There was still some discomfort but i was able to move through full range of motion without feeling any tweaks.
To be on the safe side i trained legs and back over the next couple of days to rest a little before i tried to press again. Full transparency I was able to get through my chest session however I still could not flat bench my normal weight. All in all, I was just happy that i could press again as i knew i was on the road to recovery. I have recently received a number of questions about what Cupping therapy actually is, so i figured this short story was the perfect segway.
What Is Chinese Cupping?
The Pacific College of Oriental Medicine explains that “Cupping is the term applied to a technique that uses small glass cups or bamboo jars as suction devices that are placed on the ski to disperse and break up stagnation and congestion by drawing congested blood, energy or other humors to the surface. In dry cupping, the therapist will simply place the suction cups on the skin. In wet cupping, the practitioner will make a small incision on the skin and then apply the suction cup to draw out small amounts of blood.
There are several ways that a practitioner can create the suction in the cups. One method involves swabbing rubbing alcohol onto the bottom of the cup, then lighting it and putting the cup immediately against the skin. Suction can also be created by placing an inverted cup over a small flame, or by using an alcohol-soaked cotton pad over an insulating material (like leather) to protect the skin, then lighting the pad and placing an empty cup over the flame to extinguish it. Flames are never used near the skin and are not lit throughout the process of cupping, but rather are a means to create the heat that causes the suction within the small cups.
Once the suction has occurred, the cups can be gently moved across the skin (often referred to as “gliding cupping). Medical massage oils are sometimes applied to improve movement of the glass cups along the skin. The suction in the cups causes the skin and superficial muscle layer to be lightly drawn into the cup. Cupping is much like the inverse of massage – rather than applying pressure to muscles, it uses gentle pressure to pull them upward. For most patients, this is a particularly relaxing and relieving sensation. Once suctioned, the cups are generally left in place for about ten minutes while the patient relaxes. This is similar to the practice of Tui Na, a traditional Chinese medicine massage technique that targets acupuncture points as well as painful body parts, and is well known to provide relief through pressure.
The side effects of cupping are fairly mild. First and foremost, visually its going to make your skin crawl because of how it look. Also, bruising should be expected, but skin should return to looking normal within 10 days. Potential side effects include mild discomfort, skin infection, and rarely burns occur. However, a trained health professional will apply an antibiotic ointment and bandage to prevent an infection.”
Ancient Chinese Proverb:
“Where there’s stagnation, there will be pain. Remove the stagnation, and you remove the pain.”
The old Chinese medical maxim holds that pain results from the congestion, stagnation, and blockage of Qi, or vital energy, vital fluids, lymph, phlegm, and blood. If pain is the essence of disease, then suffering is a result of obstructed or irregular flow in the body. Chinese cupping is therefore a method of breaking up the blockage to restore the body’s natural flow of energy.
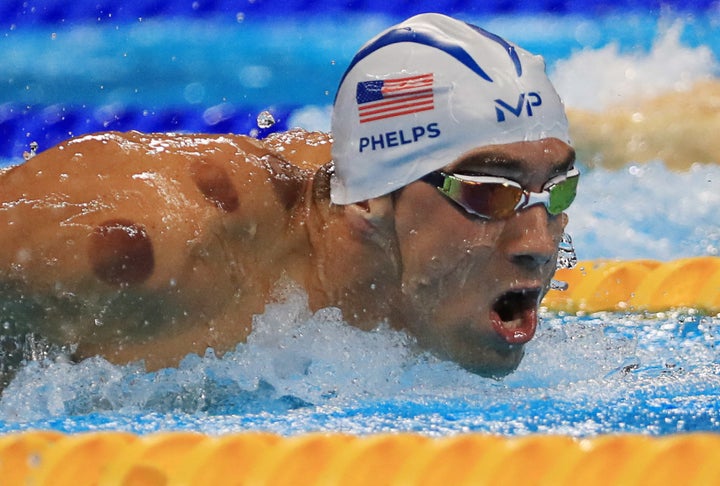
Cupping has been used by many athletes, fitness enthusiasts, and gym junkiez alike as a tool for helping them recover faster and maintain good health. Michael Phelps was a major advocate for the use of cupping which quickly grew among the other Olympians. Today, quickly becoming apart of the massage therapy services regularly offered, and with good reason. Here are 3 specific benefits of Cupping that will hopefully encourage anyone that has been dealing with some form of physical ailment to try it out.
3 Benefits of Cupping Therapy
Removing Toxins
Cupping therapy is highly effective in helping individuals recover from the strenuous training they subject their bodies to. During intensive training, you develop micro tears in their muscles and tissues. As these tissues heal, they help boost stamina and performance. However, the stress also leads to a buildup of toxins like cholesterol, calcium deposits, uric acid, and lactic acid in the muscles. If not cleared, these toxins can hamper the healing of the tissues. Cupping can break down the chemical structure of the compounds into simpler forms that can be expelled from the body by natural processes. For example, uric acid converts into ureates that can be easily eliminated by the urinary system.
Aleviate Inflammation
Cupping therapy can help heal the inflammation and stiffness in the joints. The reverse pressure exerted during cupping works to pull the tissues and muscles off the bones. The vacuum thats created fills with fresh blood and lymph that is rich in oxygen and nutrients. These infusions flood the affected area and cause it to heal. The lymph brings with it compounds that boost the body’s immunity besides aid in the healing process. While conventional medicine aims at suppressing inflammation, cupping therapy works to remove the causes of the inflammation. In this way, it speeds up healing and also removes pain and stress in the tissues.
Cupping as Myofascial Decompression
Cupping therapy can also help relieve hamstring strains, and myofascial restrictions even if they result from training and not from some injury. The treatment helps increase flexibility so people can train longer and harder. When the procedure was performed on athletes, they noted better a better range of active flexion and extension movement. Cupping can also treat musculo-skeletal injuries and relieve the spasms athletes suffer when undergoing intensive training.
Cupping therapy is an excellent form of noninvasive treatment that can help you recover from a multitude of injuries. Its even been known to help with acne! If you have been weight training for a number of years and experience random bouts with joint or muscle pain, I strongly encourage you to give this a shot. Those that are fairly new to the game, prevention is always the best method. Take good care of your bodies now and they will be good to you for the long haul. Give cupping a try and let me know what you think!! Train Smart!!! Train Hard!!!!
In the spirit of New Years resolutions, many ladies will be frequenting the gym to get in shape. I want to share an article written by Charles Staley to put emphasis on a few things I have been trying to explain to a few ladies in recent conversation. Ladies I do not want you to waste time in the gym and I want you to be able to reach your physique goals faster. The faster you see results the more confidence you will have. The more confidence you have the more you will want to continue working out and eventually turn into the future Gym Junkiez in the world!
written by Charles Staley
Questionable Practices
While both men and women tend to make predictable errors in the gym, some of the more recent trends in female physique training are particularly questionable. First, you have to wonder who’s perpetrating some of the silly things you see women doing, like workouts consisting exclusively of jumping and pseudo-plyometric drills.
How about workouts that feature nothing but triceps kickbacks, drills that rely heavily on balance (such as dumbbell presses done standing on a BOSU balance trainer) and “multi-tasking” movements such as lunging with light dumbbells that you press overhead after each lunge?
Time-Wasting Workouts
Men are much more likely to emphasize the proven staples, exercises that have been successfully used by physique athletes for decades – squats, presses of various types, pull-ups, dips, rows, deadlifts, and sure, let’s also include direct work for arms, abs, and calves.
Many women, on the other hand, focus mostly on movements that have such high skill and/or balance requirements that they can’t be loaded sufficiently to improve strength or hypertrophy to any significant degree. Take for example when women simultaneously lunge and overhead press. If the dumbbells are light enough to overhead press, they won’t be heavy enough to create a challenge during the lunge portion of the exercise.
Or, going back to the BOSU presses, when you’re standing on an unstable surface, you won’t be able to use weight that’s heavy enough to challenge the target musculature.
If your training goals primarily involve getting stronger, leaner, or more muscular, the exercises you perform must permit you to perform a significant amount of work, which is defined as displacing a specific mass over a given distance.
Exercises that significantly restrict (or even eliminate) the amount of work you perform are substandard for the purposes of strength and muscular development. In other words, they’re pretty much useless.
Exercise That Work, Exercises That Don’t
The weight training exercises that work best for most lifters (male or female) are those that move a relatively large load over a relatively great distance, with a reasonable margin of safety of course.
This is why many strength coaches and athletes over the decades have referred to the barbell squat as “the king of exercises.” Some would opt for the deadlift for this title, but either way, the point is made. Additionally, more than a few experts refer to dips and pull-ups as “the upper-body squat.”
Notice, though, the common characteristics of those four exercises. They permit you to safely move a large load over a large distance. And, it should be noted that all four movements challenge a large number of muscles simultaneously.
Contrast these movements with a few of the exercises we’ve all recently seen some women performing, both in person and on social media:
Bulgarian split squats performed with the rear foot in the stirrup of a suspension trainer, while simultaneously pressing a pair of light dumbbells at the completion of each rep.
A squat/twisting lunge combo, also performed with very light weights for very high reps.
A Burpee/pull-up combo performed by a well-meaning and hard-working woman who wasn’t strong enough to do a single proper push-up or pull-up.Both exercises are performed with the poor and unsafe technique that you’d expect.
Squats performed with the knees and feet together. Aside from the obvious danger this presents in terms of instability, the stance used dramatically restricts ROM as compared to a more conventional foot placement.
Why Do So Many Women Train This Way?
Why are female gym-goers so prone to ignoring the fact that to make significant progress you have to move a relatively large load over a great distance?
It’s likely that women learn these techniques from other fitness pros, whether they be coaches or a physique competitors of some type. But assuming that this is the case, where did these fitness pros come up with such wacky notions? What’s the underlying premise or rationale? Here’s a stab at that mystery:
1 – Fear of looking like a dude
There remains a persistent, underlying myth that most conventional resistance training exercises (i.e., the ones that actually work) will only serve to masculinize women, especially if performed with heavy weights.
This pernicious error is difficult to quash. There’s an overwhelming tendency to assume if we simply do what someone else does, we’ll get the same results they got. The problem is, we may not possess the same genetics or take the same drugs that they do.
It’s a classic case of mistaking correlation for causation. When women see the bulky physiques of high-level bodybuilders and strength athletes, it deters them from lifting weights like these women. This, of course, is a mistake.
2 – Not listening to good trainers
As a coach, whenever you start with a new client, there’s often a battle of wills at stake. Many clients have strong ideas about what they think they should do, and as a fitness pro, you have your own ideas as well. More often than you’d think, trainers tend to gradually acquiesce to their client’s ill-informed wishes rather than taking a stand as a professional and insisting upon good decision-making.
3 – Overestimating the energy cost of the exercises they do
Many men make this mistake too. It particularly applies to jumping drills, which are very strenuous and therefore create the assumption that they burn a lot of calories. And to be fair, per unit of time, many of these drills do burn more calories than other choices. There are a few problems with this thinking:
You can’t do these exercises for long enough durations to rack up much of a calorie burn.
Jumping drills in particular are very risky for the joints, especially tricky female knees. Whenever you evaluate the potential value of an exercise, you need to examine the cost-to-benefit ratio. Low benefit, low risk equals minimal value. Low benefit, high risk equals dangerous and counterproductive. What we’re looking for ideally is low risk, high benefit.
These bouncy exercises do little to nothing to build strength or muscle.
The underlying problem here is that people tend to assume that difficult or painful equals effective, even though that’s often not the case at all.
4 – Giving in to boredom
Truly effective training tends to be a bit on the monotonous side. This is why most successful commercial exercise programs (such as P90X) are all based on a high degree of variety. Yet the most successful weight-training programs are kinda boring by comparison.
5 – Gravitating toward what they do best
It’s only human nature. Women tend to be relatively better at tasks that require more mobility, endurance, and complexity, and their training tends to reflect this tendency.
6 – Hiring misogynistic trainers
For several months I’ve been watching a handful of male trainers at a local commercial gym. When they have a male client, they have him do legitimate, effective exercises like barbell squats, chins, RDL’s, military presses, and so on.
The next client is often female. She’s instructed to start by doing 10 minutes on the bike, followed by 10 minutes of foam rolling, walks with an elastic band around her knees, followed by sumo squats with a light kettlebell, a few lateral raises, and a few sets of light glute bridges.
The problems aren’t limited to ineffective exercises, they also involve inadequate loading and too much time spent on low-payoff “preparatory” activities. Additionally, these trainers exude genuine enthusiasm when training their male clients, but palpable disinterest with the females, unless the client in question is particularly hot. These trainers simply don’t respect and value the majority of their female clients.
3 Things Women Do Right
There are many things that men can learn from women in the gym. For instance, guys tend to focus excessively on bar weight and not enough on movement quality, range of motion, and the mind-muscle link. Men always place quantity over quality, and often to their detriment. Not so with women.
Women never push through pain in stupid ways, either. Men often allow ego to take precedence over common sense. Dumb. And dangerous.
Lastly, women often tend to think of themselves as novices when they’re actually fairly knowledgeable, whereas men tend to think, simply by virtue of having a Y chromosome, that they were born knowing how to lift. The result is that women are much more open to learning than men are.
Every guy wants to have a monster bench press. For as long as I can remember 315 has been the milestone many gym junkiez aim to achieve. Well, if this applies to you and your goals for the bench press I will show you how to get their in the shortest amount of time. Below is a 4 week plan to quickly meet that goal. And once you hit 315, you can use this same program to hit the next goal.
In this 30-day periodized program to help you bench press 315 pounds, you’ll be benching on Mondays, Thursdays and Saturdays using weight based off a 315 1RM, multiplying your 1RM by the decimal listed for each session (e.g., 275 x .75 (75%) = 206.5 ** use 205 on Bench). This will be the focal point of your training for the next 4 weeks.
WEEK 1
Workout 1 – Monday
1) Bench Press – 10×2 @ 85% with 2-3 minutes rest. Focus on how fast you can press the weight off your chest.
2) DB Incline Press – 3×8
3a) Standing Chest Press – 3×10
3b) Push-Ups: 3xMAX
Workout 2 – Thursday
1) Bench Press – 10×6 @ 75% with 2 minutes rest
2a) Hammer Strength Presses – 3×10
2b) Push-Ups – 3xMAX
3a) Chest Flies – 3×12
3b) DB Negative Press – 3×12 with 5-second negative
2) Negative Bench Press – 3×1 @ 110% with a 3-4 second negative. Focus on lifting heavy weight without getting too psyched up. The central nervous system can become extremely taxed when you rile yourself up. Take a big deep breath and lift the weight under control, ideally without any music.
Workout5 – Thursday
1) Bench Press- 5×5 @ 80%
2) Incline Bench Press – 5×10 @ 60%
3a) Chest Flies – 5×10
3b) Push-Ups – 5xMAX
Workout 6– Saturday
1) Bench Press – 6×5 with 2-3 minutes rest. For sets 1-2 use 45%, for sets 3-4 use 35% and for sets 5-6 use 30%. Move the weight as quickly as possible,
2a) Include DB Press – 3×10
2b) Push-Ups – 3xMAX
3a) Standing Shoulder Press – 3×1-0
3b) Push-Ups – 3×10
WEEK 3
Workout 7 – Monday
1) Bench Press – 3×10 @ 85% with 2-3 minutes rest
2) DB Incline Press – 3×8
3a) Standing Chest Press – 3×10
3b) Push-Ups – 3xMAX
Workout 8 – Thursday
1a) Incline Bench Press – 5×5 @ 70%
1b) Plyo Push-Ups – 5×5 with 2-3 minutes rest
2a) Chest Flys – 5×10
2b) Push-Ups – 5xMAZ
3) Bench Press – 3×60 seconds with 5-second negative and 1-second press
4) Bench Press – 3xMAX @ 40%
Workout 9 – Saturday
1) Bench Press – 10×8 @ 75% with 2 minutes rest
2) Hammer Strength Press – 3×10 (partner accelerated negative for last 5 reps)
3a) Chest Flies – 3×12
3b) Push-Ups – 3×60 seconds
WEEK 4
Workout 10 – Monday
1) Bench Press – 5×1 @ 95% with 2-3 minutes rest
2a) Bench Press Drop Set – 5×1 @ 87%, drop set into 70% for max reps
2b) Bench Press Drop Set – 5xMAX @ 70%, drop set into 40% for max reps
Now on to testing. Rest on Monday and Tuesday and max out Wednesday to test your new strength.
Accessory Lifts to Improve theBenchPress
You need to train your triceps, anterior deltoid and back equally to make sure the gain train is headed your way. Here are some exercises you should perform three times per week. The best way to do this is add the first 3 on Monday, the Farmers Walk on Thursday, and the Bent over Rows on Saturday. This should allow you an optimal rest time so that you are fresh for the next workout:
Face Pulls – 5×10-15
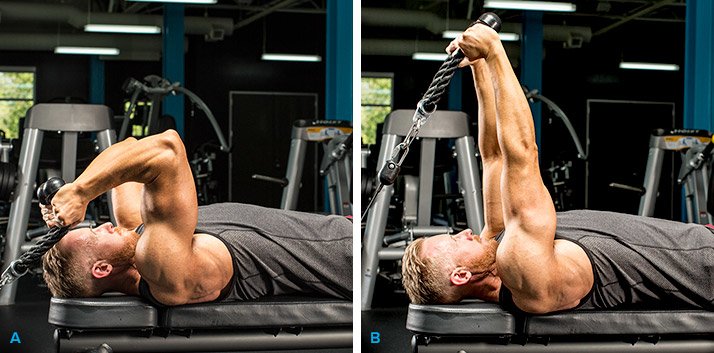
Skullcrushers – 5×8-15
Band Pull-Aparts – 5×12-25
Farmers Walks – 2×100 yards @ 75-95% of your bodyweight
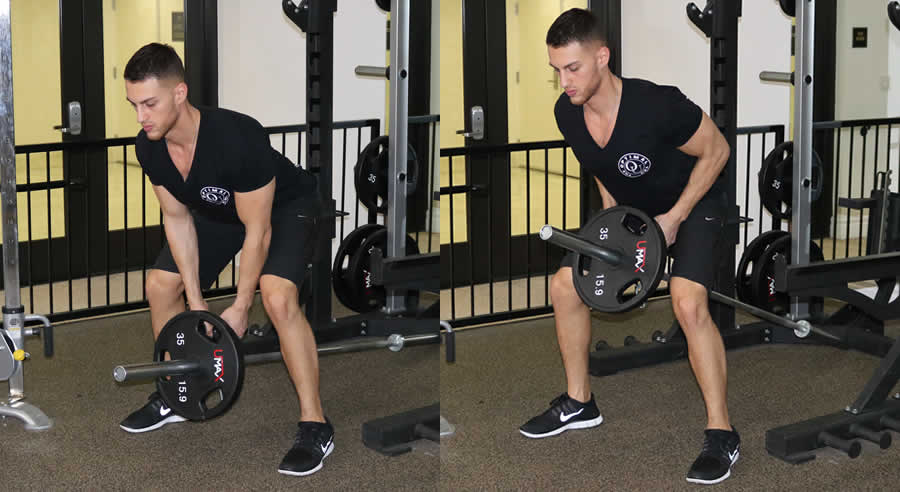
Bent-Over Rows – 5 x 6-12
Now i dont want to be a downer but i have to be honest. This program is designed to reach the goal mathematically. If you fall short of that goal, remember you are still stronger than you were 4 weeks prior. Training is about becoming the best and strongest version of YOU. If you fall short keep pushing till you hit it!!! I want everyone that meets their goal at the end of this program to email me at gymjunkiez17@gmail.com; or tag me in a photo of your PR on Instagram. Be Consistent and Train Hard!!
Dr. Layne Norton is one of the foremost experts on training and nutrition. He also happens to be a pro bodybuilder and an elite competitive powerlifter (see his track record below). I have been a fan and an avid follower of Dr. Norton for a number of years. His training program i am sharing with you, my fellow gym junkiez is the program that allowed me to make the most improvements out of all of the regiments i have tried. He is a stand up guy and knows his stuff. I encourage anyone that reads this to try the program. I promise you will love the gainzzz!!!! Enjoy
BODYBUILDING CAREER HIGHLIGHTS
INBF Mid America Muscle Classic overall Teen champion
SNBF Tennessee men’s open tall champion
ABA Mr. Indiana men’s open overall champion
ABA Mr. Illinois men’s open overall champion
OCB Spirit of America men’s open heavyweight runner-up
OCB Great Lakes States men’s open overall champion*
NGA Heart of America Natural Classic men’s open overall champion*
IFPA Pro International: Heavyweight Winner
IFPA Gaspari Pro Classic: 4th Place Heavyweight
IFP Yorton Cup Pro World Championships: 5th Place Heavyweight
NGA Pro Universe: 4th Place
* denotes pro qualifier
POWERLIFTING HIGHLIGHTS
AAPF Illinois Raw Power Challenge 220 lb class champion
Pro Raw Unity 220 lb class 4th place
Raw United Tony Conyers Extravaganza 220 lb class champion and best pound for pound lifter
APF Europa Pro Raw Challenge 220 lb class champion
USAPL Raw Nationals 93kg Champion
USAPL Southeastern Regionals Overall Champion
Arnold Raw Power Challenge 93kg Champion
IPF World Championships 93kg Overall Silver Medalist
USAPL Raw National 93kg Runner Up
Achieved ‘Elite’ Raw Total classification
Current IPF 93 kg class World Record Squat 303 kg (668 lbs)
Former USAPL 93 kg National Record Squat 303 kg (668 lbs)
Former USAPL 93 kg National Record Deadlift 322.5 kg (711 lbs)
Best total: 800kg/1763lb at 91.7kg/202lb bodyweight
Last week someone asked a question about developing leg strength and muscle with bad knees. I realized that too often people think they can’t workout their legs when they have knee pain.
And while you don’t just want to jump into a lower body strength routine if you aren’t sure what is going on with your knees, there are knee-friendly lower body exercises you can do once you’ve identified the problem and are doing the proper rehab to take care of them.
The exercises below put little to no strain on the knees and also strengthen common areas of weakness that contribute to knee pain….Aka WEAK GLUTES and EXTERNAL ROTATORS!
Using these exercises (along with a proper prehab/rehab routine that includes foam rolling and stretching) you can ALMOST prevent knee pain from ever returning!
8 Knee Friendly Lower Body Exercises:
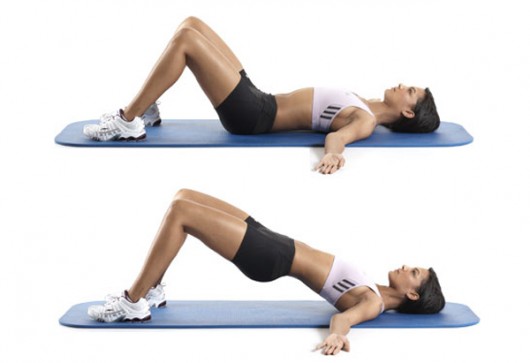
1. Glute Bridge (Table Top Bridge, Off Box Bridges, Hip Thrusters):
I love glute bridges or any variation of the glute bridge because I think it is probably the best exercise for EVERYONE to do. It strengthens your glutes and hamstrings and opens up your hips while also helping to strengthen your core.
And it is completely KNEE FRIENDLY. It is actually a great rehab/prehab exercise and, depending on the variation you are doing, a great ACTIVATION EXERCISE to include in your warm up!
Also, the glute bridge and curl can be a knee-friendly variation; however it is more difficult. For variations of the glute bridge and curl, check out this video : Glute Bridge Variations
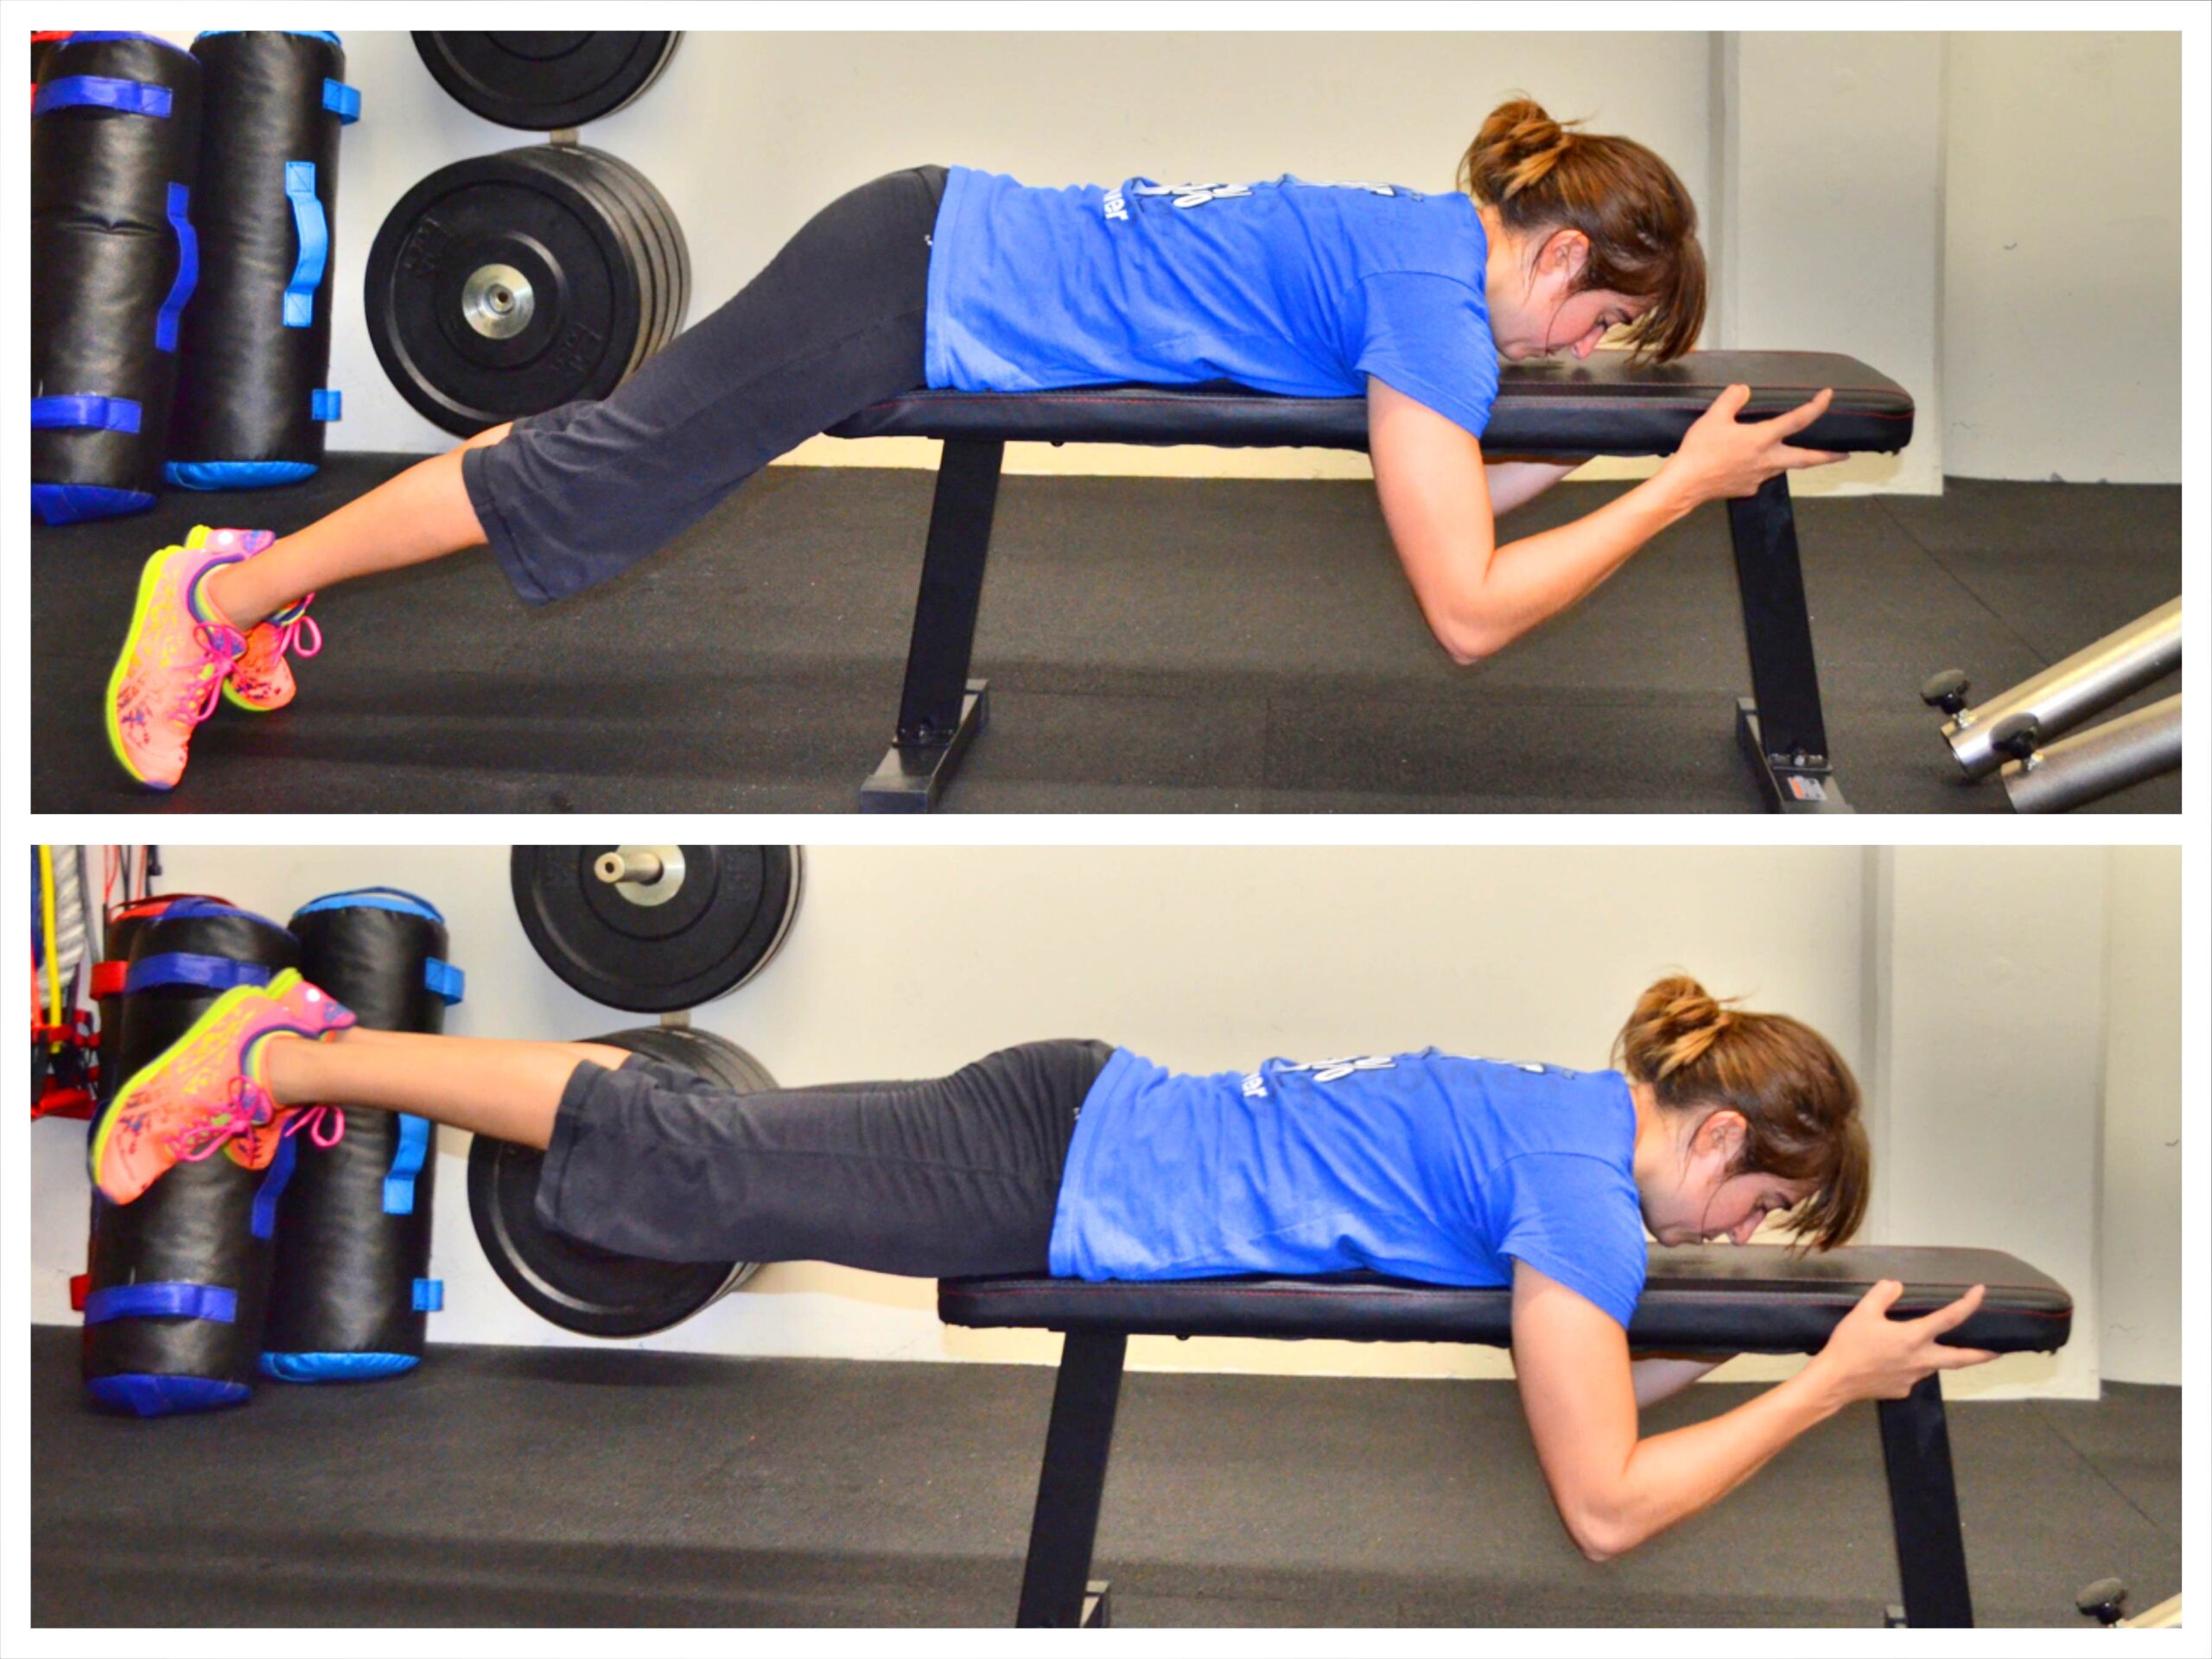
2. Reverse Hyper:
Another great glute exercise, the Reverse Hyper is completely knee-friendly and great for everyone from the beginner to the advanced lifter.
The key with Reverse Hypers is to make sure you hold at the top. Do not rush through this move.
To do the Reverse Hyper, lie face down on a table, bench or box. You want your hips close to the edge. The more your hips are on the box or bench, the easier it will be to keep your core tight and not let the move go into your back. The further off the bench your hips are, the more the move will require your abs to stay engaged to protect your low back.
Hold on to something in front of you if you want. Keep your upper body relaxed. Squeeze your legs together and point your toes out a bit if you are having trouble activating your glutes. Lift your legs to basically parallel to the ground, keeping your legs straight. Do not hyperextend your back and lift way higher than parallel. You do not want to feel this in your low back. Hold for 2-5 seconds and then lower down. Keep your core tight and really squeeze your glutes as you lift.
3. Anterior Reach Lunge:
I think one of the hardest things to do when you have knee pain is work your entire leg. It is easy to stay focused on your posterior chain since many of those moves require little to no knee flexion.
BUT with the Anterior Reach Lunge you can work your entire leg and add a bit more variety to your routine. Beginners will want to start with no weight while more advanced exercises will want to weight this down.
Add weight slowly and make sure your form is correct so that you keep this move KNEE FRIENDLY!
To do the Anterior Reach Lunge, Stand with your feet together and take one big step forward. Bend your front knee as you step forward, keeping your front heel down as you lunge forward. You will not bend your front knee to 90 degrees. Do not come up onto your front toe as you lean your torso over keeping your back flat. Keep your weight in your front heel and your back leg straight. Then come back up and step your front foot back. Complete all reps on one side before switching. Beginners will reach their hands overhead when they lunge. Advanced exercisers will hold weights down by their front leg as they lunge forward and hinge over.
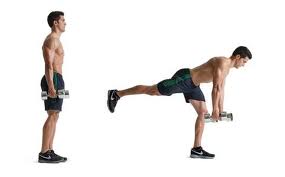
4. Single Leg Deadlift:
I often encounter clients with knee pain that also have (or had) foot and ankle pain/injury. Often those injuries weren’t properly rehabbed, which ends up leading to knee pain because of improper movement patterns.
For those people, I love using single leg deadlifts because they work on the mind-body connection to improve movement patterns while also working on balance and strengthening the lower leg, hamstrings and glutes.
To do a Single Leg Deadlift, stand on one foot with the knee of that standing leg slightly bent. Hinge over at your hips, sweeping the other leg back toward the wall behind you. Pretend you are driving the heel of that foot straight into the wall behind you. Lean forward with your upper body as you hinge forward, keeping the back nice and flat. Make sure that as you hinge, you are sitting into the heel of your standing leg. Do not lean forward and come up onto your toes.
To stand back up, drive through the heel of your standing leg and squeeze your glute at the top. Try not to tap the other foot down at all or at least not till you are fulling standing. Complete all reps on one side before switching to the other leg. To make the move harder, do a 3-5 count lower down toward the ground. Take 3-5 seconds to hinge over and then push straight back up. You can also add weight to the move to make it more challenging.
5. Straight Leg Deadlift/Good Morning:
The straight leg deadlift is another great standing posterior chain move that really works the glutes and hamstrings (and if you front load the move with weight at your chest, it can also really challenge your core!)
The key with this move, and the Single Leg Deadlift, is to not lock out your knees and to make sure you keep your back flat and don’t round it while reaching toward the ground.
To do the Straight Leg Deadlift, hold a sandbag, barbell, kettlebells or dumbbells in you hands in front of you or by your sides. With your feet no wider than hip-width apart, hinge over, keeping your back flat. Your knees should be soft as you hinge over and push your butt back toward the wall behind you. You should feel a nice stretch down your hamstring as you hinge over. Do not let your back round toward the ground. Keep your weight in your heels. Come back up to standing, driving through your heels and squeezing your glutes at the top.
You can also hold a sandbag or weight at your chest as you perform the hinge.
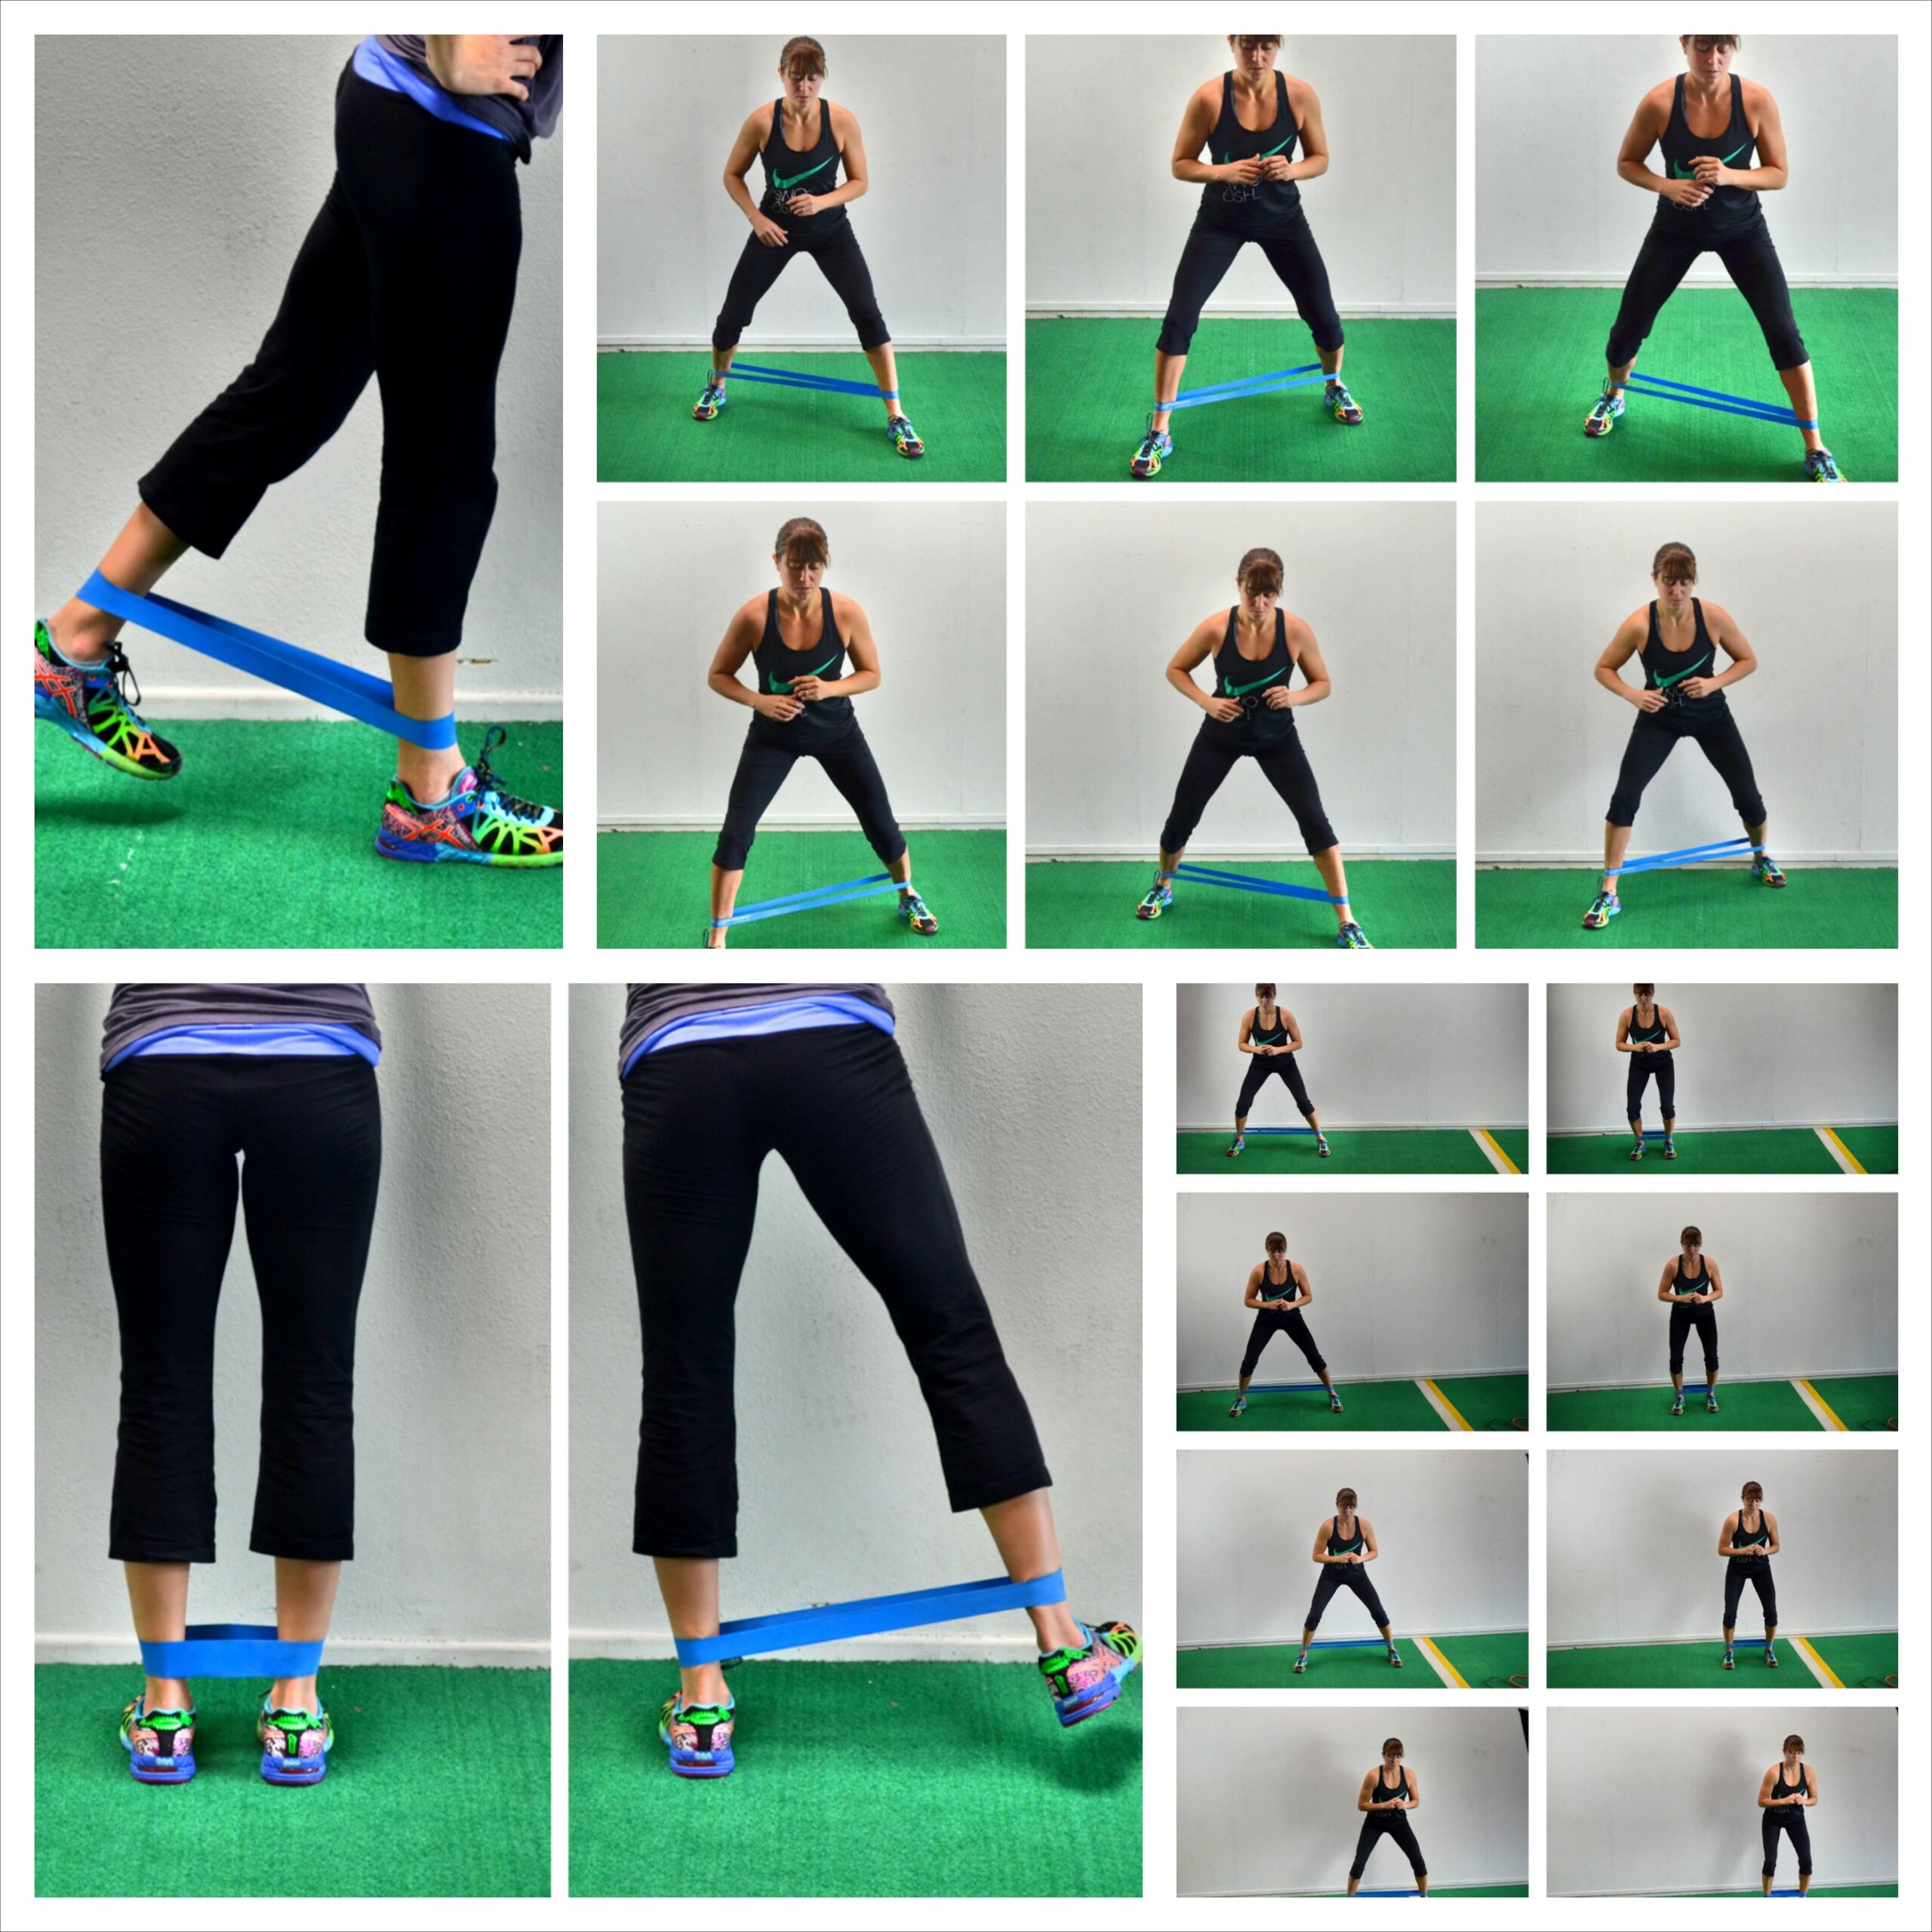
6. Band Exercises: Clams, Monster Steps, Side Shuffle, Kickbacks, Side Raises:
The mini band is a great tool to own because it is small, lightweight and tortures the muscles of your butt like none other and complete knee friendly!
There are so many great mini band moves to get your glutes activated and help you prevent knee pain that I couldn’t pick just one to list here…So I went with a general…MINI BAND MOVES!
They can be included as part of your workout or as part of your warm up, but they need to be included because they will help you strengthen your glutes and lessen your knee pain.
7. Yoga – Mobility Work
Often we suffer from pain and injury because we lack mobility, which means smaller, weaker muscles end up doing work they shouldn’t be doing.
Therefore, in order to get rid of your knee pain, you need to improve your mobility while you activate the weak muscles. The best way to do this is YOGA
Yoga uses isometric exercises do just that. The following isometric leg poses open up your hips and improve your mobility while helping you develop muscular stability. Not only are these moves knee-friendly but they develop the mobility and stability you need to get rid of the pain and prevent it from ever coming back!
Warrior II – Set up in a nice wide lunge stance with one foot forward and one foot back. Turn the back toe out so your feet are perpendicular. Your front foot should be at the instep of your back foot when you turn it out. Sink down into a lunge, keeping the back leg straight and the front heel firmly planted. Try to get your front knee bent to 90 degrees and your quad parallel to the ground. You may find you need to step your front foot forward a bit more to sit comfortably in the lunge and keep the front heel down. The lower you sink in the lunge, the harder the move will be. Do not let your front knee cave inward. Squeeze the glute and keep the knee in line with your hip and your ankle. While in the low lunge, open your arms out at shoulder height. Reach one forward over the front leg and the other back over the back leg. Keep the chest open and do not lean forward. Keep your weight centered in the lunge.
Warrior III – Balance on one leg with the knee slightly bent. Hinge over lifting your back leg toward the wall behind you. Lean your torso over, keeping your back flat and your core tight. Reach your hands overhead in front of you. Hold in this position. Do not let your back round or your other foot touch down. Keep your arms in line with your body. You want a nice straight line from the bottom of your lifted heel to the end of your finger tips. Make sure you do not lock the standing leg out as you hold. Beginners may need to reach back toward their foot instead of out in front of them. Using a wall can also help beginners. Stand with a wall behind you and when you hinge over have the lifted foot lightly touch the wall behind you to help you balance.
Crescent Pose – Start in a high plank position. Step one foot up between your hands with the front knee bent and the back leg out straight. Your front heel will be down while your back heel will be up. Lift your hands up off the ground and reach them back and overhead as you stay low in the lunge. Keep your front heel down as you sit back into the lunge. If your front heel is coming up, you may want to step your front foot forward a bit more. As you hold the lunge, your back heel will stay up and the back leg will stay straight. Feel a nice stretch down the front of the hip and quad of the back leg. Hold then switch to the other side.
(Warrior I, Triangle Pose, Glute Bridge Hold, Squat Hold, Half Moon, Tree Pose…All of these are great as well…AKA Yoga can be a super beneficial thing for anyone with knee pain!)
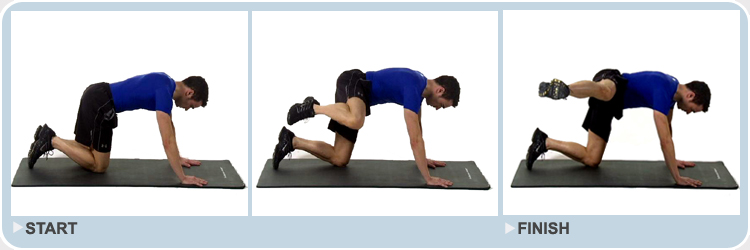
Just like there are a ton of mini band moves that are safe to do if you have bad knees, there are also a ton of quadruped glute and core exercises that you should include in your routine if you have knee pain.
These moves also focus on activating the core and can even open up your hips.
The three below are a few of my favorites because they hit the glutes from numerous different angles while also building core strength. They also all can help improve your hip mobility.
Fire Hydrants –Place your hands underneath your shoulders and your knees underneath your hips. Flex your feet. Then raise one leg out to the side, keeping the knee bent to 90 degrees. Lift it as high as you can while keeping your arms straight. Try to not let the foot get higher than the knee or the knee get higher than the foot. Really squeeze the butt cheek as you lift. Hold for a second or two at the top. Lower down and then repeat. Complete all reps on one side before switching.
Bird Dogs – Place your hands under your shoulders and your knees under your hips. Flex your feet. Kick one leg out straight as if kicking it into the wall behind you while you reach the other arm out straight toward the wall in front of your head. Don’t worry about lifting your leg or arm up high. Really try to drive your arm and leg toward opposite walls. Squeeze your glutes and keep your belly button pulled in toward your spine. As you lower your arm and leg, bend them and bring them together under your body. Try to touch your knee to your elbow before extending back out. Repeat all reps on one side before switching to the other side. All reps should be done in a slow and controlled manner. You should even hold for a second or two at the top of the move. You can advance this move by adding a resistance band around your leg and opposite arm so that you lengthen the resistance band as you reach out and have to fight against it pulling you back in.
Donkey Kickbacks – Keep the knee bent close to 90 and keep the foot flexed as you kick one leg back and drive the heel up toward the ceiling. Don’t let the low back arch. Make sure that as you lift you are squeezing the glute of the leg you are raising. Also make sure the foot is driving straight up to the ceiling. And do not let your elbows bend to get the leg higher. Hold at the top and squeeze the glute then lower and repeat. Make sure you are driving straight back and that the knee of the raised leg isn’t flaring in or out.
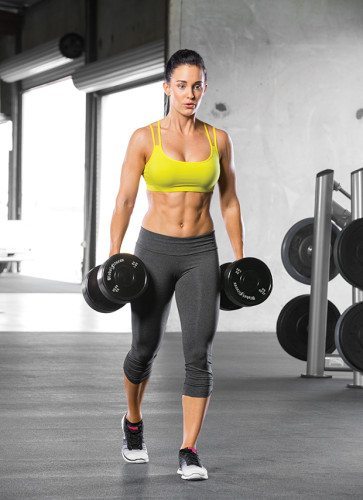
8. Farmer’s Walk
The farmers walk is literally one of the easiest exercises you can do that will not only develop your leg muscle and strength, but your overall physique. You just pick up some weight and walk for as long as you can, drop, and repeat. There are so many variations of the farmers walk that you can do to break the monotony. If you want to learn those check out this link: 15 Farmers Walk Variations
But for purposes of this post we will stay as basic as possible. So use dumbbells. As you get stronger, your can choose any variation you want!!!
Legs contains the largest group of muscles on your body. If you dont have a strong set of legs, life will become increasingly hard as the years pass. I do not want to see anyone have mobility issues in their elder years so i feel its my duty to share any and all information possible to prevent thee things. So now that you have some options, start working on building a balanced physique. If you have any questions or comments please feel free to leave them below. Train Smart!!!!!!
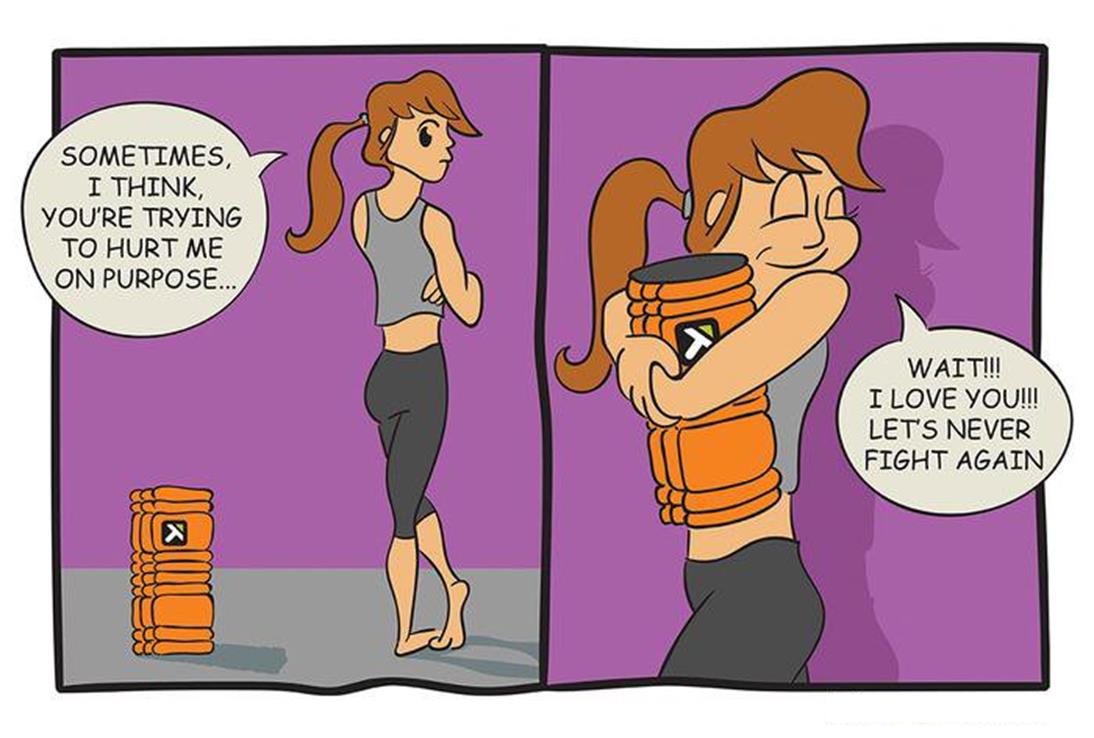
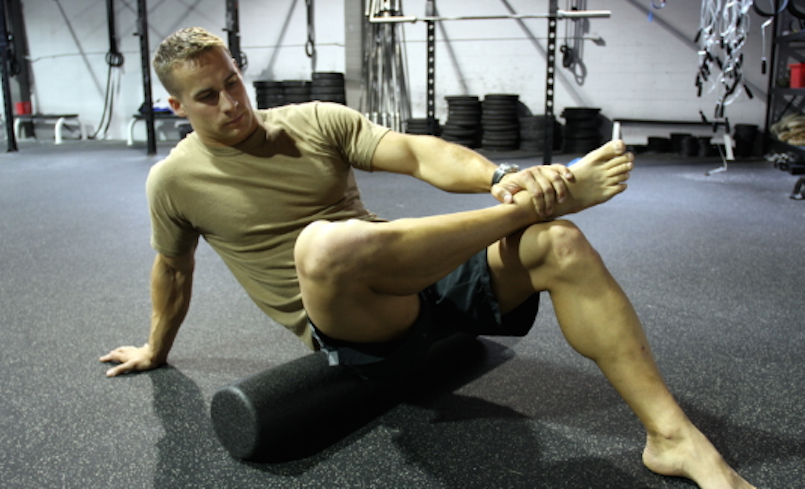
I have been lifting heavy for a lot years now. I, as well as many other bodybuilders and gym junkiez, tend to get very sore and stiff as a result of consistently training hard and heavy. As we get older and more advanced, recovery becomes one of the number one factors in continuing to be consistent with training. One way of improving that recovery time is frequent deep tissue massages. If you are like me and don not want to spend that type of money, their is a more cost effective option. The “poor mans massage” – The Foam Roller.
Regularly using a Foam Roller – especially a deep tissue massage roller – offers many of the same benefits as a sports massage, including reduced inflammation, scar tissue and joint stress, as well as improved circulation and improved flexibility.
Regularly rolling pre and post workout will mean you will help prepare your muscles for the workout ahead and also help with post muscle recovery.
It will be a love/hate relationship but once you start rolling I guarantee you will wonder how you ever worked out without it and really understand foam rolling benefits.
Check out a few reasons why you should incorporate foam rolling into your routine today!!
I know that there are other reasons that we might have missed. Feel free to add them in the comments below
1) Prevents Injury & Helps You Recover Fast
Learning the finer points of self-myofascial release could help you train harder and look better while also reducing injury.
“If you are still of a mind that foam rollers are for everyone else, then you are missing out on one of the most effective tools at your disposal for physique-building, recovery and injury prevention. Rollers are the most popular mechanism for self-myofascial release, or SMR, and are gaining popularity among elite athletes of all walks because of the drastic and usually immediate impact it has on their performance and overall health. Here are some of the most frequently discussed aspects of SMR as it pertains to dedicated lifters.”
2) Breaks Up Scar Tissue
Breaking up scar tissue and adhesions between the skin, muscles and bones is crucial for a healthy body.
“When you foam roll, you put targeted pressure on your fascia, releasing trigger points where you’re feeling pain. The process relieves pain caused by shin splints and IT band syndrome, both of which are very common in runners, and more generally, usually clears up problems caused by tight fascia and muscles.”
“So you can bench press a car and deadlift a truck, but can you bend down and touch your toes or hug your knees to your chest? With so much mixed information about stretching, static v. dynamic, pre-workout v. post-workout, it’s tough to know the best way to relieve muscle tension. But there’s a simple technique that will keep your muscles sliding and gliding with ease. Taking proper care of underlying fascia is your new secret weapon to improving mobility, flexibility, and range of motion.”
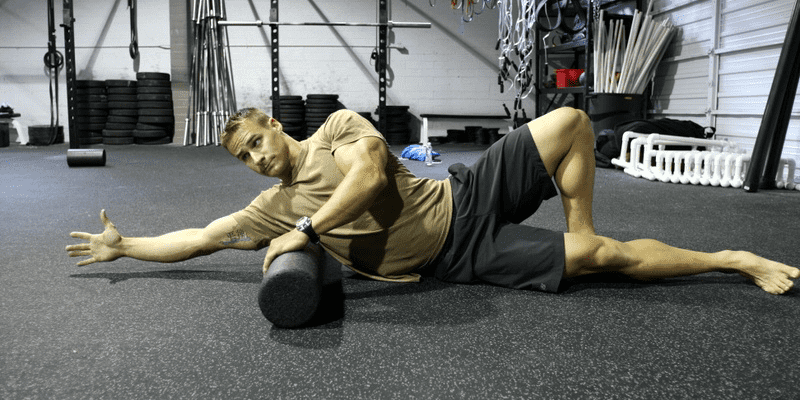
Here is an easy little foam rolling workout that you can do prior or after your main workout to help warm up and stretch those right muscles. You can do each move for anywhere from 60 seconds to 90 seconds a day. This workout is short and easy and takes 10 minutes or less!
Despite the very many health benefits of massage, we can’t all ball out and book regular appointments at the local spa. But there’s a basic (and cheap!) tool are known to many regular runners, gym junkie, and other athletes that just might be the next best thing. If you haven’t already, it’s time to get familiar with a foam roller.
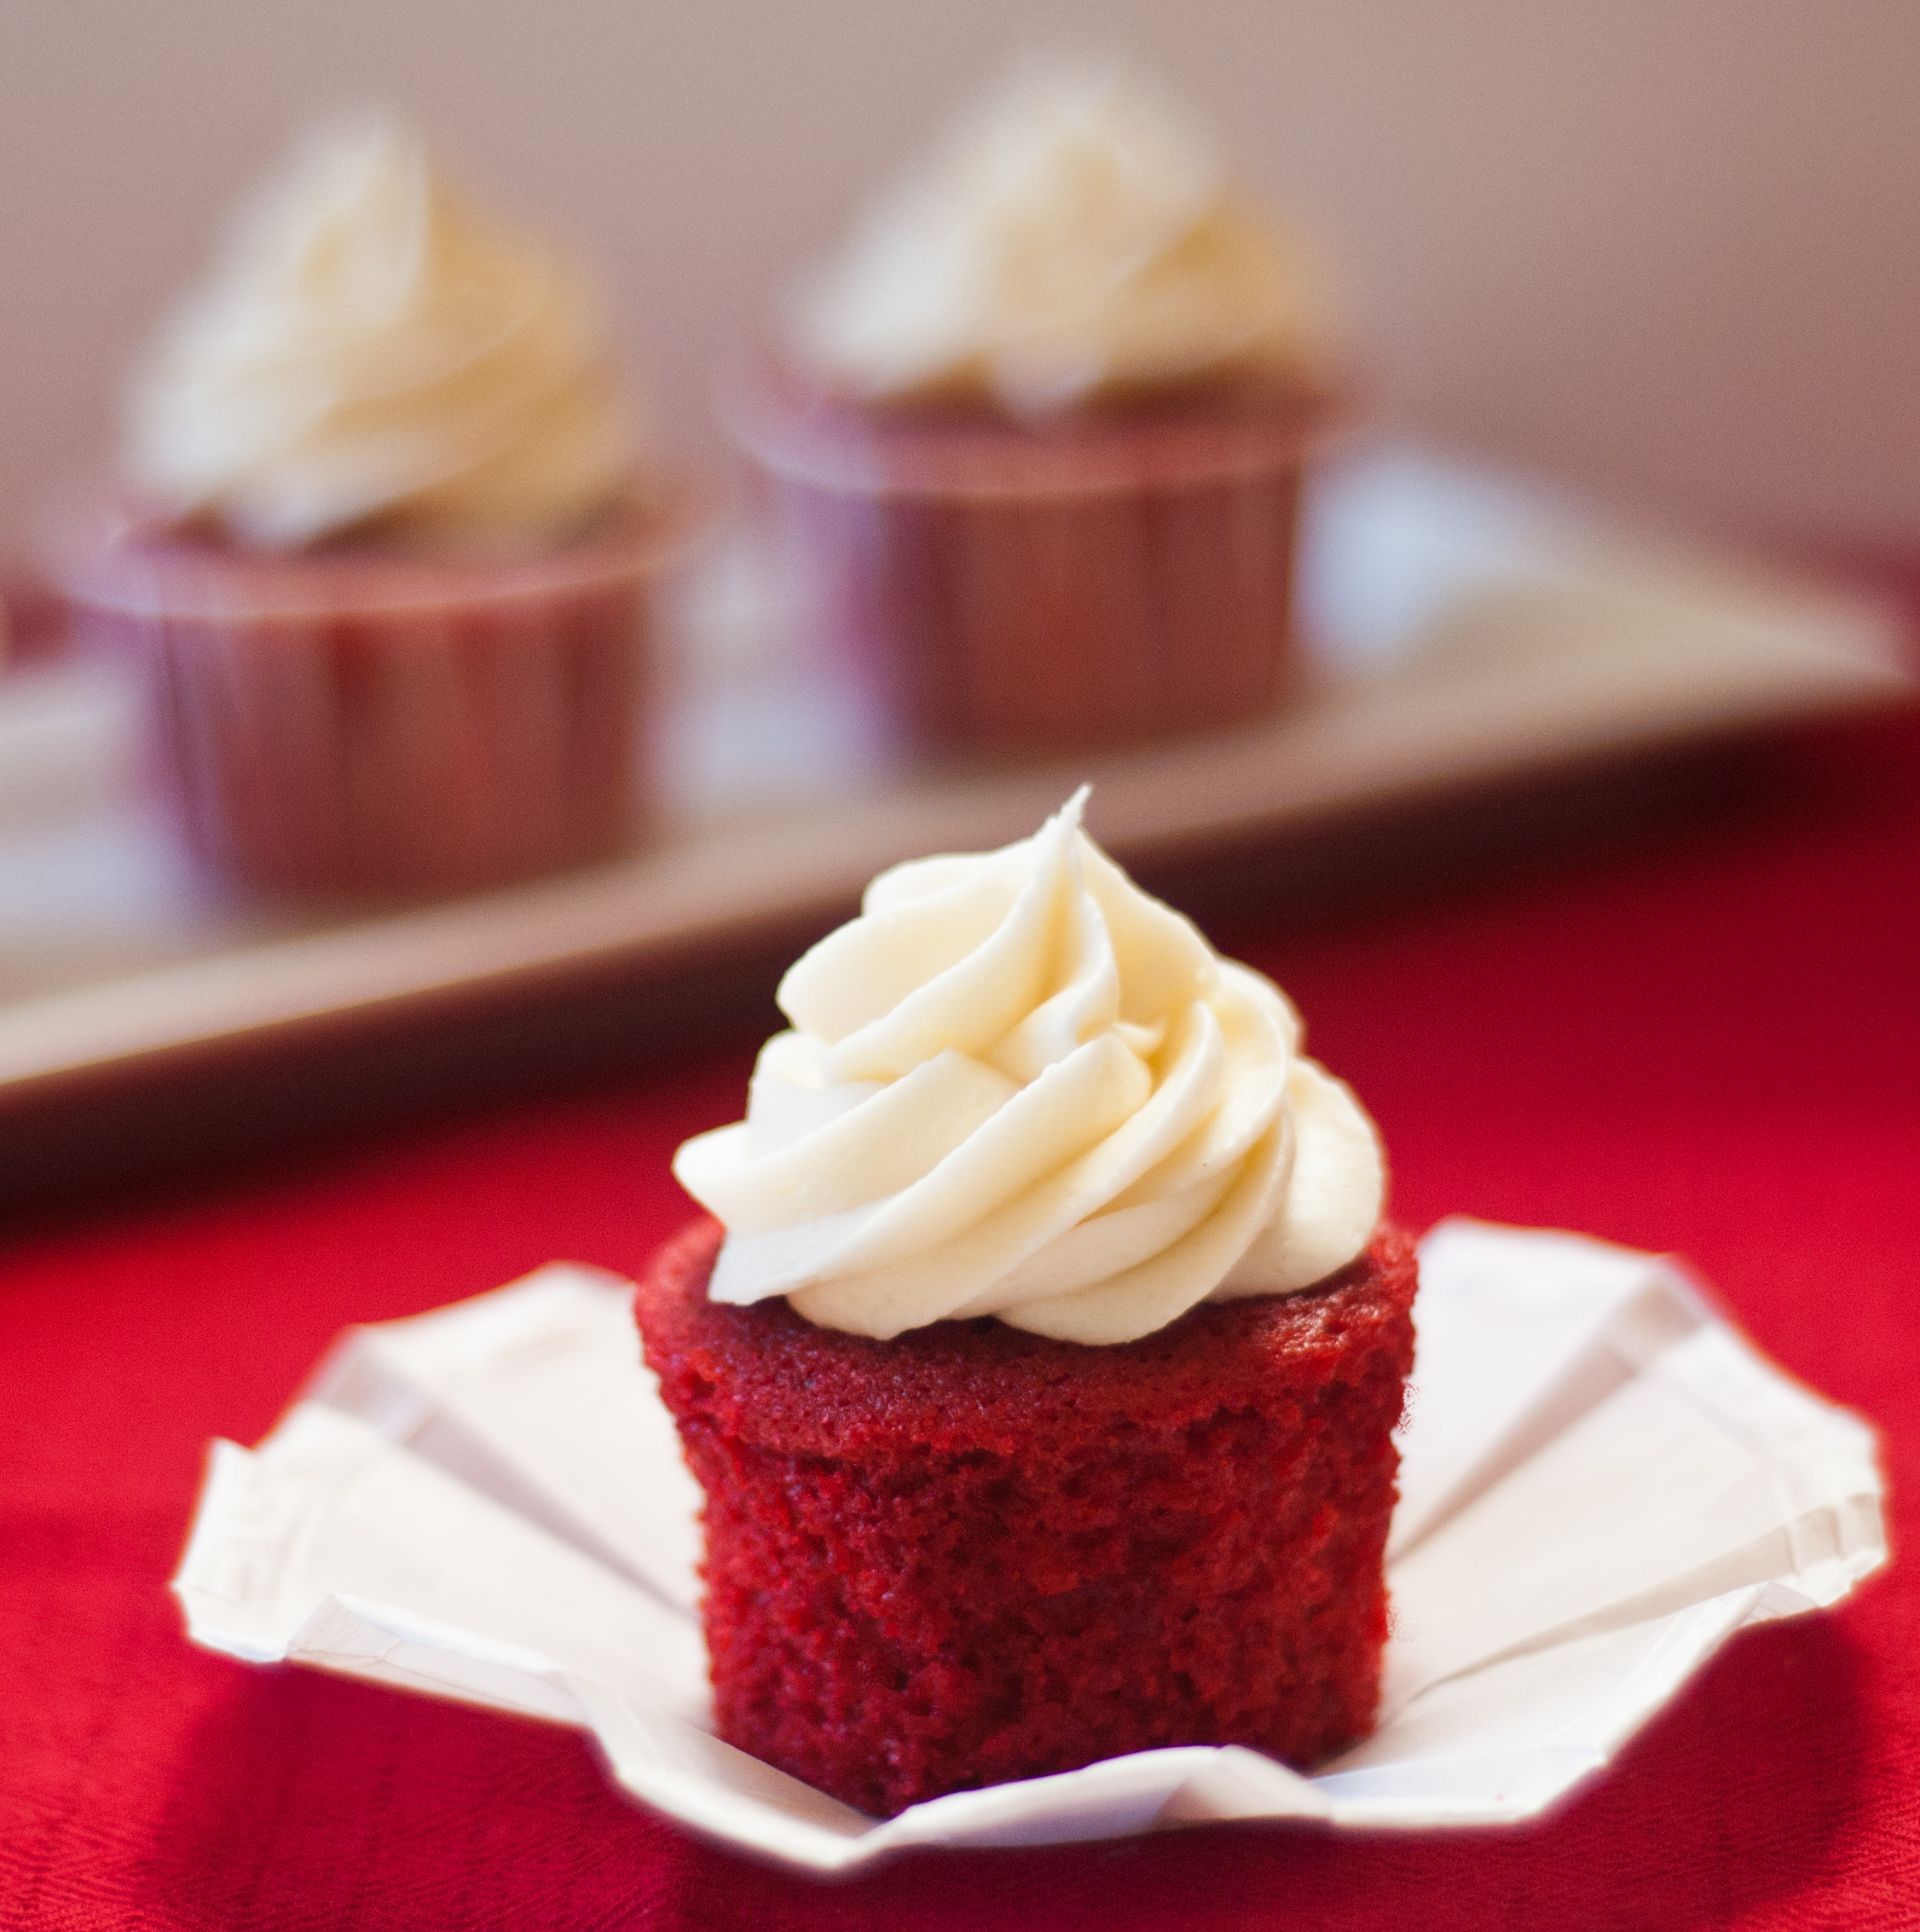
I have received a few requests for dessert options when you have those late night cravings. Here are 3 options for you to enjoy!! Guilt Free!!!! These are quick and easy do it yourself options that will not disappoint! Try them out and let me know how you like them!! Eat Smart!!
Begin to make the frosting by draining and rinsing the cashews.
Blend the cashews with the filtered water and stevia until smooth. (Depending on your blender, you may need a little more water and you may need to scrape the sides down a couple of times.)
Refrigerate until ready to use.
Preheat oven to 325F (163C).
Combine egg whites, oil, and yogurt until smooth (with whisk or electric mixer).
Add remaining ingredients, and mix until smooth. Batter will be thick.
Whisk together dry ingredients (through salt) in a mixing bowl.
Mix in wet ingredients (through vanilla) to form a dough.
Fold in chocolate chips.
Lightly coat baking sheet with cooking spray.
Place twelve rounded tablespoons of dough onto sheet a couple inches apart. Press flat just slightly.
Bake for 8-10 minutes until edges are golden brown. Enjoy!
Again try these out and let me know what you think. If you like them leave me a comment and let me know. If you would like to see more recipes from Gym Junkiez, leave a comment as well!! Eat Smart!!!
I get asked constantly, how I can eat the type of food I do and still stay in great shape. Being completely honest, it took me a long time and a great deal of trial and error to learn how to do this.
I want to share a few recipes that help break the monotony of eating clean/ healthy food. There are a few secrets to enjoying food the way you guilt free! I will share those over time…. Two of those secrets that I will share today are Walden Farms calorie free sauces, and salad dressings; and zero car pasta(thats right ZERO carb)!! I promise you will never look back at traditional recipes again once you add these options to your arsenal. I will start with 3 recipes and if you would like to see more… let me know I will begin to post them regularly!!!
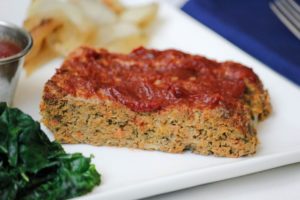
Cut up the ingredients and toss them into a mixture of the ground turkey, eggs, Worcestershire sauce, and salt. Form the mixture into a loaf. Heat the oven 375. Cook for 35-40 Minutes until the top is golden brown. Top with some Walden Farms Calorie Free BBQ Sauce
Boil Zero Carb Pasta (Fettuccini or Spaghetti) for 6-8 minutes or until soft. Use coconut spray to coat the pan and add in fresh garlic. Cut the chicken into chunks and cook on medium heat while covered for 6-8 minutes. Cut up the broccoli into small spears and add into the chicken for an additional 3-5 minutes. In a small pot warm up mixture of heavy whipping cream, garlic powder, parmesan cheese, and sea salt. Heat mixture for 3-5 minutes and then pour over chicken and broccoli. Add pasta to a plate, the Alfredo mixture and top with a little chopped parsley.
Try these out and let me know what you think. If you like them leave me a comment and let me know. If you would like to see more recipes from Gym Junkiez, leave a comment as well!! Eat Smart!!!
I am an African-American male that works as part of a leadership team for a Fortune 500 Telecommunications company. As a leader I have been recognized for being one of, if not the best in my field. The problem is I also get recognized for being “Aggressive”, “Intimidating”, and “Menacing at times”.This type of feedback is given in response to why i am overlooked for promotion repeatedly over the past few years.
Full transparency, I am 5’11, 265 lbs. I have a very deep voice and I do not walk around with smiling at everyone, By nature, I am an introvert but i have consistently worked to not be limited by that and be open/friendly to everyone. I am a millennial, even though my personality doesn’t match, i am in the generation that needs information immediately! I was taught to walk with my head up, shoulders back, and with pride. That’s how I was raised. I was also raised to be honest, hard working, and not surround myself with individuals i do not trust because one of two things will happen, they will bring me down or I will speak my mind and cause unnecessary trouble for myself. I have a degree in Computer Science, I have a range of skills from programming to building and maintaining networks. Suffices to say that i have some intelligence.
All of these positive attributes are consistently overshadowed by my physical appearance. I constantly work to build and improve a work standard for front line employees, as well as the members of my leadership team that is repeatedly halted because my drive and passion for meeting these goals is perceived as “aggressive” or “abrasive” simply because of my voice and physical appearance.
I was recently “coached” for being aggressive during a refresher training. I asked two questions during that session. Now, I was told that the two questions I asked were very valid. It was just my delivery of those questions. I asked how I could have asked the questions differently, and I was told there was nothing wrong with the what I asked. (How the hell is that?!) I asked during that “coaching” conversation if my voice was the reason. They stated no, but i may want to try and soften my tone so that i don’t come across in an unprofessional way. I then proceeded to ask several clarifying questions… “did i speak out of turn, did i cut the trainer off while she was speaking, did I raise my voice” The answer was no to all of those questions.
With that being said I was told that in order to prevent from getting into further trouble in the future I need to smile more, and be more approachable. The problem with that statement is I smile all of the time and despite being introverted, am very approachable to everyone except for:
those that try to get over on me
those that have less than stellar job performance
and those that are basically intimidated by what they see vs getting to know me
I began to research how many black males struggle with perceptions in Corporate America. I also looked into how muscular people struggle with perceptions of society in general. What i found was this scenario is just one example of the perception of black males in corporate America getting painted as a threat. If you add physically fit, with intelligence, and morals, then those perceptions are amplified 10 fold.
It was very interesting to read that there are many similarities to the struggles of black males in comparison to the struggles of muscular people. Both are seen as a threat just because of physical appearance. Both are given suggestions to stand a certain way, to sit down vs, standing when speaking to an audience, to not lean forward when engaging someone in conversation, to not make a spectacle of themselves by asking “unnecessary” questions (which is determined by someone else), the list goes on…
Now there are some positive suggestions that both sides share. Be the first to engage people in conversation to show that you are approachable and friendly. Actually thats the only positive one i found… :-/
The sad truth is that as a black male with a muscular body, I have to face double the perceptions and work twice as hard as everyone else just be seen in a positive light.
Bernard J Tyson shared the following excerpt with Fortune magazine:
” Let us begin, then, with one cold, hard-numbered truth: For much of corporate America, racial diversity continues to be at best a challenge—and at worst a flat-out fiction—particularly in the executive ranks. There have been only 15 black CEOs in the history of the Fortune 500, of whom five are currently in the role. (Ursula Burns, CEO of XeroxXRX-0.73%, is the only woman; Kaiser Permanente, the organization that Tyson runs, is a nonprofit and therefore ineligible for the Fortune 500.) Nor is it much better outside the corner office. According to a corporate diversity survey released last June by the office of Sen. Bob Menendez, a New Jersey Democrat, black men and women account for a mere 4.7% of executive team members in the Fortune 100 (the top 100 U.S. companies by revenue), a share that hasn’t budged since the survey was first conducted in 2011. Even at smaller companies, African Americans hold an estimated 6.7% of the nation’s 16.2 million “management” jobs, according to the latest figures from the Bureau of Labor Statistics, though they make up twice that share of the population at large.
Numbers, however, don’t capture the frustration that many black executives feel as they try to thrive and compete in a realm where race is often seen as an asterisk on their resumes and an unspoken subtext in conversations about career advancement. For black men, though, the challenges of the corporate life are daunting at least in part because they are sometimes hard to pin down—influenced as much by age-old prejudice as by cultural preconceptions, the subtleties of psychology, and the weight of human history (more on that soon). Black males are not seen as an option for leading executive positions many times simply because they do not look how someone believes they should, or they have ideas that are not accepted by their leadership. And many black males in positions of authority have built their own ideals of how things should work at their perspective companies. Sometimes those ideals do not agree with the status quo designed by company leadership and if they work to change the culture for the betterment said company, its viewed as “not supporting company initiatives.” Black males are in a constant battle to even the playing field that many times lasts the span of a career. This leaves many having the feeling of failure, or short-comings due to impenetrable glass ceilings put in place by white corporate America. “
Now couple those prejudices with the fact that I, as well as many other minority men are bigger,stronger, more muscular, or however you wish to describe an individual that lives a fitness lifestyle and those statistics are worse than what you see above. As I think about this, the scariest part of it all is that you can interchange the gender and minority type and see many of the same issues.
So the question becomes, what do we do about that? Do we smile, play the game by their rules, and just try to get by and not work towards the goals we set for ourselves? Or do we continue to fight and break down barriers that would help others like us in the future? My conundrum
Want to fast-track your muscle growth and build size in a hurry?
Nobody wants to wait for results. You post a photo on Instagram, and you hope to see at least 100 “likes” within an hour. You keep up with your favorite team’s results just by opening an app on your smart phone for play-by-play coverage. With that sense of urgency in mind, I stole some quotes from powerlifter-turned-bodybuilder and Dymatize athlete Geremy Satcher for his best tips on not just gaining muscle, but doing it in the fastest time possible. This will be the best “build muscle in a hurry” advice for those who simply don’t have time to wait.
Substitute multijoint movements for isolation exercises.
Most workouts consist of a collection of multijoint and single-joint movements—say, presses and a fly movement in a single chest routine. The biggest difference between them is that multijoint exercises engage more muscle groups, allowing you to push heavier weights.
Bench Press
Deadlift
Squat
Dips
Military Press
These exercises recruit a large amount of muscle mass, multijoint exercises trigger a more significant hormone response than single-joint movements. In fact, workouts that stress a large amount of muscle mass tend to produce the greatest increases in both growth hormone and testosterone.
Take a closer look at your workout. If you’re doing more than one single-joint exercise for any body part (with calves, biceps, shoulders, and forearms being the exceptions), retool it by substituting more multijoint movements.
Challenge yourself in the gym and push outside your comfort zone.
A couple of years ago, I worked out with a younger guy who could do 80-pound dumbbell presses for eight reps. When I suggested he try the 90s, he insisted he couldn’t handle those. I insisted, though, and he found out on the very next set that, in fact, he could handle them—and just not for eight reps. He actually did nine reps!
I suspect my friend did an additional rep with a heavier weight just because I was there encouraging him. You’ve probably noticed a similar phenomenon whereby you completed more reps than you thought possible when you had a spotter on hand, especially if you normally train alone.
If you never leave your comfort zone, you never force your muscles to adapt to new demands. “Staying within your comfort zone leaves room for stagnation,” says Geremy Satcher. “Challenging yourself and going beyond what’s comfortable directly links to your overall confidence. Build your own confidence and take baby steps toward increasing the weight you train with. Whatever you do, avoid becoming stagnant!”
Train with a workout partner who will push you.
A workout partner can do more than just force you to show up for your workouts. He or she can push you to new heights by helping you handle more weight, more reps, or both. And they can help you do this safely. Taking a set of squats or overhead dumbbell presses close to failure, for example, is less prone to disaster with an experienced spotter on hand.
However, don’t take every set to failure. In “Jim Stoppani’s Encyclopedia Of Muscle & Strength”, the author says, “Australian researchers discovered that when trained lifters completed one set to failure of the four sets they trained with on the bench press for eight weeks, they had double the strength gains of lifters who did not complete any of the four sets to failure.2 And in a follow-up study, the same team of researchers discovered that doing more than one set to failure on the bench press for eight weeks offered no additional increase in strength gains.3 It appears that performing only one set to failure allows for enough stimulus to be delivered to the muscle fibers without fatiguing the muscle too much, which can limit muscle strength during the workout when training with too many sets to failure.”4
“Developing a friendship with someone and having them in the gym with you is one of the most important things you can do when it comes to getting past training plateaus,” says Geremy Satcher. “That person is one of the few you can trust to give you straightforward input regarding corrections you need to make, your physique, and your attitude.”
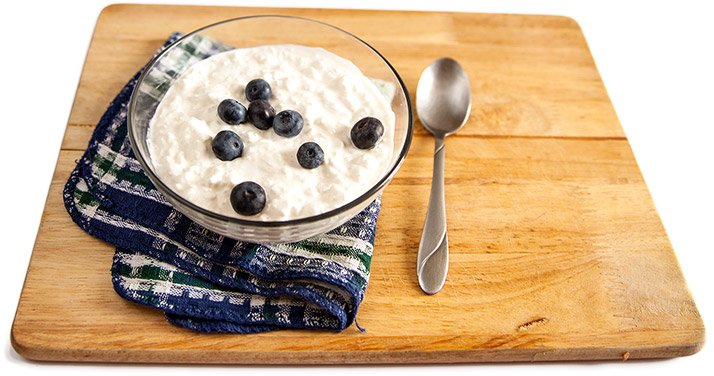
Add a pre-bedtime meal of cottage cheese or casein.
Hard-gainers complain they can’t gain weight—but are they doing everything they can to consume all the protein they need? No dietary change is easier to make than adding a pre-bedtime snack that includes slow-digesting proteins of the sort found in cottage cheese or a casein protein shake.
Slow-digesting proteins are especially useful during sleep—which is an eight-hour fast—because the amino acids they release are available all night long, which is more useful to fasting muscles than a quick-digesting protein like whey.
No dietary change is easier to make than adding a pre-bedtime snack that includes slow-digesting proteins of the sort found in cottage cheese or a casein protein shake.
If you’re not taking creatine, add 5 grams’ worth to your shake.
An avalanche of research supports creatine for bodybuilders and strength trainers. Creatine works by increasing the number of energy substrates capable of high-intensity work within the muscle, helping you maintain energy for more reps. Long-term usage has been shown to lead to 5-15 percent greater gains in strength and performance. So either eat lean cuts of beef daily (which i dont really recommend for digestive health) or buy a container of creatine online. One container will last you for a couple of months!
In the first tip, I listed a number of exercises that are proven muscle builders. Notably absent was any mention of machine exercises. That’s because the free-weight movements are superior for building muscle and strength. Those free weights require a lot more secondary muscle activity and stabilizers to help control the motion and balance the weight, engaging more muscle mass.
Machines have a place for beginners learning movement patterns, those who are working through injuries, and even for bodybuilders toward the end of their workouts. But if you’re doing machine movements early in your training in place of a free-weight alternative—well, maybe you’re just being lazy. Choose the most challenging exercises early in your workout rather than looking for easier alternatives.
“I’ll be as blunt as I can with this topic: Stick with free weights for mass building!” says Geremy Satcher. “Consider machines as assisted weight. When you’re training with free weights, you muscles have to carry the full force of the movement, and that makes you work harder.”
Get inspired.
What separates those who succeed from those who don’t? Those who can put ideas into action. Here’s where motivation counts. I already assume you want to gain an extra 10-15 pounds of muscle, but I can probably also assume you’ve been saying that for the past few years.
So how do you take the next step and make it happen?
Start engaging with like-minded people, both at home and online. Watch training videos from bodybuilders and strength athletes who inspire you—my personal favorites are Chris Jones (pump chasers), Marc Lobliner (tiger fitness), and the old “In the trenches” videos for muscular development. Chat online with a bodybuilder, or even engage their services for a month or two to help push you to the next level. Read about new workouts and techniques you can insert into your training. If none of those works for you, take a scoop of pre-workout and you’ll be ready to rock ‘n’ roll in about 40 minutes.
“Finding your inspiration will only accelerate your growth,” says Satcher. “There’s no one fighting against your efforts except you. The wrong attitude will compromise the altitude of your life!”
Eat calorie-dense foods.
If you’re having trouble putting on weight, look at your diet a little more closely. While I’d never suggest skimping on your veggies, the produce aisle is known for healthy fare that fills you up without much of a caloric punch. In a nod to health, get your daily servings of fruits and veggies, but don’t expect a meal plan of salads and high-fiber foods to give you much of an assist when you’re trying to gain weight.
On the other hand, consuming beverages such as protein shakes won’t make you feel full for very long. Just watch out for all the empty sugar calories in many sodas and teas. And, of course, there’s always Chinese food.
Prepare a daily meal plan that ensures you’re consuming the necessary daily macros and daily caloric surplus to support muscle growth. Time spent in the kitchen preparing your meals is a smart investment that supports muscle growth.
Rest the day before your most challenging workouts.
I’d like to think you have some kind of life outside the gym, so you may typically take your rest days from the gym on weekends or situate them around other events in your schedule. Rest days are an opportunity to ensure you’re fully fed and caught up on your sleep, meaning you’ll be ready to hit the weights hard again the next day. That makes those next days ideal for leg or back training—grueling workouts that require more effort and sap your energy.
You might even consider a two-days-on, one-day-off split so you’re getting every third day for rest. Oftentimes, your best workouts come after a full day’s rest, so including more of them in your training can help you push harder.
Set your goal and follow a specific plan.
There’s a great divide between saying you want to get bigger and just showing up at the gym without a plan, and actually defining your goal and following a detailed workout that helps you achieve it. Greatness never happens by accident.
A great place to start is Bodybuilding.com’s Find a Plan page, or Pintrest . Regardless of which one you choose, you should understand how and why it works, believe in it, and commit to it. By following a specific plan, you’ll be miles ahead of others who wander through their workouts blindly.
“Setting goals for yourself is the first step to being successful, it’s something we all must do with our lives at some point. It’s not just making a choice; it’s finally taking the critical next step and investing in yourself physically and mentally. Remember, no goal is too lofty as long as you have a plan of action.”
Let me know if this was helpful to you or not. leave me a comment and let me know what you think.
Running on the treadmill, doing round after round on the stationary bicycle… cardio can be quite mind numbing.
At the same time these boring, prolonged methods of cardio aren’t even particularly efficient assuming burning calories, shredding fat and getting stronger are your goals.
That’s where car pushes enter the equation…
Car pushes are an unconventional gruelling form of high intensity interval cardio that’ll require every ounce of exertion you have. And I must warn you. This is NOT for the faint of heart!!
2 Big Benefits Of Car Pushes Over Conventional Cardio Methods
Car pushes are easy on the joints
Unlike sprinting up and down stairs, jump rope or box jumps the car push is easy on the joints, while still providing the same or higher level of intensity from other intense, high impact exercises.
Multiple intense sessions of jump rope or stair sprints per week always leave me with sore knee and ankle joints, car pushes leaving me feeling fine.
Car pushes build immense leg strength and drive
Car pushes are harder than you think, they’ll test the power and drive you can muscle through your legs instantly.
If you perform these workouts regularly you’ll find you build power and strength in your legs too! This power can translate over to the weight you’re lifting on your squat and leg press.
Sprints, cycling or jump rope for example are a non-resistance aerobic based cardio exercise, there’s no tension on the muscles like there is when you’re driving through your legs to get the car to budge.
Car Pushing Workout Form
There’s no fancy tips or tricks here, here’s the basics of car pushing…
Ensure car is in neutral with your training partner ready to steer/brake as necessary
Lower your head, extend your arms and place your dominant foot forward
Push while driving through your legs
Attempt to build up speed as the car begins to move forward
Push car for prescribed time or distance (see workout structure ideas below)
The Vehicle
The vehicle you use plays a huge role in how effective or ineffective you find your car pushing workout.
If you’re a strong oriented athlete and you’re pushing a Mazda Miata you’re not going to be challenging yourself in the slightest.
At the same time, if you’re a beginner or don’t train for strength then you’ll find it discouraging (and may even risk injury) trying to haul a Hummer from one side of the parking lot to the other.
I’ve personally found the Nissan Pathfinder to be solid challenge.
If you’re limited to a small/light vehicle your training partner can utilize the brakes to increase the resistance to get and maintain the movement of the car.
Workout Structure
There’s no right or wrong way to structure your car pushing workout, however here are a few structures and ideas I’ve tried that work well…
For time
Use a timer, push and rest for predetermined intervals.
20 seconds on/20 seconds off for 10 rounds
10 seconds on/10 seconds off for 10 rounds
30 seconds on/30 seconds off for 10 rounds
Tabata (8 rounds of 20 seconds on/10 seconds off)
For distance
Set yourself a goal distance and push for that distance for a pre-determined number of rounds (exact measurements are necessary, I generally just specify one length of the car park I use).
If you are not afraid to try something different that will improve your conditioning, build your leg drive, and burn a ton of calories, try this and let me know how you feel afterwards.. leave me a comment. Train Hard!!!
Protein powders are a quick way to help ensure that your body is nourished and satisfied. People use them for a variety of reasons — to lose weight, to improve sports performance and build muscle mass, and for overall wellness.
How do you know which protein powder is best to meet your personal health goals? It’s important to know the difference between available protein powders as well as how they stack up against whole food protein sources.
Whole foods vs. protein powder
You can meet your body’s daily protein requirements whether you drink shakes or eat only whole foods. However, they don’t offer equal nutritional value.
What you may find surprising is that shakes generally contain fewer nutrients than whole foods. For that reason, shakes may help you lose weight, but whole foods have more vitamins and minerals the body needs to function properly.
Protein types and uses
Whey protein is one of the most commonly used proteins and is best for day-to-day use. It contains all of the essential amino acids and is easily digested. It helps boost energy and can reduce stress levels. Whey isolates and concentrates are best to use after a workout.
Soy protein is another common choice. It helps reduce high cholesterol and can ease symptoms of menopause for some women. It can also help with osteoporosis by helping build bone mass.
Other types of protein include:
Egg protein, released more slowly than whey, can be taken throughout the day.
Milk proteins help support immune function and enhance muscle growth.
Rice protein, which is 100 percent plant-based, is a good choice for vegetarians or for people who don’t consume dairy products. It’s also gluten-free.
Pea protein is highly digestible, hypo-allergenic and economical.
Hemp protein is also 100 percent plant-based. It’s a good source of omega-3 fatty acids.
Matching a powder to your needs
With so many choices, how do you decide which protein powder is best for you? Here are some general guidelines, based on the outcomes you’re looking for:
Build muscles — For muscle growth, choose a protein powder with a high biological value (a value that measures how well the body can absorb and utilize a protein). Whey protein and whey isolates are your best options.
Lose weight — To lose weight, choose shakes with no added sugars or dextrins/maltodextrins (sweeteners made from starch). Don’t choose those with added branched-chain amino acids (BCAAs), as they help promote muscle growth and weight gain.
Stay vegetarian or vegan — If you are vegetarian or vegan, don’t choose milk-based protein shakes (e.g., whey, milk proteins); instead use 100 percent plant proteins.
Go low-sugar with diabetes — Patients who have diabetes should choose protein shakes without added sugar (don’t choose protein powders with sugar listed as one of the first three ingredients). It’s also best to look for a shake that’s low in carbohydrates (less than 5 grams per serving).
Limit protein for kidney disease — People with kidney disease can’t tolerate a lot of protein at one time. Stick with powders that have a lower-range protein content (10-15 grams per serving).
Avoid gastrointestinal problems — Patients with irritable bowel syndrome or lactose intolerance should choose powders that don’t contain lactose sugars, artificial sweeteners or dextrins/maltodextrins. If you have a gluten allergy or sensitivity, don’t choose powders that contain gluten.
Stick to your budget — To save money, buy tubs of protein powder instead of ready-to-drink protein shakes which are more expensive because they’re convenient.
Top 5 Highest Quality Protein Powders
I will be the first to admit that the supplement companies that I have used and promoted for years are not the best on the market. I can only image what type of progress I could have made in the gainz department had I been aware of this information. Oh well…hopefully this information will help you guys not miss any opportunities to make some quality progress towards your physique and health goals. The list below is comprised of protein powders with the highest concentration of protein, as well as economically priced. The information used to determine this list come from the lab results completed by labdoor.com. If you need a supplement to meet your protein needs, make sure you choose one of these.
MTS Whey Protein
Concentration of Bound Protein – 92%
Description – MTS Nutrition Machine Whey is the perfect whey protein supplement. While we want the in-tact biologically active fractions found in whey protein concentrate, we also want whey protein isolate to keep the lactose extremely low, and the fat and carbohydrate content nearly non-existant. Machine Whey is perfect for use around training and is also a great protein source for your meals. Imagine replacing that bland chicken breast with a delicious milkshake – this is the protein for you!
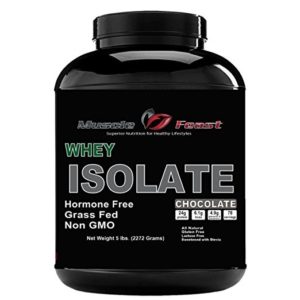
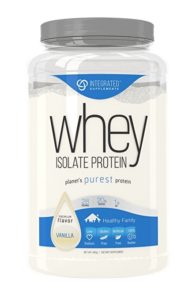
Impact Whey Isolate is an isolated form of undenatured whey protein. This means it is manufactured using an ultrafiltration process to provide a protein content of over 90% per serving while retaining most of the protein’s bioactivity. Due to this complex and careful process, each serving of Impact Whey Isolate contains minimal amounts of fats and carbohydrates, maximizing the amount of protein you get for your money. Ingredients: Whey Protein Isolate, Cocoa Powder, Artificial Flavoring, Sucralose, Soy Lecithin. ALLERGENS: Contains Milk & Soy (Lecithin) Ingredients.
Unlike other whey proteins, integrated supplements 100% natural CFM whey protein isolate is expertly formulated using only the highest quality ceramic filtered whey protein isolate. Absolutely no inferior whey concentrates, ion exchange isolates, or resin-filtered isolates are used. Make no mistake about it. All whey proteins are not created equal. We truly believe that you’ll find integrated supplements 100% natural CFM whey protein isolate to be the absolute best-tasting protein supplement you’ve ever tried. We spared no expense to formulate our flavors with the highest quality Dutch cocoa, real strawberry pieces, and finest natural vanilla money can buy. One taste of integrated supplements 100% natural CFM whey protein isolate and you’ll know you’re experiencing the best protein supplement ever created. The integrated supplements commitment to quality ensures that we produce our products without the use of FD&C colors, aspartame, sucralose, or acesulfame potassium. In fact, you can rest assured that all of our products are all natural and we use absolutely no artificial flavors or sweeteners in any of our formulations.
ISO100 is simply muscle-building fuel. Known worldwide for quality, taste, and purity, ISO100 is produced to our highest quality standards. ISO100 is formulated using a cross-flow micro-filtration, multi-step purification process that preserves important muscle-building protein fractions while removing excess carbohydrates, fat, lactose and cholesterol. ISO100 is made with pre-hydrolyzed protein sources to ensure fast digestion and absorption
As you can see there are quite a few popular brands that are missing from this list. The important thing to remember about protein supplements is that when you are trying to meet a macro goal. you want to be as spot on as you possibly can. Whole food will always be the best choice but when time constraints permit you from getting in a meal or after you workout you need to get that protein in… you have to make smart decisions about products you use. If you think i missed a brand or have questions, feel free to leave in the comments section. Eat smart!!!
Most gym junkiez don’t put enough emphasis on a killer back workout routine – nothing showcases a powerful physique more than a wide – thick back.
Having a strong and muscular back puts your physique together and gives you a powerful base.
Not to mention if your back is lacking, you will be more susceptible to injuries during training.
Having a weak back actually holds you back from building lean muscle mass all over your body because you will be weaker on every single compound exercise such as the deadlift, bench press, squat, and barbell row.
Building a strong back is the foundation to big gains!
If your body has no glaring weakness and you are able to lift with maximum intensity on all of the best compound exercises, then you will be able to stimulate an incredible amount of anabolic hormone release.
This alone will transform you into a muscle-building machine. Because your back is one of the largest muscle groups in your body, it is vital that you train it with intensity and overload creating the ideal amount of hypertrophy.
The correlation to bigger arms and a strong back
Many naturally skinny guys have weak biceps and small arms from this lack of a functional foundation.
The stronger your back muscles are, the more your opposing muscle groups can fully develop.
If you have a weak back it will be nearly impossible to reach your full arm growth potential.
Take for instance your chest and bicep muscles that are the opposing muscle groups to your back.
Having a strong and fully developed back will help you press more weight on the bench and curl more weight with your biceps as your body works in symmetry to opposing muscle groups and this will elevate your functional strength a great deal.
This is why one of Arnold’s favorite workouts from his bodybuilding prime was the classic “push and pull” workout.
This helps put an equal emphasis and equal amounts of strength on your back and chest muscles, which creates a powerful and impressive physique.
Just as extremely impressive shoulder muscles involve working all 3 deltoid heads – you need to make sure you are performing a wide array of back exercises that focus on building each section of your back.
There are actually four main groups of muscles in your back – and it is crucial that you develop all four components. The four components to your back muscles are the trapezius, rhomboids, latissimus dorsi, and erector spinae.
Back Training Principles
You want to follow a few principles with your back training if you want an aesthetically pleasing and strong back that will build an incredible foundation to your upper body.
These are the principles to back aesthetics.
Make sure you are training your traps with heavy weight to establish the upper back “caps” that bring everything together
You need to put an emphasis on your upper and mid lats to create that aesthetically pleasing V-Taper that forms the basis of aesthetics.
You need to emphasize heavy weight and time under tension with row exercises to build those bulky rhomboid muscles.
Direct lower back work that will create structure in the lower back.
Finally: DEADLIFTS. Deadlifts will develop your entire back like no other.
Now most guys train their back but only have a slight V-Taper due to a lot of lateral pull downs but don’t have the other components of their back muscles.
If you want to have an incredible looking back that looks aesthetically pleasing and also builds an awesome foundation you need to follow these principles and train each of the 4 main groups.
The best back workouts that emphasize a “symmetrical back” and stimulates the maximum amount of muscle growth and anabolic hormone release will follow these principles:
Compound Exercises that work the lats and hit other components of the back
Heavy Training in the 5-8 repetition range that is 75-90 percent of your 1 rep max
Exercises that build depth, thickness and width in the back.
A high amount of focused and heavy reps with 5-7 days rest between (50-70 reps every 5 to 7 days seems to be the perfect amount for an experienced lifter)
With that being said, what does the best back workout look like that will emphasize all four components of your back muscles and give you that incredibly strong and aesthetic looking back?
Let’s dive in and break down the best back workout for an incredible looking back. Do this workout every 5-7 days for maximum lean muscle gains! Ladies you can follow this same regimen with two adjustments; deadlift rep range 10-12, all other exercises 12-15 rep range!
THE ULTIMATE BACK WORKOUT FOR AN AESTHETIC BACK
Deadlifts
Sets: 4, Reps: 3-6, Rest Time: 120 Seconds
Note: This is an incredible back workout because you are emphasizing the erector spinae all the way to your traps. Another benefit is that this exercise will also blast your hamstrings. Make sure to emphasize your form and stay tight during this movement.
Seated Cable Row (Close Grip)
Sets: 3, Reps: 6-10, Rest Time: 90 Seconds
Note: This is a fantastic exercise for emphasizing the large rhomboid back muscles so make sure you get a great pump and really squeeze those muscles as you row the bar into your abdomen.
Wide Grip Lateral Pull down
Sets: 4, Reps: 8-12, Rest Time: 90 Seconds
Note: This exercise will build your lats and really emphasize the middle portion, which brings together that V Taper look. Make sure that your hands are wider than shoulder width apart to emphasize the mid lats.
Barbell Row
Sets: 4, Reps: 8, Rest: 2 Minutes
Note: The barbell row is another awesome exercise for strengthening the erector spine and building up your back muscles. Another bonus is that you will be getting an incredible bicep pump during this exercise.
Underhand Grip Pull-Ups (Weighted Optional)
Sets: 3, Reps: 6-10, Rest: 90 Seconds
Note: This one is going to drill your upper lats and also build thickness and depth in your biceps. Underhand Grip Pull-Ups are one of the best bicep builders since you are working your bicep muscles from a different angle.
If you are strong enough make sure that you do these weighted either with a dumb bell between your feet or with a weight belt.
1 Arm Db Row
Sets: 3(each arm), Reps: 8-12, Rest: 90 Seconds
Note: This exercise is going to sculpt your rhomboid muscles and is the best iso-lateral type movement for building that barn house door back. The 1 arm db row allows you to work each side of your back individually chiseling your rhomboids to aesthetic perfection.
Weighted Reverse Hyper-extension
(A lot of Gyms do not have a reverse hyper extension machine so above is an option that you can use)
Sets: 4, Reps: 10-12, Rest: 90 Seconds
Note: This is the best exercise for targeting your lower back and building a strong foundation. Unlike the other back exercises that are working your upper and middle sections of the back, the weighted reverse hyper-extension will target your lower back muscles, which is most guys’ weakness.
This exercise will also help you to dead lift more weight and build a very strong foundation. Many injuries occur due to weaknesses in the lower back.
Finisher
By now your back should just about be done. This quick super-set will finish your session off and give you an insane pump! In order to do this right, you cannot have an ego and use a ton of weight that you cant lift with proper form. These two exercises are strictly for you to squeeze and feel every rep!
T-bar Row – Sets: 2, Reps: 20
super-set with
Straight Arm Pulldowns – Sets: 2, Reps:20
Note: You do not want to use any body-english on either of these exercises. You want to extend your arms to get a full stretch, contract hard, and squeeze for 2 seconds.
If you get through this workout, consider yourself a true Gym Junkie!!! Let me know how you like it or if you have any questions please leave them in the comments. Train Hard!!!!

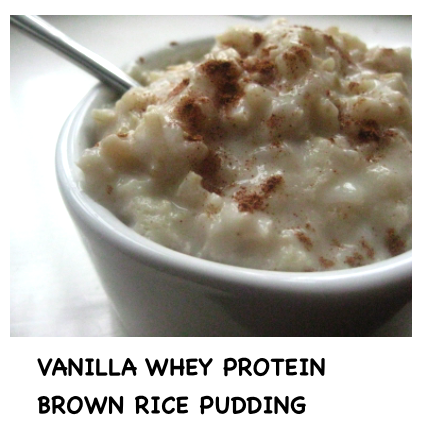

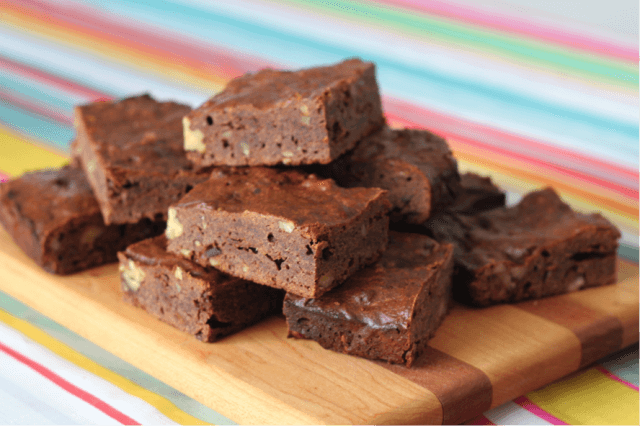
 PLUS
PLUS  EQUALS