Author: Gym Junkiez

  • Shredded and Sexy by Summer

    Shredded and Sexy by Summer

    With all of the new years resolution-ers invading the gyms and resolving to be in the “best shape of their lives”, its important to have a plan of action. If you are a newbie and have no idea what you are doing in the gym, please find a good trainer that will teach you and hold you accountable. If you have some experience, this is for you! I am giving you some free game… . The only ask in return is that you stick to using moderate to heavy weight that allows you to complete each rep and each set with good form; and to failure or close to failure. Also stick to the structure of the training sessions for optimal results. Lets get this work!!!!!

    Workout Notes

    Before we get to the workout though, here’s some important points to keep in mind:

    Lift Heavy

    The days of going super high reps for ultra-light weight (i.e. pink dumbbells) are gone. Ladies; training heavy (moderately heavy) and looking like a man is A MYTH. Its almost impossible for you all to gain rock hard muscle and be as lean as men become. So leave that excuse at the door of the gym. You’re shedding fat here, not muscle. To keep your muscle while eating at a deficit. So ladies train with, at minimum, some moderately heavy weight. Guys, you will need to lift heavy f#%king weights.

    Diet Clean Up

    I’m not talking about washing your fruits and vegetables before eating them (i.e. “clean” eating). By “cleaning up” your diet, we’re talking about focusing on whole foods – lean meats, fruit, vegetables, whole grains, and healthy fats. Use junk food/cheat meals as a reward for a weeks (5+ Days of Hard work!).

    A lean -sculpted physique is the goal, so that means curbing the daily cheats to get rid of the excess calories. We’re in deficit mode now, which means each and every calorie needs to count — there’s no room to waste on bon bons and Butterfingers.

    Track Everything

    Reiterating the two points above, you have to track everything — weights used on working sets, number of reps accomplished each set, how much you’re eating each day, and what you’re eating each day.

    If you’re not monitoring what you’re doing in the gym and in the kitchen, you have no idea if you’re progressing with your training, stalling, under/overeating, or anything else. To truly succeed and make the most of these next 8 weeks, you must buckle down and track everything. Your end results are riding on this!

    Commit

    Cutting fat isn’t rocket science, you need to tightly monitor your diet and train your ass off. We’re burning off the goo here through a combo of high volume/intensity and heavy weight.

    This isn’t easy by any means, and that’s where the last point comes in –COMMITMENT.

    There’s going to be times when you want a drink with the gang after work or some cake with your co-workers during an office party. If this the reward meal for the week, then by all means; if not I strongly urge you not to! I mean, i cant tell you what to do and sure you can do that, but then again you can kiss your dream body goodbye. That drinking and bullshit doesn’t sound as “necessary” anymore does it?

    Commit to your goal and pursue it with relentless, reckless abandon and you’ll be astonished at the end results!!!

    Pump n’ Grind

    Pump Chasers brings you the all new powerful pre-workout, Pump N’ Grind! This top of the line product features clinically dosed ingredients that will help bring you the explosive energy that you need to make every rep count! Pump N’ Grind also focuses on the muscle building compounds by adding in Creatine Monohydrate and the perfect dose of Betaine Nitrate to get that pump that makes everyone in the gym stop and stare! You’ll notice that the pumps, focus and energy you get from this product are unlike any pre-workout you’ve ever tried!

    Now… It’s time to TRAIN!

    5 Day Workout Program Outline

    • Day 1 – Lower Body A
    • Day 2 – Upper Body A
    • Day 3 – Lower Body B
    • Day 4 – Upper Body B
    • Day 5 – Body weight conditioning**

    Each workout for Days 1-4 will consist primarily of supersets – that is performing two exercises back to back with as little rest as possible between the two, then resting for 60 to 90 seconds. This accomplishes two things: you’ll get a tremendous amount of work accomplished in less time and your heart rate will stay elevated, helping increase the number of calories burned and burning more fat while still maintaining muscle.

    **Day 5 is a high intensity day. Explosive movements with little to no rest between exercises for 25-30 minutes. You will have a choice between a body weight plan and a HIIT session called “Hell on Earth” created by Rheufit trainer Dion Rheubottom. My advice, for better results, try Hell on Earth!!

    Ripped Body Workout Plan

    Your training needs to burn excess calories and we’re going to do that through a variety of techniques and methods (high volume, supersets, short rest periods, etc.). Choose one compound movement and one isolation movement for the supersets you do until you make it through your entire workout. This is precisely what you need to get the results you’re after – a body no beach freak can resist!

    Get ready, because it’s nothing but a grind from here on out. Do you have the heart and determination to get the results you want!!??!

    ** superset the first two exercises listed.. then the next two..

    Monday
    Lower Body A
    ExerciseSetsRepsRest  
     Barbell Back Squat – Drop set last set 3 8-12 60  
     Leg Press – Drop set last set 3 8-12 60  
     Barbell Romanian Deadlift 3 10-15 60  
     Dumbbell Reverse Lunge – Reps are per leg 3 10-15 60  
     Standing Calf Raises 3 20-25 60  
     Seated Calf Raises 3 20-25 60-90  
     Ab Wheel Roll outs 3 10-15 0  
     Hyperextension 3 12-15 60  
    Tuesday
    Upper Body A
    ExerciseSetsRepsRest  
     Wide Grip Pull Ups 3 6-12 0  
     Incline Dumbbell Press 3 6-12 60-90  
     Bent Over Barbell Row 3 6-12 0  
     Flat Barbell Bench Press 3 6-12 60-90  
     Incline 2-Arm Dumbbell Row 3 10-12 0  
     Standing Overhead Dumbbell Press 3 10-12 60-90  
     Standing Dumbbell Lateral Raise 3 10-12 0  
     Seated Dumbbell Rear Delt Flies 3 12-15 60-90  

    MTS Yohimbine HCL is a superior aid in for getting rid of excess fat.  Click here to order now.

    Thursday
    Lower Body B
    ExerciseSetsRepsRest  
     Lying Hamstring Curl 3 10-12 0  
     Front Squat 3 8-12 60-90  
     Dumbbell Romanian Deadlifts 3 10-12 0  
     Bulgarian Split Squat – Per leg 3 10-12 60-90  
     Walking Dumbbell Lunges – Per leg 3 10-15 0  
     Swiss Ball Leg Curls 3 AMRAP 60-90  
     Hanging Leg Raises 3 8-12 0  
     Cable Chops 3 12-15 60-90  
    Friday
    Upper Body B
    ExerciseSetsRepsRest  
     Neutral Grip Pull Up 3 10-15 0  
     Standing Military Press 3 8-12 60-90  
     Hammer Strength Row Machine 3 10-12 0  
     Low Incline Dumbbell Squeeze Press 3 8-12 60-90  
     Dumbbell Upright Row 3 8-12 0  
     Single Arm Cable Lateral Raise 3 10-15 60-90  
     EZ Bar Curls 3 8-12 0  
     Lying Triceps Extensions 3 12-15 60-90  

    Saturday
    Bodyweight Conditioning (HIIT)
    Exercise Sets
    Reps

    Rest
      
     Bodyweight Squats 1 30 0  
     Push Ups 1 20 0  
     Chin Ups 1 10 0  
     Jumping Lunges 1 20 0  
     Bear Crawls –  1 25 yards  60-90   
      Rest 60-90 seconds after each round. Complete between 5-7 rounds      
          
          
    Hell on Earth (HIIT)
    Men – barbell with 95lbs or 145lbs Women – barbell with 65lbs or 85lbs
    ExerciseSets
    Reps

    Rest
      
     Barbell Curl 1 10-1* 0  
     Deadlift 1 10-1* 0  
     Barbell Clean 1 10-1*  0  
     Standing Military Press 1 10-1*  0  
    Back Squat  1 10-1*  0  
      * 1 round is each exercise for 10 reps. Rest 15 seconds. Complete next round with 9 reps of each exercise… Each round subtract 1 rep until you get down to 1…..see the video below     
     Good Luck!     
         
    Rheufit

    Note: Perform the bodyweight circuit going from one exercise to the next with as brief a rest as possible (5-10 seconds between the moves). Perform all reps for a given exercise before proceeding to the next one. Each week aim to reduce the number of breaks needed each week to perform all reps for each exercise, as well as trim the rest periods between circuits by a few seconds.

    You won’t need to be slogging away on the treadmill anymore with this conditioning circuit to end each week!

    Time to Shine!

    Gym Junkiez do not want to be like everyone else in the gym. We do not want to train for months and stay the same . The time to start getting in shape is now! Whether you plan to hit the beach while its still hot, prepare for a shoot, or just become the best version of yourself, bear down for the next few weeks and really commit to your diet and training. When it’s time to remove your clothes, the new you that will stun everyone.
    Let me know how this plan works out for you…. Till the next time gym junkiez, Train Hard!!!!!
  • Small Waist Principles

    Small Waist Principles

    It’s the beginning of a new year. With that comes a large group of people, called resolution-ers, that want to get in “The Best Shape of their Life”!

    There is also a group of athletes that are beginning their preparations for the upcoming competition season! This means its time to get Lean!!

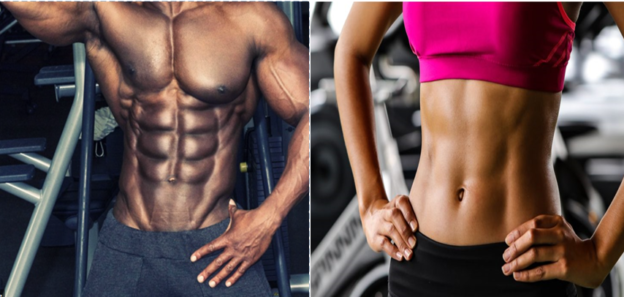
    Men and women both desire to have the perfectly proportioned physique from top to bottom. For those that compete, that illusion of a tiny waists, broad shoulders, and sweeping quads/calves; the X-frame; is what wins shows!

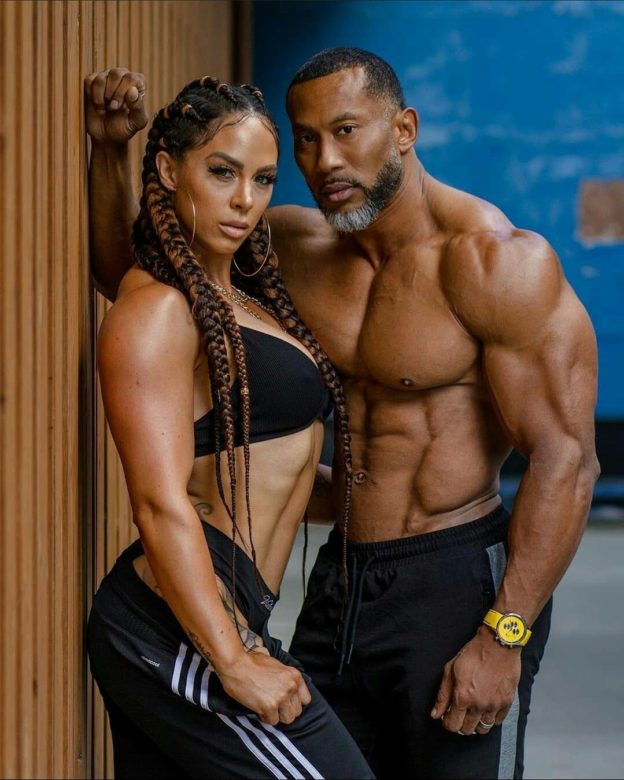
    Simeon Panda and Chanel Brown
    Terrance “Ruff Diesel” Ruffin, IFBB Pro

    For average gym junkiez, the only goal is to be in whatever shape that will produce the look of a small waist, and defined abs. The other body parts are gender specific goals (Men- big shoulders, big chest, arms, etc. / Women- flat stomach, small waist, big hips/glutes, etc.).

    Regardless of the goal you are chasing, always be mindful of your waist. Keep a tight waist and make the most aesthetic physique possible. I am going to give you 5 principles to adhere to while working to accomplish your physique goals!

    1. DO YOUR CARDIO! Small waist and abs will not be obtained without burning the fat around your midsection. While you cannot spot reduce, focus on losing as much bodyfat as possible. While strict dieting will allow people to acheive the goal of a small waist and visible abs, the reality is most people do not have iron clad discipline. So develop a habit of doing your cardio consistently. It doesnt matter if its low intensity or high intensity… pick a plan and follow it!
    2. Don’t stop squatting and deadlifts: Squats and deadlifts do activate the rectus abdominis and obliques, but they DO NOT cause the waist to get thicker/wider. Electromyography studies have shown that the abdominal wall and surrounding muscles are activated while completing those lifts but actually do it to a smaller degree than direct abdominal work itself. If you need these lifts from a development aspect, stick to them. Squats are the king of leg development, and deadlifts… well I will talk about deads in a later post. Way too much to talk about when it comes to what deadlifts are actually for! But for now I will just say, most associate deadlifts with thick-wide back musculature. Be sure to keep that goal in mind when choosing exercises for your training program.
    3. How to train abs!
      1. Do direct ab work for the rectus abdominis, both crunches and leg raises, even incorporating twisting movements in both of those exercises. You do not have to do a thousand reps either. Anywhere from 12-20 reps are more than enough if you focus on the squeeze of each rep!
      2. AVOID weighted oblique work all together to limit waist widening. Think about it, using weight builds muscle.. heavy weight; thick muscle! You do not want thick obliques! You will get more than enough activation in the obliques from the exercises mentioned next!
      3. MOST HELPFUL – Do daily abdominal vacuums to train the internal corset (transverse abdominis aka TVA). The best way to stay consistent at them is to do them as soon as you wake up; before you get out of bed (best to do them on an empty stomach). 5-6 sets for 15-30 seconds is all you need. If you do not know how to do vacuums properly, see the video of explaining how to do them at the bottom of this post.
      4. Train the functional bracing component of the core with isometric planks, side planks and bird dogs.
    4. Don’t Rush Progress: Growing fast makes everything grow fast including your waist. Increased fat gain only leads to more inflammation, insulin resistance, and increased fat around the organs; meaning larger waist. It takes an extremely long time to correct issues with inflammation and insulin resistance so practice sound nutrition habits! Great segway to the next principle
    5. Keep Digestion in Check:  The transverse abdominis works like an internal weight belt, supporting all the organs in place. Now, if we walk around all day long pushing out our gut and let that continue to happen year after year it could potentially stretch out the abdomen and leave you with a gut you can push way out in front of you. So, make food choices that keep food volume within a reasonable amount and limit gas and bloating. 

    Stick to these principles and you will get that waistline that people will be envious of! Just be prepared to answer a lot of questions about how you did it! LOL!! Eat Smart, Train Hard!!

    Stomach Vacuums

  • Pro Tip for Back Development – Branden Ray

    Pro Tip for Back Development – Branden Ray

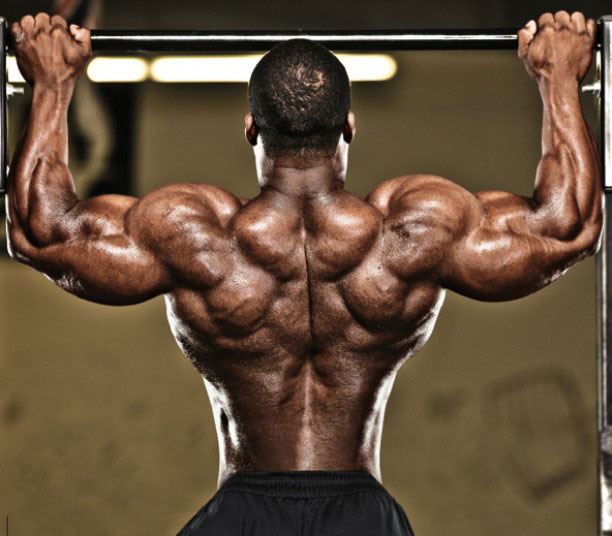
    This exercise comes from IFBB Pro Branden Ray. He has developed some insanely dense back musculature, with a crazy V-taper! I added this exercise to my back regimen this week and the mind muscle connection was intense! As Branden describes below, it doesn’t require a lot of weight and you will get more out of this variation than with a conventional deadlift. Check out how he describes the exercise!

    The whole purpose of doing rack pulls for back instead of full range deadlifts from the floor is to keep the lower body out of the movement. However, I can instantly tell when a rack pull is more legs than back, the hips come forward during the pull, the body becomes fully erect standing straight up, and then that extra little lean back at then end thing which mostly just squeezes the booty more so than the back. The loud plates rattle, the bar bends, the video gets double tapped, the chest gets pounded 🦍, everything going on but the back.

    With my version of deadlifts targeting the back, my hips stay back because I’m leaning back on the rack. I’m stabilized so I don’t need any help from my lower body to overcompensate during the left.

    I allow the bar roll forward under control which full stretches my back, especially my lats. I always believe that the deeper the stretch, the deeper the contraction.

    Now, because my lower body and lower back are stabilized, I can focus on the stretch and contraction of the back without my erectors in flight or fight mode, meaning, trying to protect my discs from slipping and spine from snapping.

    As I pull, I drive my elbows back and chest up, something that I learned from @thecharlesglass years ago to contract every muscle of the back. Pulling at the angle of my legs opposed to just vertically allows me to hit more muscles of the back. I only use 135lbs so don’t expect to go heavy because of the isolation. It’s all about the results, the end game. CHESS NOT CHECKERS

  • Benefits of Yoga for Weight Training

    Benefits of Yoga for Weight Training

    Gym Junkiez!!! I am a 270 pound bodybuilder. a Man’s man; and yoga was not something i considered “manly”. The sad truth is i knew the benefits of yoga would far outweigh my chauvinistic thoughts. I have to admit, when I first tried yoga, I loved the fact that pain i would feel in my muscles and joints has pretty much disappeared. I have come to realize that weightlifting and yoga are the Yin and Yang!

    Many bodybuilders/ weightlifters lack flexibility and frequently complain of overall tightness in the body, especially upon waking in the mornings. I’ve trained in a lot of gyms and competed in over a dozen different bodybuilding shows. I know weightlifters and bodybuilders with a lot of muscle mass and look like the Hulk when they flex, but can’t touch their toes or scratch their own backs. Hell I was the brunt of those jokes for a very long time. When you have that kind of mass and potentially associated strength, but lack flexibility, you are setting yourself up for injuries.

    I’ve seen it happen. Without stretching and elongating muscles, muscles and ligaments can be torn.

    Why Yoga is Good for Weight Training

    Lifting Weights without yoga doesn’t make sense. Have you noticed the increase massage parlors that offer stretching as a service? Or how NFL teams are looking into yoga as part of their weekly routine?

    There are several reasons why yoga and bodybuilding complement each other. Here are the best three:

    1. Yoga helps to lower stress. It not only helps the body, yoga also brings peace and relief to the mind. Lowering stress lowers cortisol, which aids in faster recovery time. Recovery is a very important factor in weight training for muscle growth. The more you can train a muscle the faster it will grow.

    2. Yoga gives your muscles the ability to fire more efficiently without shutting down in response to stretched tendons. Mind – Muscle Connection

    3. No more use for a weight belt.  The increase in core strength will teach you how to to use your abs — your natural stabilizers.

    Different Kinds of Yoga to Try

    Power Vinyasa yoga would be great if you are looking to strengthen your body and build muscle. This is the yoga for bodybuilders that they’d want to do on a non-weight lifting day. It’s gentle on the body and allows deep stretching while strengthening sans weights.

    If you’re a bodybuilder experiencing chronic pain, you might want to look into Yin yoga. Yin lengthens connective tissue through relaxation and encourages joints to reach full flexion and extension. This type of yoga will alleviate muscular tightness and joint pain.

    The third type of yoga great for aches and pains is Restorative yoga. This style of yoga emphasizes healing and realignment through supportive postures and sequences, and is awesome for people recovering from an injury.

    A few poses to get you started on your weightlifting/ yoga venture are:

    1. Legs up the Wall Pose

    Related image

    One of the best Restorative yoga poses, this pose will get blood flowing in the opposite direction and is great for people who travel, are on their feet a lot, or have desk jobs where their feet are always toward the ground. For those gym junkiez who squat and deadlift very heavy weight, this pose takes all of the pressure off of the spine and posterior chain.

    To do the pose, find the nearest empty wall. Come to lie on your back, with your knees bent. Scoot your bum as close to the wall as you can, while you walk your feet up the wall. Eventually, your bum will be directly against the wall, with your legs resting along it above you.

    You can either rest your hands on your belly, or spread your arms out on either side, with palms up, like a big “T.”

    Stay here for as long as comfortable, and relax.


    2. Frog Pose

    My personal favorite and the best hip opener stretch around. If you spend at least 20 seconds in this pose, your body will thank you.

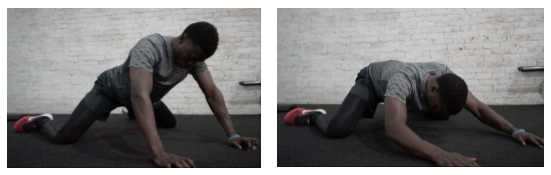
    To get into Frog Pose, start from Downward Facing Dog. Your knees should be slightly wider than hip-width apart. Keep your knees in line with your hips and slide them outward, sinking your hips down to form a 90-degree angle with your hips and knees. Your ankles should be aligned with your knees. Your shins should be parallel to each other. Point your toes towards your shins. Come down to your forearms.

    To simplify Frog, stay on the hands, or decrease the width of your hips.

    To advance Frog, get down on your elbows. Sink your hips down and back, decreasing the space between your hips and the ground. To advance even more, come down to your forearms by flattening and bending your elbows. Rest your chin or cheek on your hands.


    3. Half Moon Pose

    Posture: Standing with feet together, raise arms straight up and clasp hands with index fingers pointing up. Push hips left and bend to right, extending left side from hip to armpit. Hold for five counts. Return to center and repeat, bending to left. Return to center, drop head back, arms behind you, hands still clasped and bend backward as far as you can.
    Tony Parrish of the San Franciso 49ers

    Weightlifters often complain about digestion issues and tight lower backs. The half moon pose is a great way to get your digestion moving and releases tightness in the spine and posterior chain.

    Standing with feet together, raise arms straight up and clasp hands with index fingers pointing up. Push hips left and bend to right, extending left side from hip to armpit. Hold for five counts. Return to center and repeat, bending to left. Return to center, drop head back, arms behind you, hands still clasped and bend backward as far as you can.

    Breathe here for 5 to 10 breaths, and gently release on an exhale. Repeat!


    Are you one of those gym junkiez that trains hard in the gym and uses yoga to recover and relax. Share some of your favorite poses with us. Tag us @gymjunkiez17 on Instagram. Train Hard!!!!

  • Turn Up! Healthy Drinks that will give you a Good Pump or a Good Buzz!!

    Turn Up! Healthy Drinks that will give you a Good Pump or a Good Buzz!!

    I am not a drinker. Never have been, never will be. With that being said, i still like to enjoy a good turn up! This year for my birthday i decided to enjoy a drink or two with my friends. I borrowed these recipes from bodybuilding.com. I made a couple of these for the ones of us that do not drink and simply added one to two ounces of gin or vodka for those that do. Ill leave up to you do decide which. TURN UP!!!!


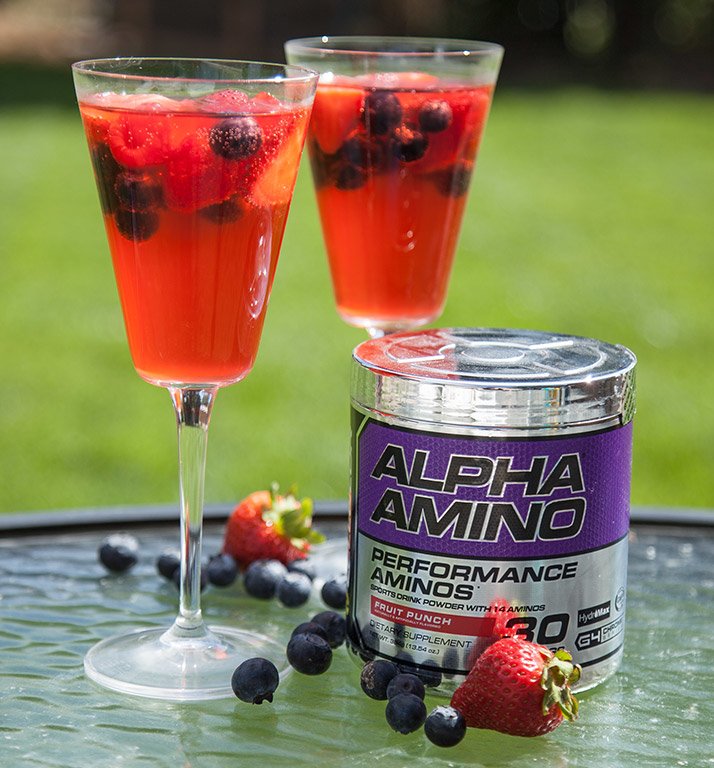
    1 Fruit Punch Sangria

    Sangria is a popular summer party drink not only for its alcohol content, but also for the way it packs a one-two punch of flavor and texture. It’s a sweet cocktail bursting with tons of little surprises—real fruit! This version is a dead ringer for the drink you’d find yourself sipping—and refilling—at a pool party. Shell out for a fancy ginger ale or ginger beer (both are non-alcoholic) made with real ginger to add even more tang to your new favorite drink!

    • INGREDIENTS
    • CELLUCOR ALPHA AMINO FRUIT PUNCH 1 SCOOP
    • STRAWBERRIES, FRESH 3 MEDIUM
    • BLUEBERRIES 1/4 CUP
    • RASPBERRIES 1/4 CUP
    • GINGER ALE 4 OZ.
    • 8 oz of water

    DIRECTIONS
    Add all ingredients to glass, shaker or jug in the following order: water, amino acids, berries ginger ale.
    Stir or shake, serve chilled, and enjoy! Makes two servings.

    2 OCEAN BREEZE COCKTAIL


    When you combine the sweetness of Icy Blue Razz aminos with a hint of lemon and bubbles, you’ll immediately feel as if you’re laying out in the sun. Plus, it’ll help keep you moving toward that beach bod you desire!

    INGREDIENTS

    • CELLUCOR ALPHA AMINO ICY BLUE RAZZ 1 SCOOP
    • CRUSHED ICE 1 HANDFUL
    • LEMON JUICE 1/4 LEMON
    • WATER 4 OZ.
    • SODA WATER 4 OZ.

    DIRECTIONS
    Add all ingredients to glass, shaker, or jug in the following order: water, amino acids, crushed ice, soda water.
    Add lemon juice.
    Stir or shake and enjoy! Makes one serving.

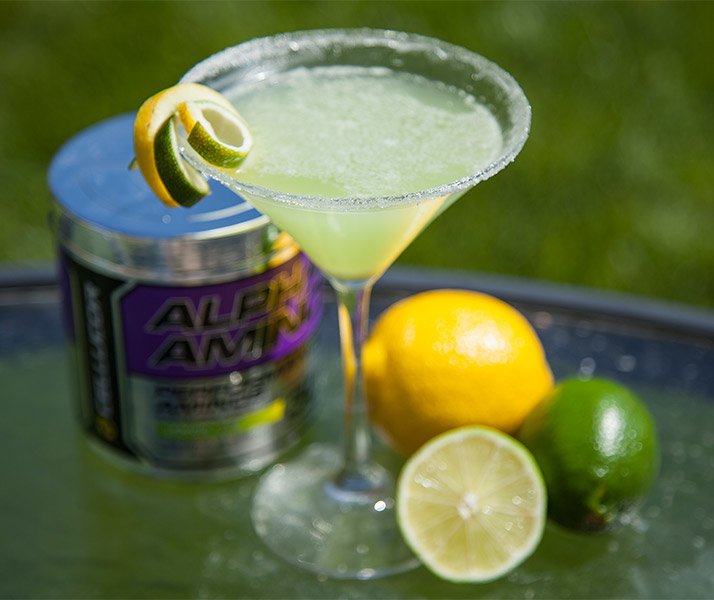
    3 LEMON-LIME DROP


    This luscious lemon-lime twist will satisfy that sweet-and-sour concoction you desire without the splurge of calories. Serve it “up” in a martini glass, with some sort of powdered sweetener on the rim of the glass; a number of companies make inexpensive lemon-and-sugar combos expressly for this purpose. If sweet-and-savory is more your thing, use salt!

    INGREDIENTS

    • CELLUCOR ALPHA AMINO LEMON LIME 1 SCOOP
    • LEMON 1 SLICE
    • LIME 1 SLICE
    • WATER 4 OZ.
    • POWDERED SWEETENER OR SALT AS NEEDED


    DIRECTIONS
    Salt or sweeten the rim of a martini glass by dipping the edge in water first, and then coating.
    Add water and then aminos to glass.
    Garnish with lemon and lime slice, and enjoy!

    4 MIXED BERRY MOJITO


    This refreshing recipe will bring you to a happy place no matter how your day has been. Fresh fruit and fresh mint go hand in hand, and you can further enhance the combo by unlocking the flavor of the mint through shredding or muddling. The easy method is simply to tear the leaves by hand and rub them lightly between your fingers before putting them in the glass.

    If you’ve got some bartending chops, put the mint leaves in the bottom of the glass along with the amino powder and grind them lightly with a muddler or the end of a rolling pin until they’re fragrant.

    INGREDIENTS

    • CELLUCOR ALPHA AMINO MIXED BERRY 1 SCOOP
    • BLUEBERRIES 1/4 CUP
    • RASPBERRIES 1/4 CUP
    • MINT LEAVES, SHREDDED WITH FINGERS 1 LEAF
    • SODA WATER 6 OZ.
    • WATER 8 OZ.
    • ICE AS DESIRED


    DIRECTIONS
    Add all ingredients to glass, shaker, or jug in the following order: water, amino acids, berries, mint leaf, soda water, and ice.
    Garnish with mint leaves as desired, and enjoy!

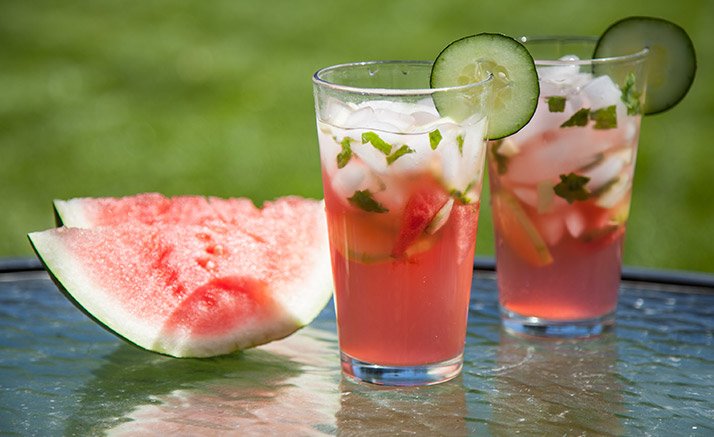
    5 WATERMELON COOLER

    No backyard barbecue is complete without a refreshing drink in hand. The combination of in-season watermelon and crisp cucumber is amazingly good on its own, but even better with a little fresh basil. Plus, watermelon is one of the world’s premiere sources of the amino acid citrulline, so slugging down this pre-workout drink might even give you a better pump! Or buzz depending on the person..lol

    INGREDIENTS

    • SPARTAN NUTRITION GUM DROP BCAA
    • WATERMELON 3-4 SMALL CUBES
    • CUCUMBER 3-4 SLICES
    • BASIL LEAF 1
    • SODA WATER 4 OZ.
    • WATER 6 OZ.


    DIRECTIONS
    Add all ingredients to glass, shaker, or jug in the following order: water, amino acids, watermelon, cucumber, basil leaf, soda water, and ice.
    Garnish with additional cucumber as desired, and enjoy!

    To all of the gym junkiez out there… It is ok to have a good time in moderation. Whether you drink or not, you will definitely enjoy these drinks especially when good company is involved. Try them and let us know what you think!!!!

  • German Volume Training: How to pack on Muscle Fast!!!!!

    German Volume Training: How to pack on Muscle Fast!!!!!

    I get asked two questions a lot by guys without fail. “Do you take steroids/growth hormones/testosterone replacement/etc” and “How did you get the mass you have”

    Now I will admit that i have some size on me. 5’11 265 lbs. I have between a 33-34 inch waist most of the year, and when i am dieting, its smaller! Now please know i am not saying this to brag, its just so you can get an idea of why i am asked these questions all the time.

    Well I am finally going to give an answer to those questions: NO I have never taken any form of drugs, I work my ass off every training session. And I will to share one of my training secrets with you…

    Guys if you want to achieve some serious muscle gains (or women if that’s your goal), then try German Volume Training!

    GVT is an old school style of working out specifically for packing on a lot of muscle mass quickly. Gains of five pounds of solid muscle are often seen in as little as three weeks. Many articles have been written about this workout, but a lot gets lost in translation when it comes to explaining why this particular program works so well.

     GVT works by targeting a group of motor units (nerves that cause a specific group of muscle fibers to contract) and subjecting them to an extensive volume of repeated efforts. Specifically, 10 sets of 10 reps of a single exercise. The body adapts to this extraordinary stress by hypertrophying the targeted fibers.

    German Volume Training goes beyond being a challenging workout physically; mentally, the sheer volume of the work can eventually make you dread going to the gym. After a GVT training cycle you’ll need a break—a long break. A good training plan would be to perform GVT for just one month, once a year or, at the most, twice a year.

    With that background, let me explain some of the mistaken ideas associated with GVT, along with a few tips on how to get the most from this workout.

    First, some bodybuilders believe that GVT is simply a slight variation of Vince Gironda’s 8×8 workout. It’s not. One of the major differences is that there’s more rest time between sets in GVT, making it possible to use more weight for each exercise and thus build more muscle mass.

    Although GVT doesn’t produce a high level of growth hormone release, it’s not as effective in the short term for reducing body fat as other programs, such as the German Body Comp program. However because GVT is a superior method of increasing muscle mass, it will more effectively raise your metabolism (i.e., the rate at which you burn calories). It has been found that for every pound of lean tissue gained on GVT, there is often a loss of an equal amount of fat weight—this is especially true with women.

    There’s also the mistaken belief that  Olympic lifts and their assistance exercises, such as power cleans or snatch pulls, could be used within the GVT program. No, they can’t. First, it would be difficult to maintain proper form in those complex exercises using such high reps—even in pulls. More importantly, those exercises are dynamic with no eccentric overload, and as such the time under tension for those types of assistance exercises is too short to create maximal gains in hypertrophy.

    With a few exceptions, such as leg curls, it would also be a mistake to use machines for GVT. Machines don’t provide the same stress from a total-body training stimulus due to their increased stability. Performing 10×10 of leg presses is certainly difficult, but nowhere near as difficult as squats. Select exercises that recruit a lot of muscle mass. Triceps kickbacks and side leg raises are definitely out—squats and bench presses are definitely in.

    You’ll increase the weight only after you complete all 10 sets with the predetermined starting weight. The load you use will be submaximal— you don’t try to reach failure on all sets; only the last three sets should be hard. Basically you get the training effect from the law of repeated efforts. Once you’re able to complete 10 sets of 10 reps, you’ll increase the weight by 2ó–5%. Also, you’ll perform the reps without any outside assistance.

    Due to the physical and mental challenges of the GVT, I’d recommend at least a year of conventional training before trying it. If you’ve tried GVT before, review the previous three paragraphs! The German Volume Training program is one of the most difficult workout programs you’ll ever perform, but the results are worth it. For a more detailed explanation, check out  www.poliquingroup.com

    The following includes a sample GVT workout within a month-long program that involves performing each training session a total of six times. Although supplementary work can be performed for the same muscle group, only two exercises in each workout are performed for 10 sets of 10 reps. Any additional work could easily push you into overtraining.

    ARMS    
    Exercise Sets/Reps Rest (sec)
    A1. Ez-bar Reverse Curl 10*10 75
    A2. Dip 10*10 75
    B1. Incline Dumbbell Curl 3*12-15 60
    B2. Ez-bar Lying Tricep Ext 3*12-15 60
         
    Chest and Back    
    Exercise Sets/Reps Rest (sec)
    A1. Incline Dumbbell Press 10*10 75
    A2. Chinup 10*10 75
    B1. Flat Dumbell Press 3*12-15 60
    B2. Single Arm Dumbbell Row 3*12-15 60
         
    Legs    
    Exercise Sets/Reps Rest (sec)
    A1. Back Squat 10*10 75
    A2. Lying Leg Curl 10*10 75
    B1. Stiff Legged Deadlift 3*10-12 60
    B2. Standing Calf Raise 3*10-12 60

    Let me know if you like this style of training. Leave me a comment or email me. Train Hard!!!!!!!

  • Gym Junkiez Recipes –           “Oh My” Sauce

    Gym Junkiez Recipes – “Oh My” Sauce

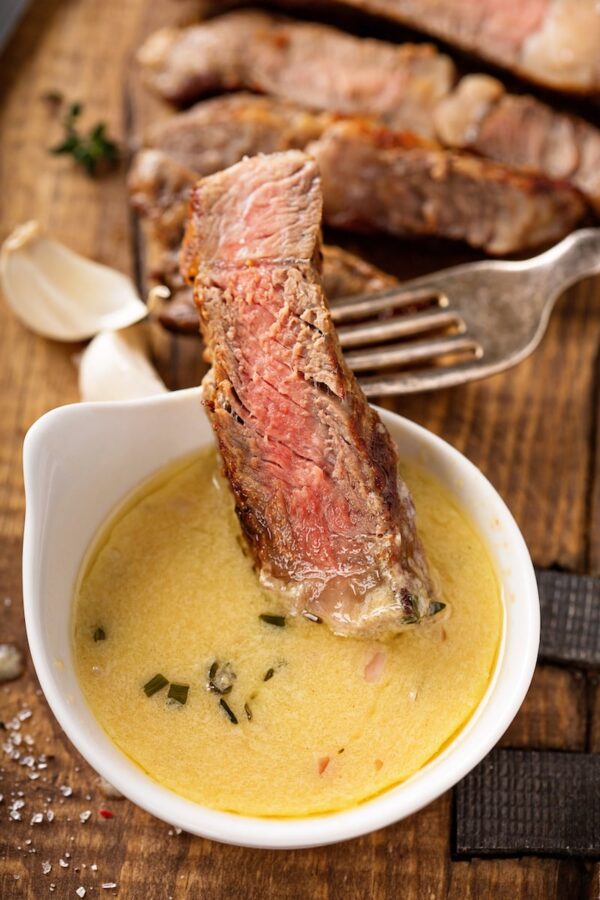
    I Love Steak! Like I literally eat steak everyday! Mainly because this sauce is insanely good! Its called the “Oh My” Sauce. Yes the name is corny but the taste makes up for the name!

    I got this recipe from a site called the novice chef about a year ago and have used it ever since. I actually started putting it on chicken and salmon too! A few slight changes to the recipe and its perfect for the gym junkiez lifestyle!! This sauce is a great source for healthy fats, has virtually no carbs in it (for all of the Carb Nazis out there), and it is addictive!

    If you struggle with sticking to a healthy nutrition plan because the foods lack the flavor you were used to, then i encourage you to try this sauce with your protein source.

    "Oh My!" Steak Sauce: my favorite secret family recipe for the best flavored buttery steak sauce! This steak sauce is gluten free, low carb and keto approved! #Keto #LowCarb

    INGREDIENTS

    • 8 tablespoons Grass-fed butter, melted
    • 1 small shallot, finely minced
    • 5 chives, finely minced
    • 3 garlic cloves, minced
    • 2-3 tablespoons prepared horseradish (the fresh kind in refrigerated section)
    • 2 tablespoons Dijon mustard
    • 3 teaspoons minced fresh thyme
    • pinch of cayenne pepper, to taste
    • Himalayan salt and pepper, to taste

    INSTRUCTIONS

    1. Whisk all ingredients till well combined.
    2. Let the sauce sit for 10 minutes and whisk again. This will allow the butter to cool and thicken just a little.
    3. Serve with your favorite steak!
    4. Store leftovers in the fridge and reheat in 15 second intervals, stirring often, until just melted when ready to reuse!

    Try it out and let me know what you think!!! Eat smart!!!!

  • 4 Bad Habits to Break in the Gym!!

    4 Bad Habits to Break in the Gym!!

    4 Bad Habits to Break in the Gym!!

    Sooooo many people post on social media or brag to their friends about all the hours and energy they are putting into your workouts. Many of these same people have not gained a pound of muscle or lost an inch from their waist since they started working out.

    It’s time for some introspection: You could be wasting precious time at the gym with some nasty habits that are hard to break. It’s important to remember that if bad workout habits are only holding you back, you have to change them in order to get the most out of each second of your workout That’s how you achieve the results you want.

    So get off your cell phones, take off the gloves, and try an exercise or routine you have been scared to try and start making some quality progress in the gym!

    1. Wearing Gloves

    I see a lot of newbies to the Gym Junkiez lifestyle wearing gloves while weight training. While gloves do help ease the stress on the forearms and make it easier to grip the weights, they will ultimately lead to weak grip strength and potential wrist pain and/or injury.

    Wearing gloves does NOT prevent calluses. The only reason you have not developed calluses is because you have not picked up weight heavy enough to cause friction between your hands and the bar. If you argue this point, that just means you aren’t training hard enough to understand this statement. Do yourself a favor and rid yourself of this gym habit. If you can’t lift your normal training weight without gloves, get going on building your grip strength.

    2. Stretching before you begin weight training

    Let me clarify. STATIC stretching before weight training is bad. Static stretching elongates the muscle and places in a weakened state. To properly warm up the body for weight training or any workout, start with 5-10 minutes of light cardiovascular work (bike, treadmill, elliptical) and then complete a series of dynamic stretches. I have found that this list of dynamic stretches before any workout will help you perform optimally

    Upper Body – 2 rounds; 30 seconds a piece

    Lower Body – 2 rounds; 30 seconds a piece

    • Butt kicks
    • High Knees
    • Leg Kicks
    • Jump Squats

    3. Cell Phone Usage

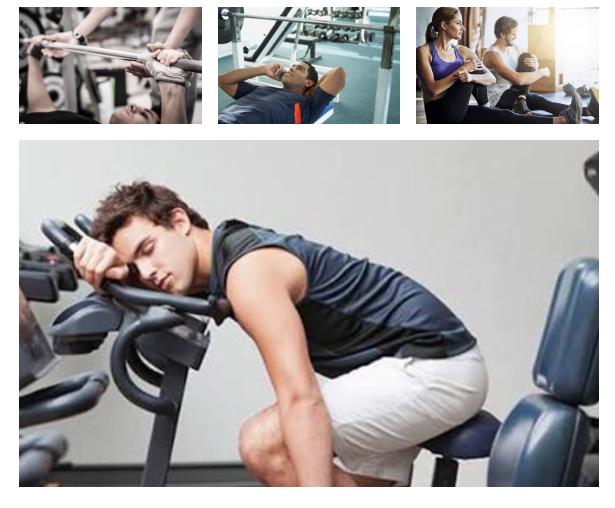
    How many times have you seen this?

    This is one of my biggest pet peeves in the gym. If you are in the gym to lift. LIFT!!! Don’t sit on a bench or machine and surf the web, social media, or just chill while face timing a friend. If you are using your phone to pick a play list, then thats cool!

    Gains come from focus and intensity. Sitting around on your phone will cause you to take more than recommended time between sets which lowers your heart rate as well as any chances of burning that tire of fat around your waist.

    I wonder how many people would still go to the gym if they banned cell phone usage on the floor?!?

    4. Following the Same Routine

    Its easy to go to the gym and follow the same routine every session. But you will only stall your progress to being in better condition or achieving a learner physique. Your body is smarter than you are (let that sink in). Constantly sticking to the same routine will get boring, stagnate your results, cause you to lose motivation, put you at risk for an overuse injury .

    In order to grow and improve there has to be some type of stress to adapt to. Varying your workouts is the only way to achieve that stress. Subtle changes in weight, number of reps, tempo of reps, or time between sets can be all that is needed to push your body to the next level. The best advice for everyone is to follow a routine for 2-3 weeks. If you are able to get through the workout in less time or feeling less fatigued by the end of it. Change it up! If you are unable to determine when its time to change your routine, hire a personal trainer. They will be able to direct you ,and if they are good, teach you how to properly accomplish this.

    Break these habits FAST. The faster you do… the faster you become stronger and in better shape. Thank me later!!!!

    Train Smart! Train Hard!

  • Weight Loss vs Fat Loss

    Weight Loss vs Fat Loss

    I am going to go on a short rant. This post is dedicated to the ladies. Guys can benefit from it, but MOST of the time, men already understand what is being explained here.

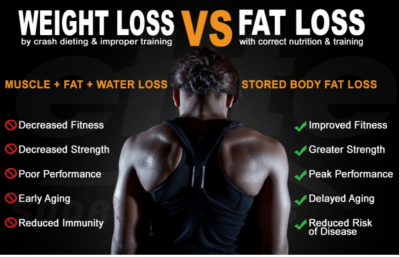
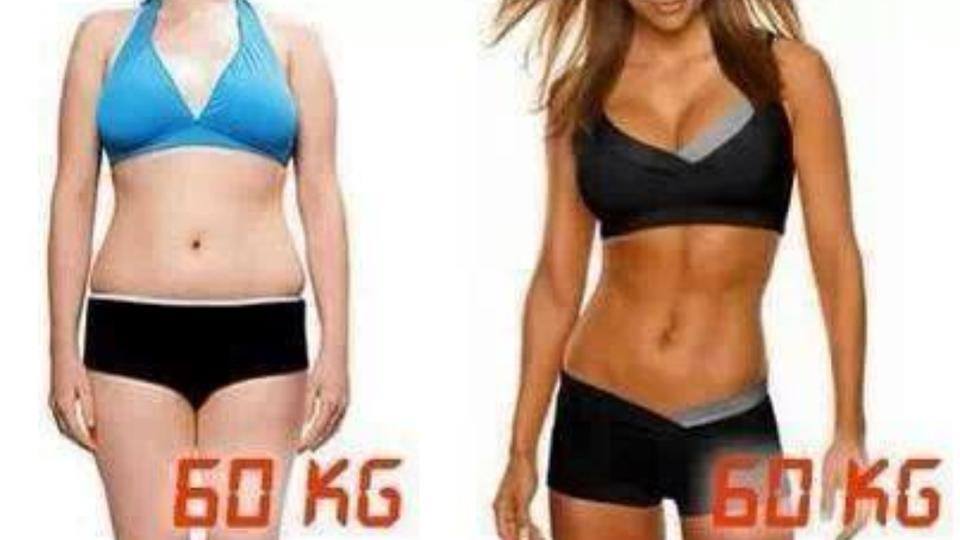
    Ladies! At some point during your lifetime, I’m sure you have made the statement “ I want to lose some weight!”. One question. What did you picture when you said you wanted to lose weight.. your body looking like this


    Related image

       If the first picture is what you are aiming for then I offer a simple solution. Stop eating. You will lose weight! But in doing so you will be losing muscle mass, bone density, and water. Many of the times there is very little fat loss, If any! But if that’s the goal, I wish you the best in your endeavors.

    If you chose the second picture, then the following message is for you!

    When you say they want to lose weight.. what you really mean is you want to lose fat. If you are currently following a program or process that is not resulting in fat being lost then stop immediately and regroup!!!!!

    The goal to successful weight loss is to preserve as much muscle as possible, or possibly even gain some, while at the same time lose as much body fat as possible. Your body fat % is a key indicator of your success, NOT the scale. In fact, stay off the scale.

    I know Telling people to ignore the scale and their weight is not getting us any cool points but it’s the best advice you will ever receive, and for good reason. Too many times successful dieting is sabotaged because of a meaningless number on a scale. A scale does nothing other than measure the force of gravity on your body. Why should this matter at all? It can’t tell you if your clothes fit better, it can’t tell you if your body fat percentage has changed, and it definitely won’t tell you that you’re looking any better.

    When you start dieting, it is imperative that you track your progress using methods other than the scale. You need progress measuring tools that are going to track fat loss – not weight loss. Body fat callipers, tape measures, pictures, clothes sizes, and people’s comments are all going to be more useful for you. Don’t worry about your weight – even if it goes up. If you’re looking better, you’re weight doesn’t matter. The only time it matters is when you tell your weight to someone who doesn’t understand the difference between weight loss and fat loss.

    DO NOT… I REPEAT… DO NOT let someone else’s ignorance about “weight loss” discourage you from continuing to progress towards your goal


    Preserve Muscle While Losing Fat


    Alright then, if your goal is fat loss, you are going to need to focus on preserving muscle while losing fat. Notice I did not say gaining muscle, I said preserving muscle.

    To prevent muscle loss, make sure you are following these basic guidelines:


    • Get in enough calories for your body size and activity level. People tend to sabotage their fat loss progress by eating too little food and too few nutrients resulting in muscle loss. Once you start losing muscle, you are fighting an uphill battle to lose fat. This is one of the main reasons why diets fail. If you do not eat enough calories to maintain your muscle, you will begin to crave certain types of foods because your body signals the need for one of two things, sodium or sugar. Eventually you start having cravings for chips or cake, juice, etc. You eventually binge out because you can’t maintain that low calorie intake and in some cases develop a food addiction.

    • Make sure those calories are nutrient dense by having them come from fruits, vegetables, meats, legumes, dairy, and whole grains.


    • Aim for calories in the 10-12 times your body weight range. This is a basic rule of thumb… a starting point. You will eventually have to adjust your calories to keep progressing. If you want to know how to properly determine your caloric intake for weight loss, read The Post about Counting Macros

    *******DO NOT DEPRIVE YOURSELF OF ANY ONE MACRO. All of these fad diets going around are BS. They work until you add the missing macro source back in and then you will be back to the drawing board. Losing Fat on a balanced diet will help you to maintain the process longer and more likely to keep the weight (fat) off*******


    • Try to get in 1 gram of protein per pound of lean body weight, and divide that evenly among 5 meals.


    • Eat enough carbohydrates to support your activity level. You can start at 150 grams and adjust from there.


    • Fill the rest of your calories with fat – healthy fats and EFAs (essential fatty acids).

    Image result for women lifting weights


    • Make sure you exercise and give your muscles a reason to maintain themselves. I highly recommend lifting weights. Yes ladies, lift weights! It is virtually impossible to look like a man from lifting weights. So please let it go.. that is the BIGGEST misconception about the gym. Lifting weights will help you maintain muscle mass and increase your metabolism. If you don’t , your body is going to shed that unneeded muscle and eventually you will hit a plateau. Force your body to preserve it and even grow it by giving it consistent stimulation.


    Follow these basic principles and you will reach your true goal of not just losing weight, but losing that unwanted fat, and keeping your beautiful curvy muscular body! Rant over. Eat Smart, Train Hard!!!!!

  • Guns Loaded!!

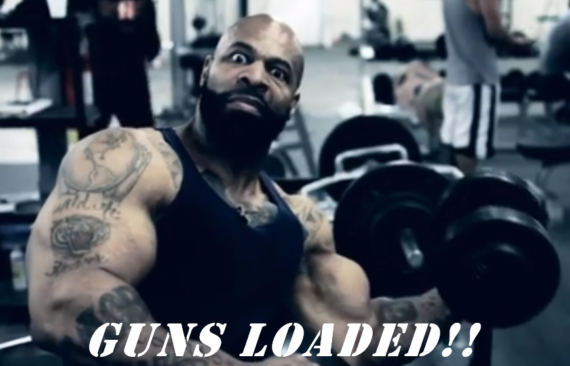
    Guns Loaded!!

    Arm Training – ” I COMMAND YOU MF’ers TO GROW!!!!

    Guys always wanna have big arms but rarely wanna do the work it takes to grow them. Ladies want “toned” arms but dont want to believe that they can achieve this by lifting heavier weights. Well ladies and gentlemen, I am challenging you all to finish this Arm Workout.  Don’t Punk out!!!

    Grab the heaviest pair of dumbbells that you can do 8 reps WITH STRICT FORM and do the following in quick succession, without resting:

    8 reps of dumbbell curls

    8 reps of hammer curls

    8 reps of cross-body curls

    After the last cross-body curl is done, do a drop set by grabbing the next lightest pair of dumbbells (5-15 pounds lighter) and go through the same progression – 8 curls, 8 hammer curls, 8 cross body curls.

    Then move on to triceps (NO REST):

    8 Tate Press – lie on a bench with a pair of dumbbells and extend your arms towards the ceiling as if you were doing presses. Your palms should be facing your feet. Without moving your upper arms and bending only at the elbow, lower the dumbbells so they barely touch your chest. At this point, your elbows will be pointing straight out to the sides. Raise the dumbbells back to the starting position by extending the upper arms.  (Should look like the video below)

    8 reps of overhead dumbbell extensions

    8 reps of dumbbell kickbacks

    After the last kickback is done, grab the next lightest pair of dumbbells for each exercise (it’s unlikely you’ll be able to use the same weights for each exercise!) and do another drop set by going through the same progression – 8 Tate presses, 8 overhead DB extensions, and 8 kickbacks.

    After finishing with the first round of triceps, go back to biceps and do a second round and then do the second round of triceps exercises. DO THIS UNTIL YOU COMPLETE 5 ROUNDS

    What makes this work out a beast is that there’s no rest between sets.  You go non-stop… and the Pump is INSANE!!! Do you have the balls to finish it!! Let me know if you survived in the comments. Train Hard!!!

  • 30 Day Morning Workout Challenge!!!

    30 Day Morning Workout Challenge!!!

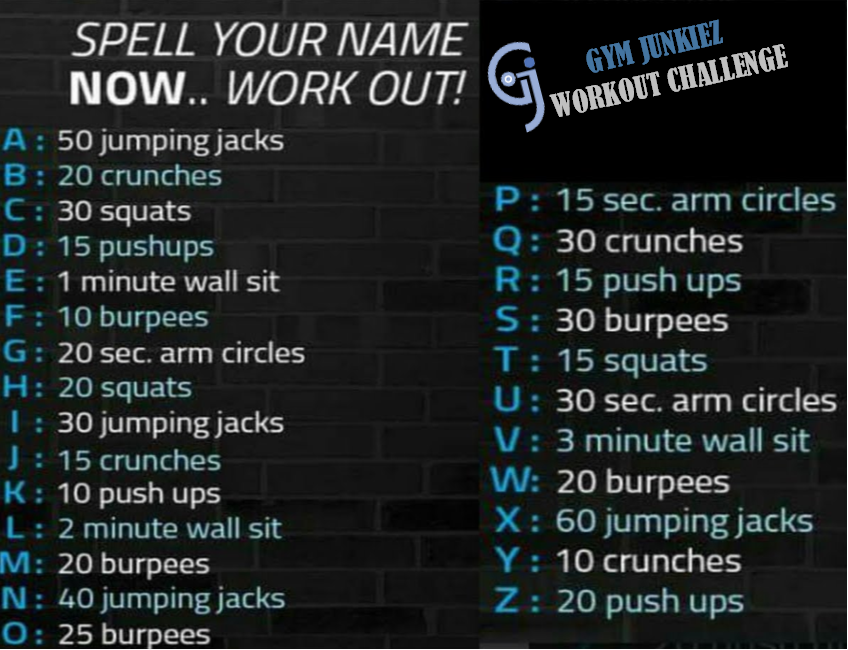
    The Challenge – Every Morning for 30 days! Before you begin getting ready for your day; Complete the Spell You Name Workout! If your name is less than 4 letters or less; go through the workout twice!

    This will take no more than 10 minutes to complete and its a good way to get your blood flowing and metabolism firing.

    I challenge the true Gym Junkiez to spell your First and Last Name!

    Tag us in your workout posts @gymjunkiez17 !! Train Hard!!!!

  • Workout Challenge – Leg Day Blast

    Workout Challenge – Leg Day Blast

    Workout Challenge – Leg Day Blast

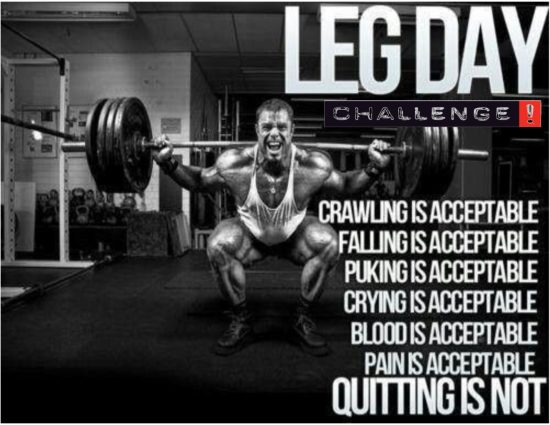
    Leg Day Carlton
    LMAO…. THIS WILL BE YOU!!!!!

    For the Gym Junkiez that love to train legs, or train legs with the purpose of growing an impressive set of wheels…. .this challenge is for you!!!

    Warning – Do not attempt this workout with food or liquid still sitting in your stomach. Allow all food to digest and liquid to pass or it will come up before this session is over!

    Today’s Leg Workout consists of 1 Giant Set of Heavy Weight being moved. 3 rounds! 10 Exercises; 12 reps each (except for leg extensions – 25 reps)! MAX Effort!!

    Here we go!!!

    LEG DAY

    Warm up – 1 set of leg extensions – 75 reps (20,18,15,12,10 – rest 10 seconds between each set of reps) So it should be 20 rest 10 secs. 18 rest 10 secs. 15 rest 10 secs…. and so on until you finish the set of 10

    Now that your knee’s and quads are nice and warm let the fun begin!

    Giant Set List of Exercises

    • Leg Extensions – 25 reps
    • Lying Hamstring Curls – 12 reps
    • Walking Barbell/Dumbbell Lunges – 12 reps each leg
    • Seated Hamstring Curl – 12 reps
    • Glute/Ham Raises on Lat Pull Down Machine** – 12 reps
    • Hack Squats – 12 reps
    • Leg Press – 12 reps
    • Back Squat (or Safety Bar if your gym has it) – 12 reps
    • Dumbbell Romanian Deadlift – 12 reps
    • Dumbbell Goblet Squat – 12 reps

    After each round take 2 – 2:30 Full Minutes of Rest. You will absolutely need every second of it.

    **Glute Ham Raises on Lat Pulldown Machine

    Related image

    Once you finish the 3 rounds go ahead and find a nice corner in the gym to lay down in. And just to be on the safe side…. take a trash can with you!

    I apologize for you having to walk like this but I promise the results will be well worth the pain you feel!

    MIB Men In Black GIF - MIB MenInBlack Roach GIFs

    Let us know how you make out with this challenge. Tag us if you post the workout on social media. Train Hard!!!!
  • Workout Challenge – Shoulders: Try this Workout and Finisher for Massive Shoulder Gainz

    Workout Challenge – Shoulders: Try this Workout and Finisher for Massive Shoulder Gainz

    WORKOUT CHALLENGE – SHOULDERS

    Everyone wants a nice set of shoulders. Men want big- capped-3d looking shoulders. Women want round-sexy shoulders. In either case they help to accentuate the look of a v-taper and a small waist! Regardless of the look you are going for you have to train the muscle. In order to develop those deltoids, you have to push as much blood as you can into all 3 heads of the muscle – the anterior (front delt), medial (side delt) and posterior (rear delt).

    Related image

    For an insane pump and crazy shoulder growth; try this shoulder routine. You will definitely know the meaning of mind – muscle connection after you finish … IF you finish!!! Try it and let me know how you like it!!!

    Shoulder Routine

    Warm-up – 4 x 12 Shoulder Dislocates (warms up the entire shoulder girdle)

    Image result for shoulder dislocates with a band

    Exercise 1 – Compound Movement – Dumbbell Military Press 4 x 12 60 seconds rest. Pyramid up in weight till you can no longer do 12 reps.

    Exercise 2 – Side Laterals w Cables 4 x 12* 30-45 secs rest. Slow controlled reps. Hold each rep for a 2 count.

    Exercise 3 – Reverse Pec Deck 4 x 15 30-45 secs rest. Squeeze each rep for a 2 count

    Exercise 4 – Front Raise with Plate 4 x 12 30-45 secs rest. Hold each rep for a 1 count.

    Exercise 5 – Dumbbell Shoulder Shrugs 3 x 15 30 seconds rest. Squeeze each rep for a 2 count

    FINISHER – If you are one of the true Gym Junkiez and want to set yourself apart from everyone else in the gym… Try this exercise to finish your workout. Your shoulders will feel like they are going to explode. After a few sessions of this, you will definitely see some noticeable changes

    The Victory Raise

    3 x 20 with no more than 30 seconds rest between each set

    1. Place a small resistance band around your wrists.
    2. Lift the dumbbells from the low position to overhead, forming a “V” at the top.
    3. Initiate the movement as a front raise with a neutral grip. As the movement progresses, spread your arms wider to end up with both arms forming a 45 degree angle with the body at the top of the movement.
    4. Come back down the same way, controlling the weight for a good 3-4 second count. Do not release the tension completely at the bottom! Keep some tension in the bands to keep the muscles firing for max results.
    Do the victory raise early in your shoulder or pressing workout. It will turn everything on and will make for safer, more effective pressing. Sets of 8-10 reps with a fairly slow eccentrics are best.

    How It Works

    This move basically combines all the benefits of a lateral raise, front raise, and band pull-apart. It hits all three heads of the deltoids as well as the rhomboids and lower traps. The band keeps the scapula properly aligned and you can’t compensate with the upper traps, making it a lot more effective at recruiting the delts.

    Try this routine out. Post a clip from your training session and tag us @gymjunkiez17 on IG or use the hashtag #gymjunkiez

  • Fasted Cardio – Science and Common Sense

    Fasted Cardio – Science and Common Sense

    Today I am going to tackle fasted cardio. Before I begin let me make two  statements:

    1. Science always wins!!!!

    2. No  matter what approach you take to meeting your fitness goals, two things must remain constant. Hard work and discipline. Which ever methods you choose to follow, as long as you remain true to the cause you will accomplish your goal.

    This morning on Instagram, I commented on a friend’s picture in regards to her remarks on fasted cardio.  I then received a DM from one of her followers (Im guessing) explaining to me that doing cardio in a fasted state is terrible for muscle retention, fat loss is simply burning more calories than you take in and being fasted doesn’t matter, and that i need to look into changing my philosophy. While he made some valid points during the discussion, I was quickly able to tell that he did not have all of the facts. So to the guy who will remain nameless, here is the information I promised you! Never argue without having all of the facts; or doing your homework on who you are arguing with (FLEX)! LOL… joking

    Anyway….. Due to that conversation, I thought it  was a perfect time to weigh in on the matter because while I do have a good scientific understanding of the matter, I also have practical experience and know what it takes to get to 5 to 6% body fat without drugs and without burning up all your muscle. Fasted cardio has been always been a staple in my overall fat loss routine.

    So, in this post I am going to cover the basic science of fasted cardio and why i believe its better for fat loss…..

    What is Fasted Cardio?

    Image result for fasted cardio meme

    Hands down the BEST form of fasted cardio there is!!! LOL

    Fasted cardio has been around for quite some time and is re-gaining popularity as an effective way to accelerate fat loss. People think fasted cardio is simply training on an “empty stomach,” which they usually think is simply a stomach that “feels empty.”

    Well, let me tell you what it really means….

    You are partially correct in saying fasted cardio is cardio done while in a “fasted” state, or in laymen terms your stomach is empty. But it’s actually a bit more than that. It has a lot more to do with how your body processes and absorbs the food you eat.

    When you eat food, it gets broken down into various molecules that your cells can use, and these molecules are released into your blood. Insulin is released and its job is to shuttle these molecules into cells. Depending on how much food you eat in a meal, your insulin levels can remain elevated for several hours (anywhere from 3 – 6+).

    When your body is digesting and absorbing what you’ve eaten, your body is in a “fed”  state. Once it has finished processing and absorbing the nutrients, insulin levels drop to a “baseline”  (low) level, and your body enters a “fasted”  state. Every day your body moves between “fed” and “fasted” state. Learning how to manage your diet and training between these two states  will help you maximize your bodies fat burning potential.

    Long Story Short:

    • Exercise done during periods where insulin levels are elevated and food is still being processed and absorbed is “fed” training.
    • Exercise done during periods where insulin is at a low, baseline level and food is no longer being processed and absorbed is “fasted” training.

    Alright, now you know what fasted cardio is. Let’s now talk about one factor that can hinder your body’s ability to burn fat!

    Insulin – The Fat Loss Killer

    Related image

    Insulin is defined as a hormone made by the pancreas that helps the cells in the body take up glucose from the blood.  Insulin does more than just shuttle nutrients into cells–it also inhibits the breakdown of fatty acids. That is, the higher your insulin levels are, the less your body is going to use fat for energy (both body fat and dietary fat).

    This makes sense physiologically. Why burn fat when there’s a surplus of energy (glucose) readily available via the food we just ate? Thus, when you eat food, your body basically shuts down its fat-burning mechanisms and lives off the energy provided by the meal, and it also stores a portion of the excess energy as body fat for later use.

    As your body processes and absorbs the food, insulin levels decline, which tells the body to start going to fat for energy as the “fuel” from the meal is running out. When the absorption is finally complete, your body is fully running off its own fat stores for energy. While this last part sounds great, do not get too happy. The amount of fat you burn between meals when your insulin levels are low is nothing to be excited about.


    As you can see, your insulin levels spike every time you eat a meal. It takes a while for your insulin levels to drop low enough for your body to tap into fat stores for energy, but by that time your body is telling you that you are hungry again, because of the low insulin levels. So in a nutshell, think of this repetitive cycle as “A Nightmare on Fat-Loss Street” and insulin as Freddy Kruger…

    Freddy is keeping you from losing fat! No matter how hard you use “healthy foods” to battle him, you cannot lose body fat! Dont fear any longer. There are two sure fire ways to end this nightmare. Weight training (which I won’t get into in this post) and fasted cardio!

    Fasted Cardio and Weight Loss


    Fasted cardio is often recommended as a way to speed up fat loss by many experienced gym junkiez and fitness professionals. However without an explanation of how this actually works, you will more than likely lose weight but will not make a dent in your fat loss goals.

    The first thing you should know about fasted cardio is it won’t help you lose fat optimally if you don’t maintain a proper diet. 

    Fasted cardio does not let you somehow cheat the laws of energy balance. At the end of the day, fat loss requires an energy (calorie) deficit, and that means you have to burn more calories than you take in (eat)!

    And with that said, fasted cardio does offer some unique fat loss benefits when done properly. Let me first explain how insulin ties into this.

    As you would expect, if your insulin levels are elevated before exercise due to a pre-workout meal, lipolysis will be hindered (your body will break down less fat cells during that workout). There is tons of research that has proven this true in  both trained and untrained individuals.

    With that said, Lipolysis is only one part of fat loss. The other part is Fat Oxidation, which is the actual burning off of the fatty acids by cells. Your body could break down every fat cell it has into usable fatty acids, but most would go unused (your body only burns so much energy) and winds up reconverted back into body fat.

    This is where many believe fasted cardio is worthless. They say that while it’s true that exercising in a fed state means less lipolysis during the workout, fat oxidation rates aren’t affected so all that happens is your body mobilizes many more fat cells than it can actually oxidize (burn).

    The National Center of Biotechnology Information gives several reasons for this belief to be wrong!

    1. Research has shown that the total amount of fatty acids available regulates fat oxidation rates.

    While your body may not be able to burn all of the fatty acids mobilized during fasted cardio, the more it has available, the more it burns.

    2. Thus, it’s not surprising that research has also shown that ingestion of carbohydrate reduces fat oxidation while at rest and when ingested before exercise.

    Now, ingested before exercise is a key phrase here because the study most commonly cited as “proof” that fasted cardio is a waste of time showed that when carbohydrates are ingested after exercise has begun (30 minutes after, in this case), then fat oxidation rates aren’t changed until after 80 to 90 minutes of exercise.

    That’s cool andall, but who starts their workouts fasted and then eats carbs 30 minutes into them?  Almost, Nobody. Many of us  eat our carbs anywhere from 30 to 60 minutes before we exercise, and as you now know, this reduces both lipolysis and fat oxidations rates and thus reduces the total amount of fat we lose in the workouts.

    So, the bottom line is when we consider all the available research, it’s clear that fasted cardio results in  more fat loss than “fed” cardio, and thus is worthwhile.

    Total fat loss isn’t the only reason I like fasted cardio, though. It also helps eliminate stubborn fat from my lower abs, and lower back!

    How Fasted Cardio Helps Get Rid of “Stubborn” Fat

    Image result for ebony abs

    If you’re a woman, your hips, thighs, and butt are probably the last to really tighten up when you’re losing weight. If you’re a guy, it’s almost certainly your lower abs, obliques, and lower back.

    This isn’t a genetic curse–it’s simply a physiological mechanism.

    You see, your body uses chemicals known as “catecholamines” to break fat cells down into usable energy. Catecholamines travel through your blood and “attach” to receptors on fat cells, which then trigger the release of the energy stored within the cells so it can be burned off. Fat cells have two types of receptors for catecholamines, alpha- and beta-receptors.

    And to make a long story short,  beta-receptors speed up fat mobilization, alpha receptors hinder it.

    So if you have been following along you have probably guessed pretty quickly that the areas that get lean quickly have a lot of fat cells with more beta-receptors than alpha, and those stubborn areas mentioned earlier have a large amount of fat cells with more alpha-receptors than beta.

    (If not leave me a comment or send me a message and i will try to clear up anything you have questions on!!)

    A major issue with these “stubborn fat” areas relates to blood flow.

    You may have noticed that fat in areas like the lower back and thighs are slightly colder to the touch than fat in other areas of your body like the arms or chest. This is simply because there’s less blood flowing through the areas.

    Less blood flow = fewer catecholamines reach the stubborn fat cells = even slower fat loss.

    So you are basically screwed twice here: large amounts of fat cells that don’t respond well to catecholamines and reduced blood flow to keep the catecholamines away.

    Fasted Cardio to the Rescue

    Blood flow in the abdominal region (upper lower abs, obliques, lower back, butt, hips, upper thighs) is increased when you’re in a fasted state, which means the catecholamines can reach this stubborn fat easier, resulting in more fat loss.

    This is where I’ve personally really noticed a difference in cutting with and without fasted cardio. When I include fasted training (both cardio and weightlifting), the journey from about 9% to 6%, where the majority of the fat you’re losing is the “stubborn” stuff, is noticeably faster than when I don’t.

    So i bet your next question is “which type of cardio is best to do in a fasted state”. Thats another answer for another post. If you want me to post the answer to this question, leave me a comment. If you have questions you would like answered. Feel free to ask in the comments section as well. Till the next time, Train Hard!!

  • iTrainers – Cell Phone Apps That Can Replace Personal Trainers

    iTrainers – Cell Phone Apps That Can Replace Personal Trainers


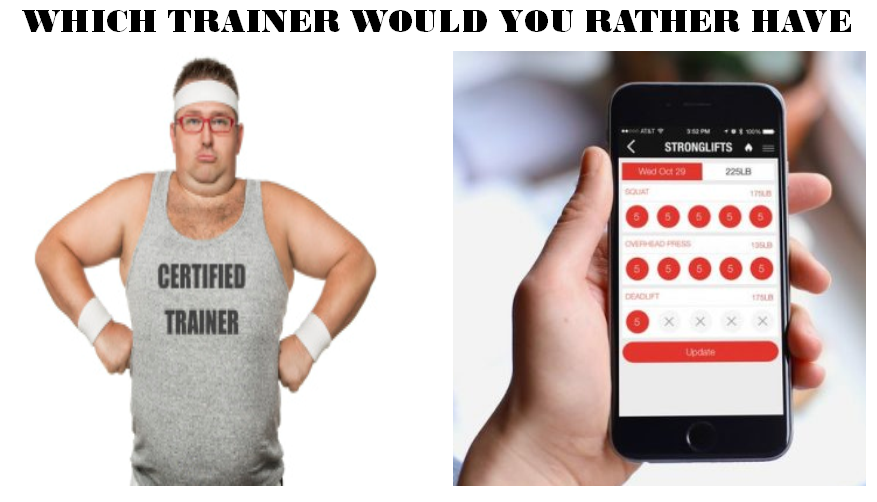
    Everyday there are newbies to the Gym Junkiez mentality. They go to their local gym and try their best to learn what exercises are best for specific body parts they desire to improve, or try different methods of working out to get in shape.  With technology constantly changing and improving, it is becoming easier to find the information to achieve the desired fitness results. Below are some of the best apps out that provide excellent workout routines, as well as allows you to track you progress towards your physique goals. These apps can easily take the place of a physical personal trainer.  If you want to get in shape but do not want to pay the insane fees some personal trainers charge, download one of these apps and give it a run!


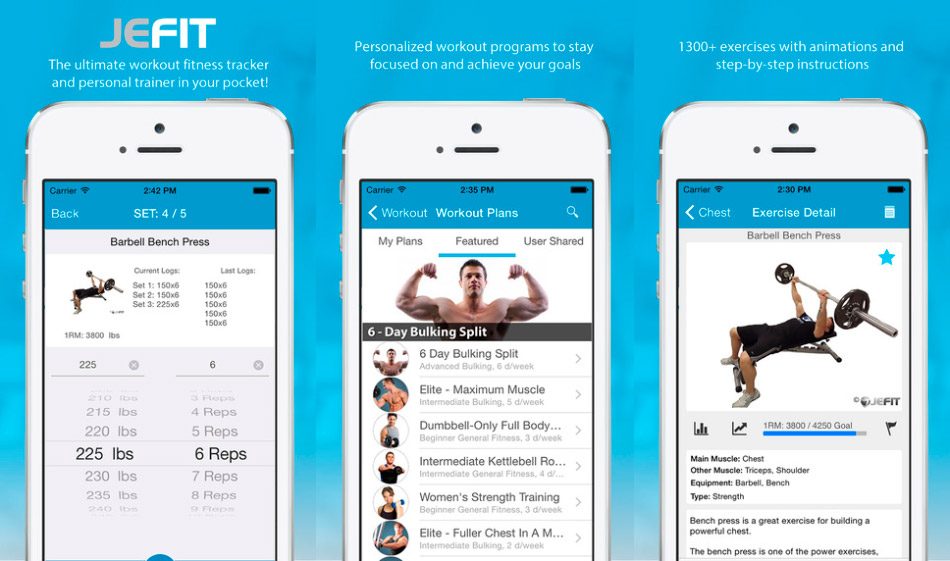
    #1 JEFIT
    This all-in-one app contains powerful fitness routine planning and tracking tools that help you target your workouts and keep easy track of your progress. Plan a routine—you can build whole workouts around individual body parts, if you like—before you hit the gym. Once you’re inside, JEFIT takes over, telling you what’s next (including animations) and even timing rest periods between exercise. It stores your info for later reference, plus packs more than 1,300 instructions and animations to help you find new exercises to achieve your goals.
    Rating: 4.59 stars on 22,994 ratings
    Available On: iPhone, iPod touch, iPad and Android
    jefit.com

    Related image

    #2 StrongLifts 5×5
    Based on the popular StrongLifts 5×5 workout—5 sets of 5 reps of free weight compound lifts—this app is out to make you really strong, really fast on only three workouts a week. Like your own personal Bob Harper, StrongLifts tells you what exercises to do, how much weight you should lift (making on-the-fly adjustments when you plateau or fail) and congratulates you when you put in a solid effort or achieve an important goal.
    Rating: 4.50 stars on 252 ratings
    Available On: iPhone, iPod touch and iPad
    stronglifts.com

    Image result for stronglifts app

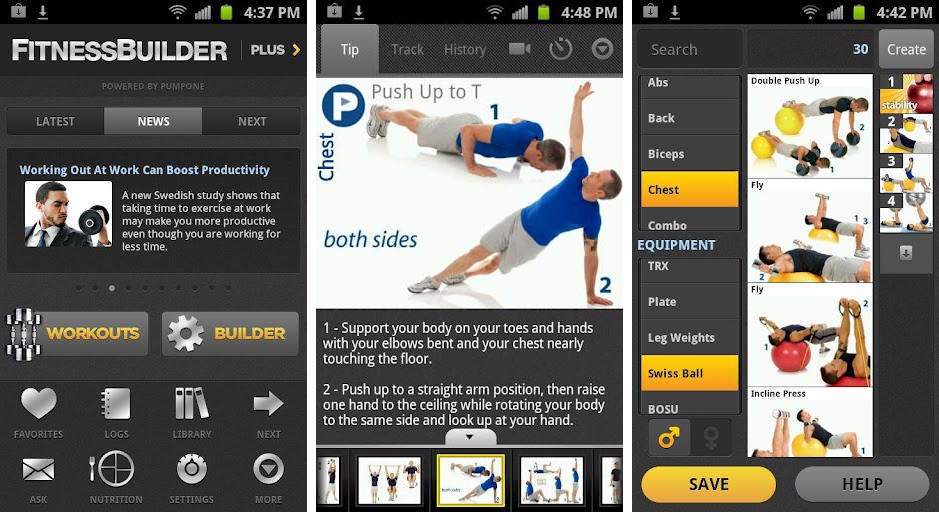
    #3 Fitness Builder
    This app has all the tools you need to get fit—a massive library of instructional training videos, live streaming personal trainers, progress reports, drag-and-drop workout builders and fitness plans. Bummer: You lose a lot of the FREE features after a trial month, but still get 300-plus exercise photos and videos and a handful of PumpOne workouts. It’s $6.99/month to continue at the Plus level.
    Rating: 3.53 stars on 2,198 ratings
    Available On: iPhone, iPad touch, iPad and Android
    fitnessbuilder.com

    Image result for fitnessbuilder app

  • Quick Tip – Use Salt!!!!

    Quick Tip – Use Salt!!!!


    Sodium tends to get a bad rap when it comes to health and fitness. But it shouldn’t. Here’s the deal…. Sodium helps to regulate a number of key functions in the body, including muscle contraction, nerve function, blood volume, and acid-base balance. When you decrease your sodium intake, your body will compensate by excreting potassium, which will cause a decrease in the fluid volume of your muscle cells. This hurts their ability to grow. Increasing sodium intake, therefore, can increase muscle size by adding more fluid volume. A higher volume of intracellular fluid also increases protein turnover, further spurring growth. Another mechanism through which sodium can increase strength is by increasing extra-cellular fluid levels (fluid outside the cell membrane), which in turn improves the leverage in your joints, allowing you to move more weight on lifts. These increases in fluid volume both inside and outside the cell have also been shown to reduce the incidence of muscle strains and tendon injuries by decreasing the friction exerted upon these tissues. Finally, many critical amino acids are sodium-dependent. This means they are able to enter a muscle cell only when accompanied by a sodium molecule.

    So what does all of that mean…… Use Salt to Improve Strength and Gainz!!

    DO NOT use table salt, instead use Sea Salt or Pink Himalayan Salt


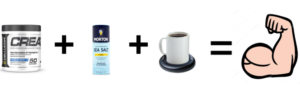
    Try this for a Pre-workout stack for a week and if it does not give you some of the most insane pumps and strength increases. Your next post workout shake is on me!!

    5 grams of Creatine 

    8 oz of black coffee

    6 shakes of Sea Salt or Pink Himalayan Salt

    Drink this 30 minutes before you begin your work out.

    To help with muscle gainz. Add 6 shakes of Sea Salt or Pink Himalayan Salt to your post workout shake or  to your post workout meal!

    ***Your post workout meal should always be protein and some form of fast digesting carbohydrate. Fat should be next to nothing!!***


    Try this for a week. Let me know how you feel. Drop a comment on this post. Till next time.. Train Hard!!!!

  • Gym Junkiez Approved –  Meal Options for the 4th of July

    Gym Junkiez Approved – Meal Options for the 4th of July


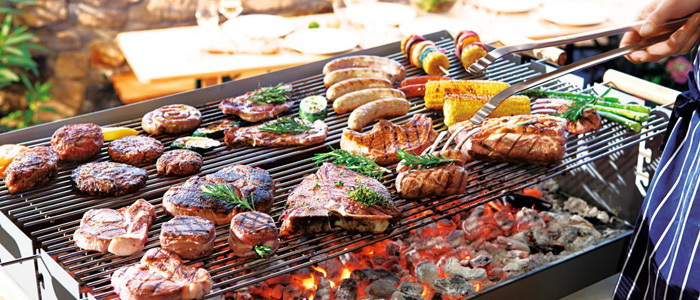
    Image result for 4th of july grilling


    Alright Gym Junkiez, July 4th is just around the corner! And I know everyone is ready to enjoy time with the family and some Good Food (of course after hitting the gym)!

    Of course every cookout has the traditional grilled chicken, steak, burgers, hotdogs, and all of the fixes and side dishes you can hold. For those of us that have to be mindful of our nutrition, here are a few options for you guys (and gals) that will keep you on track  while still enjoying some delicious food!

    Hit the store (or Amazon) and pick up a few of these options. Most of the condiments listed are no/low-calorie and sugar-free and still taste great!

    **S/N Amazon Pantry is clutch for ordering Groceries and other necessities , I highly recommend that you sign up for it if it is available in your area. To try it out and/or find out just click here on this banner to check!**  


    Condiments

    Meats

    • Morning Star Spicy Black Bean Veggie Burgers
    • Bison or Lean Ground Sirloin
    • Applegate Farms Uncured Beef Hotdogs
    • Turkey or Chicken Hotdogs
    • Salmon
    • Ahi Tuna

    Ok now that you have those, add some of these options to your cookout menu! I guarantee they will be a hit with everyone, not just the gym junkiez!


    All of these options can be made into a low carb option by wrapping in lettuce. You can also use the P28 Wraps instead of a bun and vice versa.

    I figure hot dogs are self-explanatory! There are not too many variations that are unknown.

    If you have recipes to share please leave a comment or send them to us at gymjunkiez17@gmail.com to share with the world. Till the next time Eat Smart!!!


  • Gym Junkiez Approved Chicken Recipes

    Gym Junkiez Approved Chicken Recipes

    Image result for fitness boring chicken meme


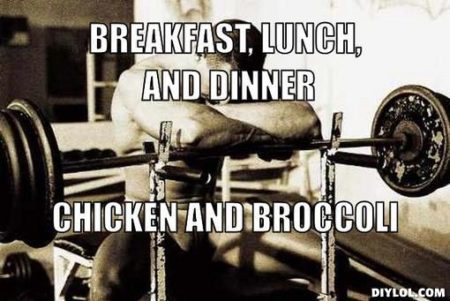
    Whats up Gym Junkiez! If you are like me then you eat a great deal of chicken! Its cheap, its easy to prepare, and its the number 1 bro food in the world. If this rings true for you, then this is also a true statement: Chicken is Boring! You get tired of eating chicken the same way and eventually either have to find a new protein source, or another way to prep it. If you are looking for quick recipes that are delicious and easy to prepare, please see below!


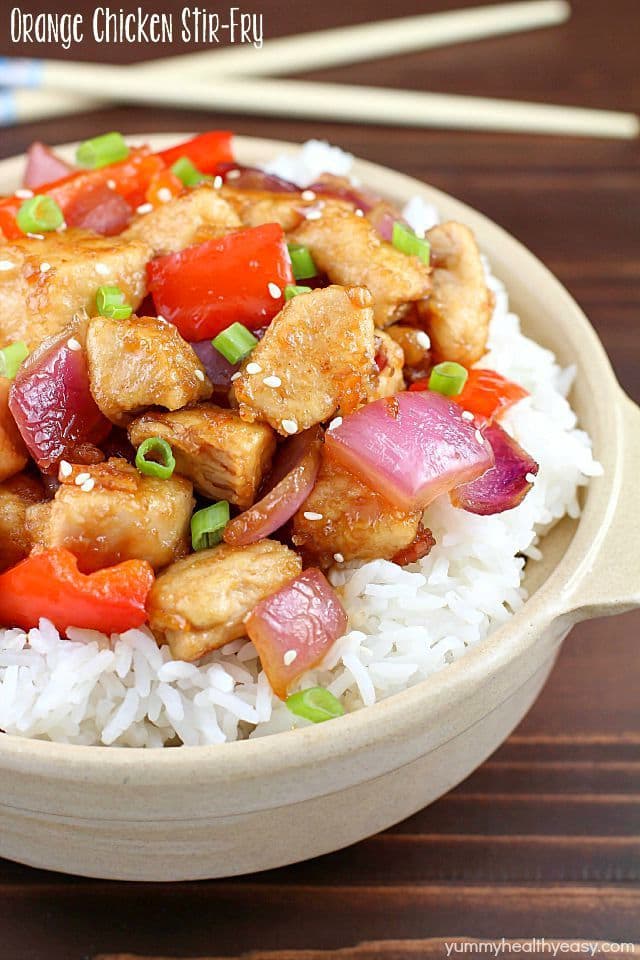
    Orange Chicken

    The most incredible Orange Chicken Stir Fry with pan seared chicken, red bell peppers, onion and a delicious sweet and savory sauce served over rice. So easy and so flavorful!

    Ingredients
    ⅓ cup chicken broth
    ⅓ cup orange marmalade
    2 Tbsp. soy sauce
    ½ tsp. garlic powder
    pinch of red pepper flakes
    2 Tbsp. coconut oil, divided
    1 red bell pepper, coarsely chopped
    ½ purple onion, coarsely chopped
    1 lb. chicken thighs, boneless skinless, cut into bite-size pieces (I used chicken breasts)
    ¼ cup cornstarch

    Instructions

    • Combine the chicken broth, orange marmalade, soy sauce, garlic powder and red pepper flakes in a small bowl, then whisk to combine. Set this aside for later
    • Heat a wok or large skillet over medium-high heat. Add 1 tablespoon of oil to the pan and cook the peppers and onions for 2 to 3 minutes, stirring frequently. Remove the pepper and onion from the pan and set aside.
    • Heat the remaining tablespoon of oil in the wok or skillet and toss the bite-size pieces of chicken in the cornstarch, shaking off the excess.
    • Add the chicken to the pan, being careful not to overcrowd the pan (I like to do this in two batches).
    • Brown the chicken on all sides, about 2 to 3 minutes per batch. Once all the chicken is cooked, add the vegetables back to the pan, then stir in the sauce and heat it through until it bubbles and thickens.
    • Garnish with sliced green onions and sesame seeds, if desired. Enjoy!


    Slow Cooker Chicken, Sweet Potato, and Quinoa Soup

    Ingredients
    1 and 1/2 pounds boneless skinless chicken breasts
    1 cup quinoa I used a black bean quinoa package
    2 pound large sweet potatoes ~3-1/2 cups
    1 can (15.25 ounces) black beans
    1 can (14.25 ounces) petite diced tomatoes
    1 teaspoon minced garlic
    1 packet (1.25 ounces) chili seasoning mix
    5 cups chicken broth*
    Optional: fresh parsley

    Instructions

    • Spray the slow cooker with nonstick spray. Remove the fat from the chicken breasts and put them into the slow cooker along with the rinsed quinoa.(I found a black beans seasoned quinoa package which I used and loved, but regular quinoa will work as well, just make sure to rinse it well.)
    • Remove the skins and chop the sweet potatoes into cubes adding them into the slow cooker.
    • Drain and rinse the black beans and add those in. Add in the undrained petite diced tomatoes, minced garlic, chili seasoning mix, and chicken broth.
    • Place on high for 3-5 hours (It took 4 hours on high for my crockpot.)
    • Using two forks, shred the chicken and stir all the ingredients together.
    • Add salt and pepper and if desired fresh parsley.
    • Serve immediately.


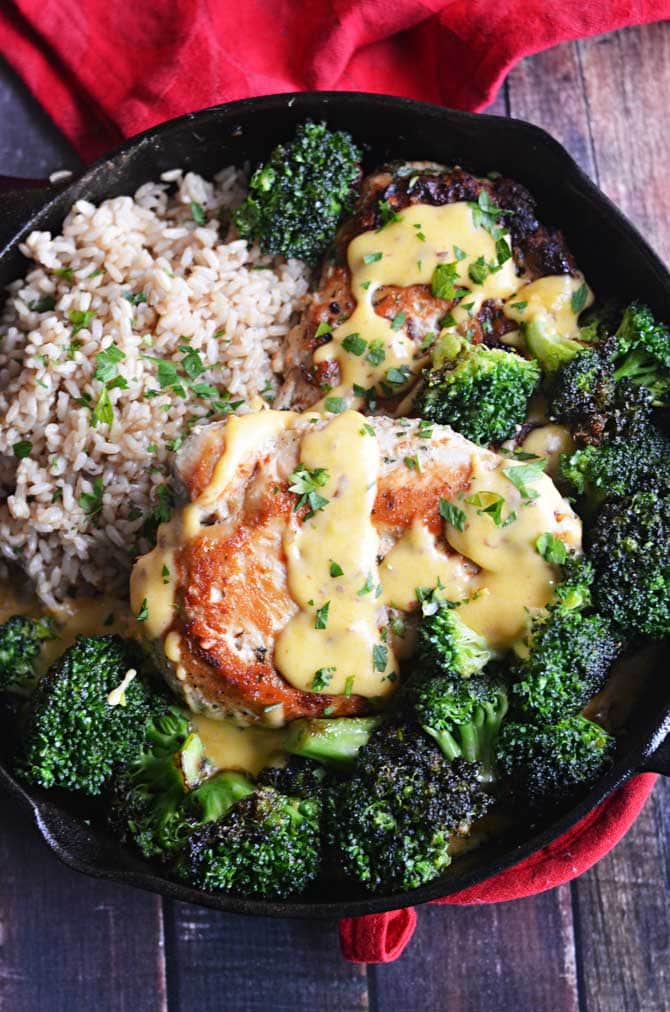
    Chicken Brocoli and Cheddar Skillet

    Sizzling Chicken, Broccoli, and Cheddar Skillet!  Way healthier than those from your favorite chain restaurants, but even more delicious! | hostthetoast.com


    Ingredients

    2 (4 oz) chicken breasts, pounded to 1/2 – 3/4″ thick
    1 cup jasmine rice, cooked according to package directions
    1 tablespoon fresh parsley, chopped, to garnish
    FOR THE MARINADE:
    5 cloves garlic, minced
    2 tablespoons fresh parsley, chopped
    1/4 cup coconut oil
    1 teaspoon crushed red pepper flakes
    Salt and pepper
    FOR THE CHEDDAR CHEESE SAUCE:
    1 cup almond milk, divided
    1 tablespoon almond flour
    1/4 teaspoon sea salt
    1/2 cup sharp cheddar cheese, shredded (light cheddar cheese, works, too)
    FOR THE BROCCOLI:
    1 small head broccoli, cut into florets
    Salt and pepper, to taste

    Instructions

    • In a freezer bag, combine the marinade ingredients and add in the chicken breasts. Refrigerate overnight or for at least 2 hours.
    • Heat a cast iron skillet over medium-high heat. Add in the chicken breasts and reserve excess marinade. Cook until cooked through, about 6 minutes per side. Remove chicken to a plate and tent with foil to keep warm.
    • In a separate small saucepan over medium heat, whisk together the flour and about 1/4 cup of the milk. Slowly whisk in the remaining milk and the salt. Bring to a gentle boil, stirring often.
    • Reduce to a simmer and allow mixture to thicken, stirring constantly, about 3 minutes.
    • Stir in the cheese, a bit at a time, until melted and completely combined. Keep over low heat, stirring regularly, until ready to use.
      In the cast iron skillet over medium heat, add 2 tablespoons of the reserved marinade and discard the remaining marinade.
    • Reduce heat to medium. Add in the broccoli and saute until bright green and beginning to brown lightly in spots, stirring and turning often, about 3 minutes. Season with salt and pepper, to taste.
    • Remove the broccoli and place on the plate with the chicken. Increase the heat on to high and let the pan sit for a minute or so to get steaming hot.
    • Remove the skillet from heat and pour 1/2 of the cheese sauce onto the hot skillet. Quickly add the chicken, broccoli, and rice on top of the cheese sauce, and then pour over the remaining cheese sauce. Sprinkle the chopped parsley on top, to garnish, and serve while still sizzling.


    Pulled BBQ Chicken Sandwich


    healthy bbq pulled chicken recipe


    Ingredients

    • 1 8-ounce can reduced-sodium tomato sauce
    • 1 4-ounce can chopped green chiles, drained
    • 3 tablespoons cider vinegar
    • 2 tablespoons honey
    • 1 tablespoon sweet or smoked paprika
    • 1 tablespoon tomato paste
      O Organics Tomato Paste 6 Oz
      $0.99 for 1 itemThru 05/16
    • 1 tablespoon Worcestershire sauce
    • 2 teaspoons dry mustard
    • 1 teaspoon ground chipotle chile
    • ½ teaspoon salt
    • 2½ pounds boneless, skinless chicken thighs, trimmed of fat
      Family/ Value Pack Boneless Skinless Chicken Thighs 1 Lb
      $2.49 for 1 item Thru 05/16
    • 1 small onion, finely chopped
    • 1 clove garlic, minced
    • Tip: Substitute Bun for P28 Protein Packed Bread (to buy click here)

    Instructions

    • Stir tomato sauce, chiles, vinegar, honey, paprika, tomato paste, Worcestershire sauce, mustard, ground chipotle and salt in a 6-quart slow cooker until smooth. Add chicken, onion and garlic; stir to combine.
    • Put the lid on and cook on low until the chicken can be pulled apart, about 5 hours.
    • Transfer the chicken to a cutting board and shred with a fork. Return the chicken to the sauce, stir well and serve.
    • Make Ahead Tip: Cover and refrigerate for up to 3 days or freeze for up to 1 month.
    • For easy cleanup, try a slow-cooker liner. These heat-resistant, disposable liners fit neatly inside the insert and help prevent food from sticking to the bottom and sides of your slow cooker.


    Thai Chicken Burgers with Cabbage Slaw

    healthy chicken burger recipe

    Ingredients

    1 1/4 pounds boneless, skinless chicken thighs (or 1 1/4 pounds 85% or 90% lean ground chicken)
    2 cloves garlic
    2 tablespoons finely minced fresh ginger
    1/2 teaspoon ground coriander
    1 teaspoon kosher salt
    1 tablespoon sesame oil
    1 teaspoon sambal oelek (1 teaspoon sriracha or 1/2 teaspoon chile flakes will also work)
    1 tablespoon soy sauce
    2 tablespoons mayonnaise
    1/4 cup bread crumbs (preferably panko)
    1 tablespoon chopped cilantro
    1 tablespoon chopped basil
    1 tablespoon chopped mint
    2 teaspoons finely grated lime zest
    1 tablespoon lime juice
    1 teaspoon sugar

    Coconut oil, for cooking the burgers

    Tip: Substitute Bun for P28 Protein Packed Bread (to buy click here)

    Instructions

    Cut the chicken thighs into 1-inch cubes. Arrange the cubed chicken in a single layer on a large plate or sheet-pan and freeze until the edges of each piece of meat are frozen but the center is still soft, 15-20 minutes.

    Put the peeled garlic cloves in the bowl of a food processor and process until finely minced. Add the par-frozen chicken and pulse until the meat is roughly chopped. The goal is to have 1/4- to 1/3-inch pieces of chicken rather than a mixture that resembles pâté. This will take about 15 to 20 short pulses. Transfer to a medium bowl.

    Add the rest of the ingredients and use your hands to mix thoroughly. Divide the seasoned chicken into 4 balls of equal size, then form the balls into patties, making a 1/2-inch depression in the center of each to account for the fact that the burgers will swell as they cook. When you have formed all the patties, place them in the refrigerator for at least 15 minutes.

    Light 2/3 chimney’s-worth of charcoal. When hot and glowing, pour out the charcoal on one side of your grill. Place the cooking grate in place, close the lid and allow the grill to preheat for 5-10 minutes.

    If using a gas grill, set half of your burners to medium-high, close the lid and allow the grill to preheat for at least 10 minutes.
    When the grill is hot, clean the grill grate and brush it generously with the vegetable oil. Place the burgers on the hot side of the grill and cook, without turning, until the burgers are nicely charred and release from the grate, about 5 minutes. Turn and cook until the other side is nicely charred and the burgers are no longer pink inside when pierced with the tip of a paring knife, about 5 minute more. Transfer the burgers to a sheet-pan or large plate to rest. If desired, brush the cut sides of the buns lightly with vegetable oil and grill until warmed through and grill marks appear.

    To serve, place the grilled burgers on a bun and top with a generous amount of the slaw. Serve any remaining slaw alongside the burgers (it goes fast!).

    Napa Cabbage Slaw

    Ingredients
    8 cups (about 1 pound) coarsely shredded napa cabbage
    1 cup thinly sliced radishes
    1 cup julienned carrots (yellow or orange bell pepper also works well)
    12 ounces snow peas, strings removed and thinly sliced on the bias (yields about 2 cups)
    1 cup thinly sliced green onions, green part only
    1 cup cilantro leaves, lightly packed

    3 tablespoons white wine vinegar
    3 tablespoon sugar
    1 tablespoon soy sauce
    1 clove garlic, finely minced or pressed
    1/2 teaspoon toasted sesame oil
    1/2 teaspoon ground ginger
    1/4 teaspoon ground cayenne
    1 cup mayonnaise
    3/4 cup shelled, roasted, salted peanuts

    Instructions

    In a large bowl, combine the cabbage, radishes, carrots, snow peas, green onions and cilantro.

    In a small bowl, combine the vinegar, sugar, soy sauce, garlic, sesame oil, ginger and cayenne. Whisk to dissolve the sugar. Add the mayonnaise and continue to whisk until the dressing is homogenous.

    Just before serving, add the dressing and peanuts to the vegetables. Mix to coat thoroughly.

    *Note: Only dress and add the nuts to the slaw mix you intend to eat immediately; it will get soggy if it sits with dressing on it. The remaining vegetables and dressing will keep, covered and stored separately in the refrigerator, for up to 3 days.


    If you like these recipes, please leave a comment and let us know. Till the next time. Eat Smart!!!!!!